


7
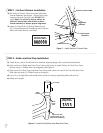
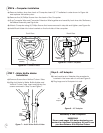
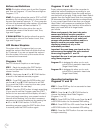
STEP 3 – Foot Platform Installation
a) Put Metal Sleeves over studs on left and right Foot Tubes, see Figure 3a. Note: Place the longer
black sleeves on center studs.
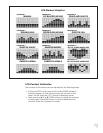
b) Slide Foot Platforms onto Metal Sleeves and align bolt holes. Secure using (4) Phillips Bolts
and (4) Washers. Tighten bolts, see Figure 3b.
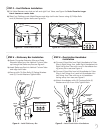
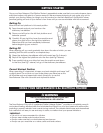
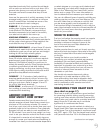
STEP 4 – Stationary Bar Installation
a) Route Computer Extension Wire and Pulse
Extension Wires from the Vertical Column Tube
up through the Stationary Bar, see Figure 4.
b) Insert Stationary Bar into Vertical Column Tube
and align bolt holes.
c) Secure with (3) Allen Bolts, (3) Spring Washers
and (3) Curved Washers. Tighten Bolts.
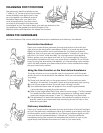
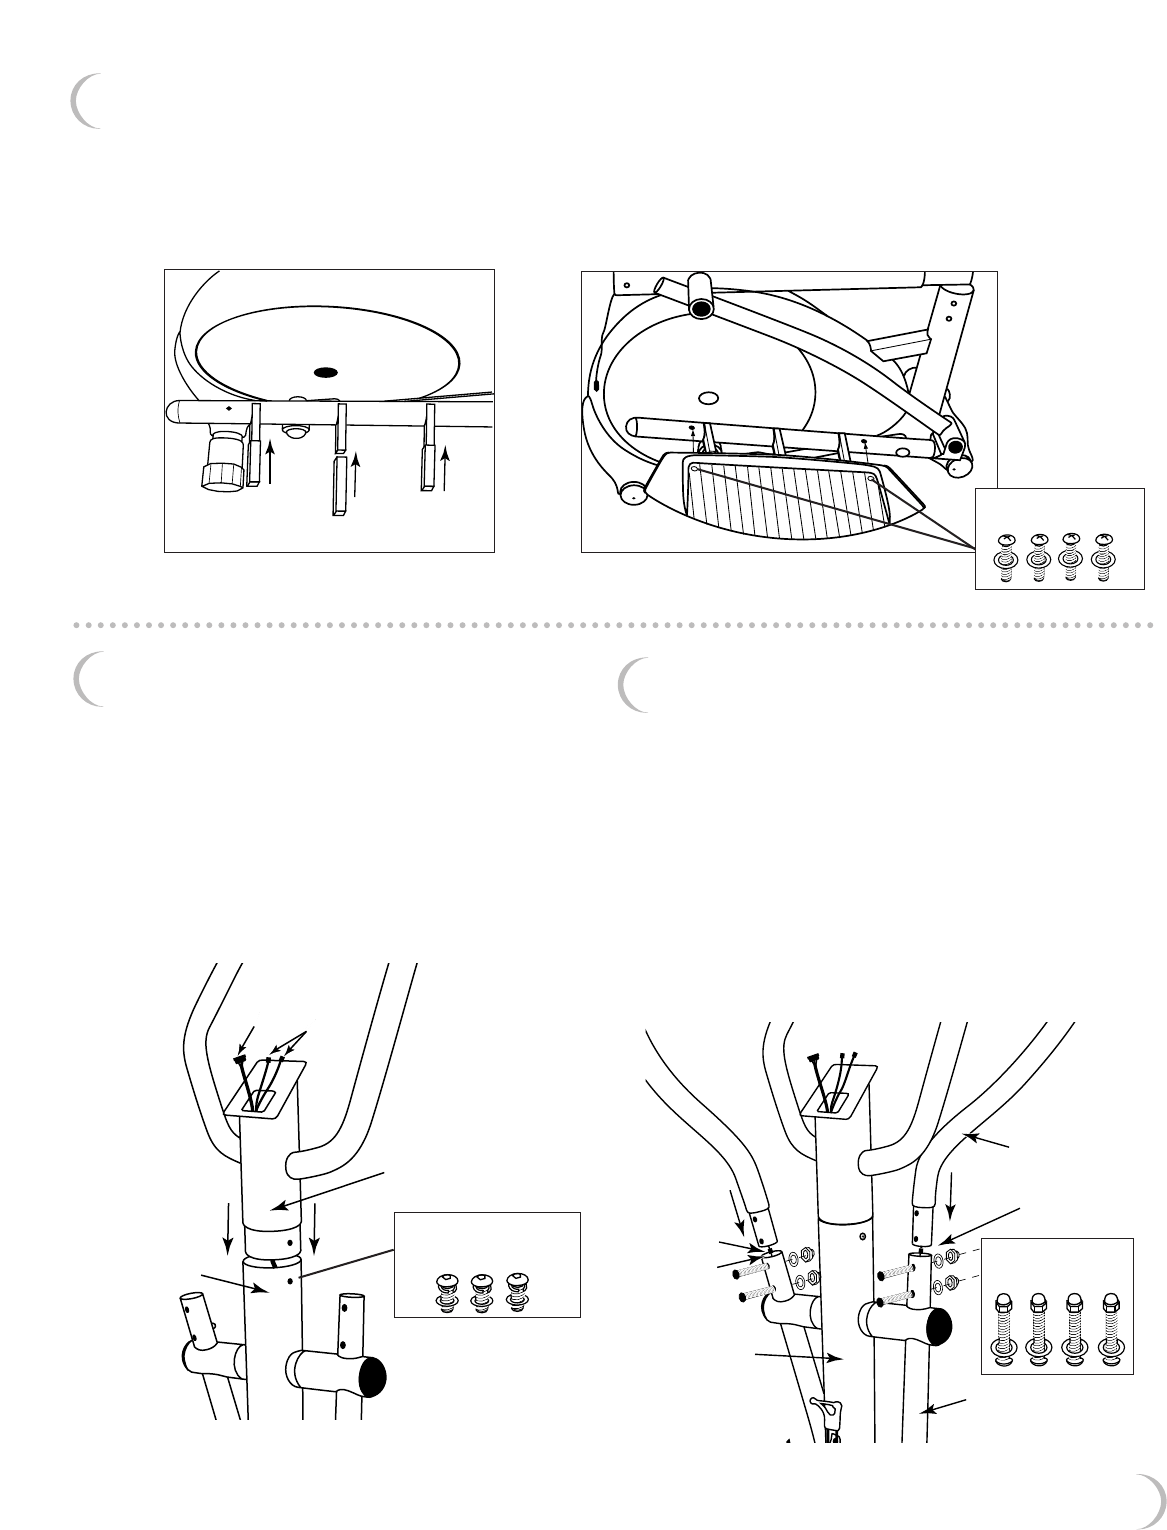
STEP 5 – Dual-Action Handlebar
Installation
a) Connect Pulse Wire from Right Handlebar to Pulse
Wire in Right Swing Arm. Insert Right Handlebar into
Right Swing Arm Tube with curve in Handlebar fac-
ing away from user, see Figure 5.
b) Connect Pulse Wire from Left Handlebar to Pulse
Wire in Left Swing Arm. Insert Left Handlebar into
Left Swing Arm Tube with curve in Handlebar
facing away from user, see Figure 5.
c) Attach Handlebars with (4) Carriage Bolts, (4)
Washers and (4) Acorn Nuts. Tighten Bolts.
right dual-action
handlebar
vertical
column
tube
pulse
wire
pulse wire
and
pulse
extension
wire
pulse extension
wire
right
swing arm
M8 carriage bolts,
M8 washers
M8 acorn nuts
stationary bar
assembly
pulse
extension
wires
computer
extension
wire
vertical
column
tube
M8 x 15mm allen bolts
M8 spring washers
M8 curved washers
Top View
Black Sleeve
1/4" x 20mm phillips bolts
M6 washers
Figure 3a – Install Metal Sleeves
Figure 4 – Install Stationary Bar
Figure 5 – Install Dual-Action Handlebars
Figure 3b – Install Foot Platforms