


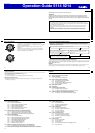
Operation Guide 5114 5214
E-32
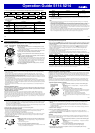
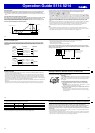
3. Press
D
to cycle through the available settings on the digital display in the sequence shown below.
Thermometer/Barometer/
Altitude unit
Auto Light
On/Off
Illumination
Duration
Button Operation
Tone On/Off
Day Month
City Code DST
12/24-Hour
Format
Seconds Hour Minute Year
• The following steps explain how to confi gure timekeeping settings only.
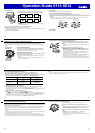
4. When the timekeeping setting you want to change is displayed, use
A
and/or
C
to change it as
described below.
Display To do this: Do this:
Change the city code Press
A
.
Cycle between Auto DST (
AUTO
), Daylight Saving
Time (
On
) and Standard Time (
OFF
).
Press
A
.
Toggle between 12-hour (
12H
) and 24-hour (
24H
)
timekeeping.
Press
A
.
Reset the seconds to
00
Press
A
.
Change the hour or minute Use
A
(+) and
C
(–).
E-33
Display To do this: Do this:
Change the year
Use
A
(+) and
C
(–).
Change the month or day
5. Press
E
to exit the setting screen.
• The hands of the watch will move to the time you set. Do not perform any operation on the watch
while the hands are moving.
Note
• For information about selecting a Home City and confi guring the DST setting, see “Confi guring
Home City Settings” (page E-28).
• Changing the time on the digital display will cause the time indicated by the hands to change
accordingly. If the displayed time and the time indicated by the hands do not match, it could mean
that the hand home positions are off. Adjust the hand home positions as required (page E-86).
• While 12-hour format is selected, a P (PM) indicator will appear for times from noon to 11:59 p.m. No
indicator appears for times from midnight to 11:59 a.m. With 24-hour format, time is displayed from
0:00 to 23:59, without any P (PM) indicator.
• The watch’s built-in full automatic calendar makes allowances for different month lengths and leap
years. Once you set the date, there should be no reason to change it except after you have the
watch’s rechargeable battery replaced or after power drops to Level 5 (page E-11).
E-34
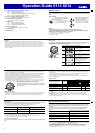
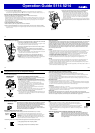
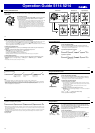
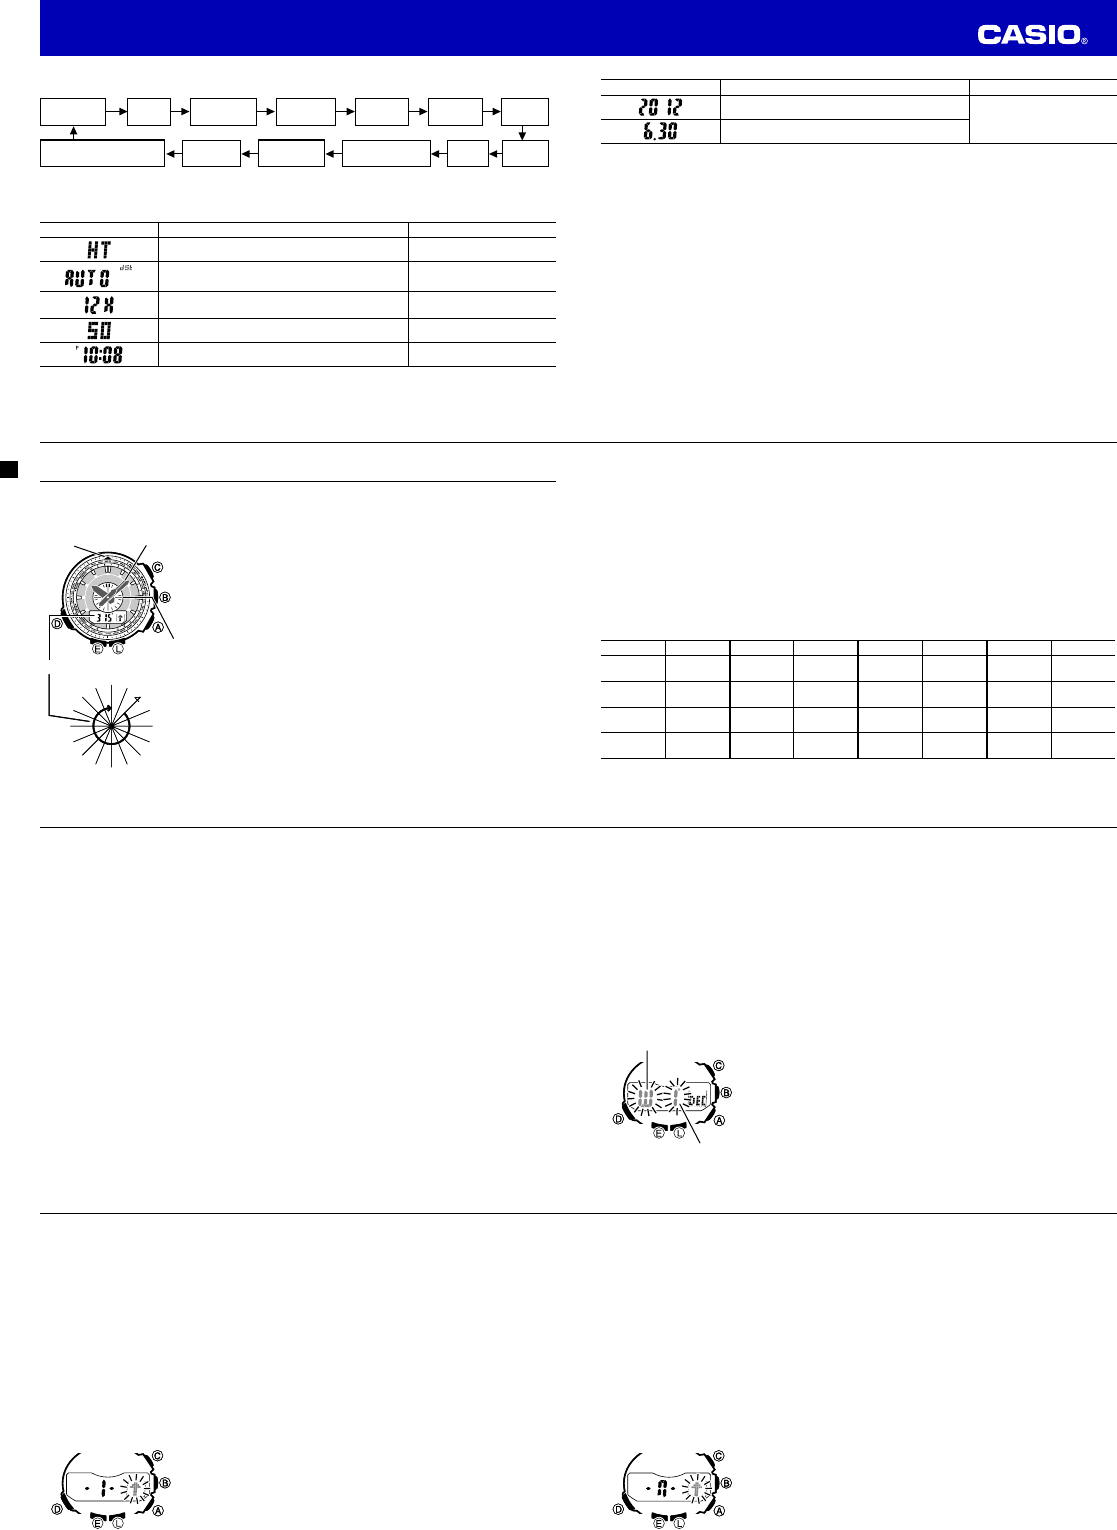
Taking Direction Readings
The Compass Mode uses the watch’s direction sensor to detect magnetic north. The second hand will
indicate magnetic north and the digital display shows one of 16 directions and an angle value.
To take a direction reading
1. Check to make sure the watch is in the Timekeeping Mode or one of
the sensor modes.
• The sensor modes are the Compass Mode, Barometer/Thermometer
Mode, and Altimeter Mode.
2. Place the watch on a fl at surface. If you are wearing the watch, make
sure that your wrist is horizontal (in relation to the horizon).
3. Point the 12 o’clock position of the watch in the direction you want to
measure.
4. Press
C
to start the direction reading operation, which is indicated by
COMP
appearing on the digital display.
• When you press
C
, the second hand will fi rst point in the direction
of the
C
(COMP) button. This indicates the Compass Mode. After
that the second hand will point in the direction of magnetic north.
• For information about direction reading results, see “Interpreting
Direction Reading Results” (page E-35).
5. After you are fi nished taking direction readings, press
D
to return to
the Timekeeping Mode.
NW
0
WNW
W
WSW
SW
SSW
S
SSE
SE
ESE
E
ENE
NE
NNE
N
NNW
90
180
270
12 o’clock
position
North indicated by
second hand
Direction
scale
Angle value (in degrees)
NW
0
WNW
W
WSW
SW
SSW
S
SSE
SE
ESE
E
ENE
NE
NNE
N
NNW
90
180
270
12 o’clock
position
North indicated by
second hand
Direction
scale
Angle value (in degrees)
E-35
Interpreting Direction Reading Results
• When you press
C
,
COMP
appears on the digital display to indicate that direction reading has started.
• After about two seconds, the second hand moves to point to magnetic north. The digital display shows
either the angle between magnetic north and the 12 o’clock position of the watch, or one of 16 literal
direction indicators.
• The watch updates the direction reading about once every second for about 20 seconds, and then
stops. The digital display shows
- - -
and the second hand moves to
COMP
(located below the
C
button) to indicate that direction readings are complete. If your want to continue taking direction
readings, press
C
again.
• Pressing
E
at this time switches the digital display between the angle value and a one-, two-, or
three-character literal direction indicators.
• The Auto Light switch is disabled during the 20 seconds that direction readings are being taken.
• The following table shows the meanings of the abbreviations used for the literal direction indicators that
appear on the digital display.
Direction Meaning Direction Meaning Direction Meaning Direction Meaning
N
North
NNE
North-
northeast
NE
Northeast
ENE
East-
northeast
E
East
ESE
East-
southeast
SE
Southeast
SSE
South-
southeast
S
South
SSW
South-
southwest
SW
Southwest
WSW
West-
southwest
W
West
WNW
West-
northwest
NW
Northwest
NNW
North-
northwest
• The margin of error for the angle value and the direction indicator is ±11 degrees while the watch is
horizontal (in relation to the horizon). If the indicated direction is northwest (
NW
) and 315 degrees, for
example, the actual direction can be anywhere from 304 to 326 degrees.
E-36
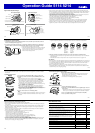
• If the second hand is indicating 12 o’clock (north), the digital display will show an upwards pointing
white on black arrow.
•
The small scale in the center of the watch face is a direction scale (page E-34). You can use the
direction scale to get an idea of how many degrees the 12 o
’
clock position of the watch is (clockwise)
from the northerly indication of the second hand. The direction scale is marked in 10-degree increments.
Some watch models may not have a direction scale.
• Note that taking a measurement while the watch is not horizontal (in relation to the horizon) can result in
large measurement error.
•
You can calibrate the bearing sensor if you suspect the direction reading is incorrect.
• Any ongoing direction measurement operation is paused temporarily while the watch is performing an
alert operation (daily alarm, Hourly Time Signal, countdown timer alarm) or while illumination is turned
on (by pressing
L
). The measurement operation resumes for its remaining duration after the operation
that caused it to pause is fi nished.
• For precautions that should be observed when using the Compass Mode, see “Compass Precautions”
(page E-43).
Calibrating the Bearing Sensor
You should calibrate the bearing sensor whenever you feel that the direction readings being produced by
the watch are off. There are three different calibration methods available: magnetic declination correction,
bidirectional calibration, and northerly calibration.
•
Magnetic Declination Correction
With magnetic declination correction, you input a magnetic declination angle (difference between
magnetic north and true north), which allows the watch to indicate true north. You can perform this
procedure when the magnetic declination angle is indicated on the map you are using. Note that you can
input the declination angle in whole degree units only, so you may need to round off the value specifi ed
on the map. If your map indicates the declination angle as 7.4°, you should input 7°. In the case of 7.6°
input 8°, for 7.5° you can input 7° or 8°.
E-37
•
Bidirectional Calibration and Northerly Calibration
Bidirectional calibration and northerly calibration calibrate the accuracy of the bearing sensor in relation
to magnetic north. Use bidirectional calibration when you want to take readings within an area exposed
to magnetic force. This type of calibration should be used if the watch becomes magnetized for any
reason. With northerly calibration, you “teach” the watch which way is north (which you have to determine
with another compass or some other means).
Important!
The more correctly you perform bidirectional calibration, the better the accuracy of the bearing sensor
readouts. You should perform bidirectional calibration whenever you change environments where you
use the bearing sensor, and whenever you feel that the bearing sensor is producing incorrect readings.
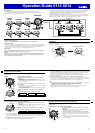
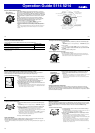
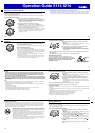
To perform magnetic declination correction
1. In the Compass Mode, hold down
E
until each of the following steps
occurs.
•
Hold SET appears on the digital display. ➝ Magnetic declination
settings fl ash.
•
This is the setting screen.
2. Use
A
(East) and
C
(West) to change the settings.
•
The following explains magnetic declination angle direction settings.
0°
: No magnetic declination correction performed. The magnetic
declination angle with this setting is 0°.
E
: When magnetic north is to the east (east declination)
W
: When magnetic north is to the west (west declination)
• You can select a value within the range of W 90° to E 90° with these
settings.
Magnetic declination
angle value
Magnetic declination
angle direction value
(E, W, or 0°)
Magnetic declination
angle value
Magnetic declination
angle direction value
(E, W, or 0°)
E-38
• To return the magnetic declination to its initial factory default setting, press
A
and
C
at the same
time. This will cause OFF to appear on the digital display. After about one second, the magnetic
declination will change to 0 degrees.
• The illustration on page E-37 shows declination angle direction value and the angle value you should
select when a map shows a magnetic declination of “West 1°”.
3. When the setting is the way you want, press
E
to exit the setting screen.
Precautions about bidirectional calibration
• You can use any two opposing directions for bidirectional calibration. You must, however, make sure
that they are 180 degrees opposite each other. Remember that if you perform the procedure
incorrectly, you will get wrong bearing sensor readings.
• Do not move the watch while calibration of either direction is in progress.
• You should perform bidirectional calibration in an environment that is the same as that where you plan
to be taking direction readings. If you plan to take direction readings in an open fi eld, for example,
calibrate in an open fi eld.
To perform bidirectional calibration
1. In the Compass Mode, hold down
E
until each of the following steps
occurs.
• Hold SET appears on the digital display. ➝ Magnetic declination
settings fl ash.
• This is the setting screen.
2. Press
D
to display the bidirectional calibration screen.
• At this time, the digital display will show -1- to indicate that the watch
is ready to calibrate the fi rst direction.
E-39
3. Place the watch on a level surface facing any direction you want, and press
C
to calibrate the fi rst
direction.
• - - - is shown on the digital display while calibration is being performed. When calibration is
successful, the digital display will show -2- . This means that the watch is ready for calibration of
the second direction.
• Calibration takes about 13 seconds. Do not move the watch while calibration is being performed.
4. Rotate the watch 180 degrees.
5. Press
C
again to calibrate the second direction.
• - - - is shown on the digital display while calibration is being performed. When calibration is
successful, the digital display will show OK and then change to the Compass Mode screen ( - - - ).
To perform northerly calibration
Important!
If you want to perform both northerly and bidirectional calibration, perform bidirectional calibration fi rst,
and then perform northerly calibration. This is necessary because bidirectional calibration cancels any
existing northerly calibration setting.
1. In the Compass Mode, hold down
E
until each of the following steps
occurs.
• Hold SET appears on the digital display. ➝ Magnetic declination
settings fl ash.
• This is the setting screen.
2. Press
D
twice to display the northerly calibration screen.
• At this time, -n- (north) appears on the digital display.
3. Place the watch on a level surface, and position it so that its 12 o’clock position points north (as
measured with another compass).