


USER’S GUIDE 2496
4
• Monthly alarm
Set the day, hour and minutes for the alarm time. This type of setting causes
the alarm to sound every month at the time you set, on the day you set.
• Weekly alarm
Set the day of the week, hour and minutes for the alarm time. This type of
setting causes the alarm to sound every week at the time you set, on the day
of the week you set.
Note
• In addition to the alarm types described above, you can also set up alarms
with the following two configurations.
Hour, minutes, month, day of the week
This type of alarm sounds at the specified time whenever the specified day
of the week occurs during the specified month.
Hour, minutes, day, day of the week
This type of alarm sounds at the specified time each time the specified day
falls on the specified day of the week.
• Alarms sound in accordance with the time (and year, month, day, day of the
week) kept by the Timekeeping Mode. Because of this, the alarm will not
sound if your settings specify a condition that does not exist. For example,
June 30, 2002 falls on a Sunday. If you set an alarm for Tuesday, June 30, it
will not sound during 2002.
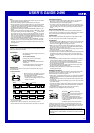
To set an alarm time
1. In the Alarm Mode, use D to scroll through
the alarm screens until the one whose time
you want to set is displayed.
2. After you select an alarm, hold down A until
the hour setting of the alarm time starts to
flash, which indicates the setting screen.
• This operation automatically turns on the
alarm.
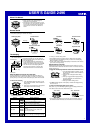
3. Press C to move the flashing in the sequence
shown below to select other settings.
I
I
I
I
I
I
I
I
I
I
I
I
I
SIG
x1 x2 x3
x5 x4
Alarm on indicator
Hour Day of week
Minutes Month Day
4. While a setting is flashing, use D (+) and B (–) to change it.
• To set an alarm that does not include a month and/or day, set xx for
each setting.
• To set an alarm that does not include the day of the week, set --- for
the setting.
• When setting the alarm time using the 12-hour format, take care to set
the time correctly as a.m. (A indicator) or p.m. (P indicator).
5. Press A to exit the setting screen.
Alarm Operation
The alarm sounds at the preset time for about 20 seconds, or until you stop it
by pressing any button.
• An alarm does not sound if its preset time is reached while an IR data
communication operation is in progress.
To test the alarm
In the Alarm Mode, hold down D to sound the alarm.
To turn an alarm and the Hourly Time Signal on and off
1. In the Alarm Mode, press D to select an alarm or the Hourly Time Signal.
2. When the alarm or the Hourly Time Signal you want to is selected, press
B to turn it on and off.
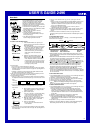
Indicates alarm is on.
Indicates Hourly Time Signal is on.
Note
• The on ( displayed)/off ( not displayed) status of an alarm is
indicated on the corresponding alarm screen (1 through 5). The Hourly
Time Signal on (
displayed)/off ( not displayed) status is indicated on
all alarm screens.
• When the Hourly Time Signal and an alarm are both turned on, the
indicators appear as
.
• The alarm on indicator and the Hourly Time Signal on indicator are shown
on the display in all modes while these functions are turned on.
• If any alarm is on, the alarm on indicator is shown on the display in all
modes.
User Information
User information identifies the watch as yours. It
also provides a record of your name, phone
numbers, e-mail address, and the date of birth
when such information is required.
• All of the operations in this section are
performed in the User Information Mode, which
you enter by pressing C.
• See “Data Communication” for information
about exchanging user information.
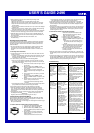
To input user information
1. In the User Information Mode, hold down A until the flashing cursor ( )
appears in the text area of the display. This is the input screen.
2. Input your user information by performing the procedure starting from step
3 under “To create a new Data Bank record”.
• Pressing A at any time during user information input exits the input screen
and displays the current user information.
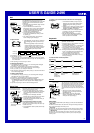
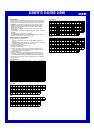
To recall user information
Pressing D in the User Information Mode switches between the Name/
Telephone Number screen and the E-mail Address/Date of Birth screen. Note
that the E-mail Address/Date of Birth screen does not appear unless it
contains at least e-mail address or date of birth data.
Name/Telephone
Number Screen
E-mail Address/
Date of Birth Screen
▲
Press D.
▲
Data type icons
Press D or B.
To edit user infomation
1. In the User Information Mode, hold down A until the flashing cursor
appears on the display.
2. Use C to move the cursor to the character or digits you want to change.
3. Use D (+) and B (–) to change the character.
4. After making the changes that you want, press A to store the record.
To delete user information
1. In the User Information Mode, hold down A until the flashing cursor
appears on the display.
2. Press D and B at the same time to delete the information.
• The message
CLEAR
appears to indicate that the information is being
deleted. After that, the cursor appears on the display, ready for input.
3. Input information or press A to exit the input screen.
Data Communication
This section describes how to perform IR data
communication and exchange Data Bank Mode,
Mail Mode, and User Information Mode data with
another Module No. 2496 watch.
Important!
• Infrared is an invisible type of light that travels
in a straight line. Because of this, the IR ports
of two devices that are trying to communicate
must point directly at each other.
• In order to help ensure you and your partner
can exchange data without any problem, be
sure that you and the person with whom you
are communicating follow the steps outlined
below.
IR port
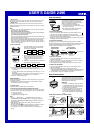
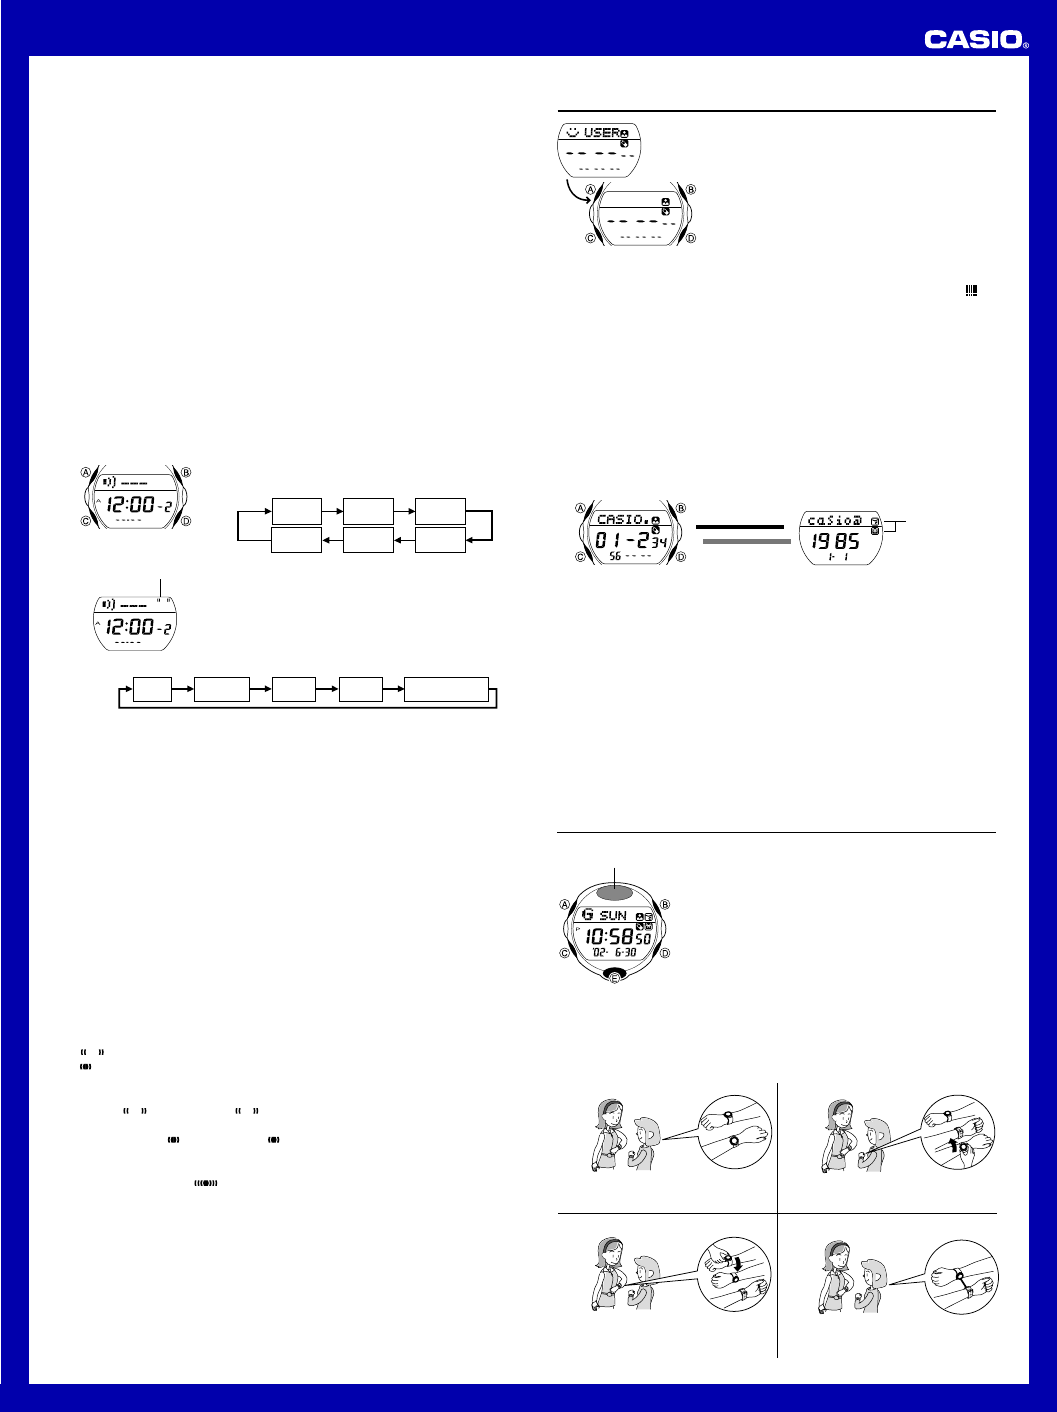
Positioning the Watches for Communication
Sender
1
Get ready
2
Receiver
Position your arms no more than 10cm
(3.5 inches) apart.
Receiver
Receiver
Perform the required button operation, and
point the receiver’s face towards the sender.
3
Sender
Sender
Perform the sender button operation, and
point its face towards the face of the
receiver.
4
Perform data communication
Sender
Receiver
Keep the watches face-to-face until they
beep.