


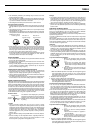
1868-4
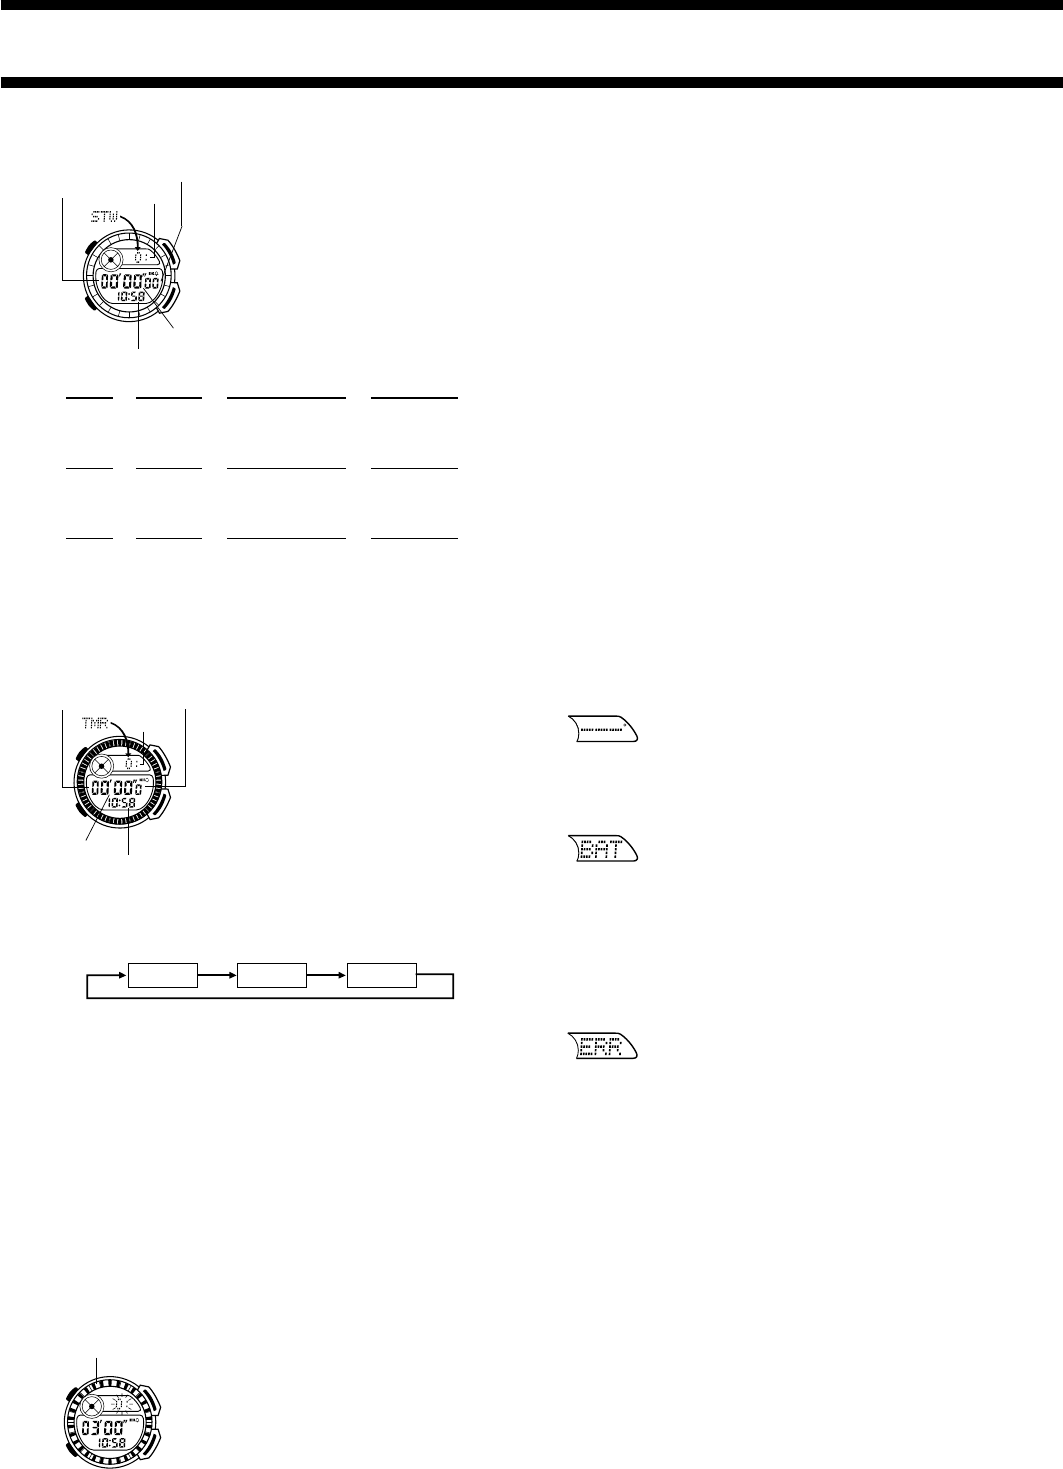
STOPWATCH MODE
The Stopwatch Mode lets you measure
elapsed time, split times, and two finishes.
The range of the stopwatch is 23 hours,
59 minutes, 59.99 seconds.
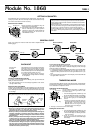
D
A
B
C
P
Hours
1/100 second
Current time
Minutes
Seconds
COUNTDOWN ALARM MODE
The countdown timer can be set within a range
of 1 second to 24 hours. When the countdown
reaches zero, an alarm sounds.
• You can also select auto-repeat, which
automatically restarts the countdown from the
original value you set whenever zero is
reached.
Setting the Countdown Time
1. In the Countdown Alarm Mode, hold down
A until the hour digits of the countdown time
start to flash on the display.
• The hour digits are flashing because they
are
selected
.
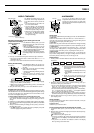
Hours
1/10 second
Current time
Minutes
Seconds
D
A
B
C
P
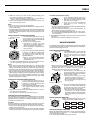
First runner
finishes.
Second runner finishes.
Record time of first
runner.
Record time of
second runner.
(a) Elapsed time measurement
CC C C A
Start Stop Re-start Stop Clear
(b) Split time measurement
CA A C A
Start Split Split release Stop Clear
(c) Split time and 1st-2nd place times
CA C A A
Start Split Stop Split release Clear
J J J J
J J J J
J J J J
2. Press D to move the flashing in the sequence shown below to select
other settings.
3. While hours, minutes, or seconds digits are selected (flashing), press
C to increase the setting.
• To set the starting value of the countdown time to 24 hours, set
0:
00'
00"
.
4. After the countdown time is the way you want it, press A to return to
the countdown alarm display screen.
Using the Countdown Timer
Press C while in the Countdown Alarm Mode to start the countdown timer.
• When the end of the countdown is reached and auto-repeat is turned off,
the alarm sounds for 10 seconds or until you stop it by pressing any
button. The countdown time is automatically reset to its starting value
after the alarm stops.
• Press C while a countdown operation is in progress to pause it. Press
C again to resume the countdown.
• To completely stop a countdown operation, first pause it (by pressing
C), and then press A. This returns the countdown time to its starting
value.
SecondsHours Minutes
Notes
• The auto-repeat on and off status indicators in the graphic area are not
shown in the countdown alarm display screen. To check whether auto-
repeat is on or off, perform step 1 of the above procedure to change to
the setting screen. Then you can check the status of the graphic area to
see if auto-repeat is on or off. After you are finished, press A to return to
the countdown alarm display screen.
• When the end of the countdown is reached and auto-repeat is turned on,
the alarm sounds, but the countdown starts again automatically whenever
the countdown reaches zero. You can stop timing by pressing C, and
manually reset to the starting countdown time by pressing A.
• Normally, an alarm tone sounds for 10 seconds when the end of the
countdown is reached. If you use auto-repeat with start time of 10 seconds
or less, the alarm tone sounds for only one second.
Turning Auto-repeat On and Off
1. In the Countdown Alarm Mode, hold down
A until the hour digits of the countdown time
start to flash on the display.
2. Press B to turn auto-repeat on and off.
• When you turn on auto-repeat, a pattern of
bars appear in the graphic area. Turning
off auto-repeat causes the graphic area to
go blank.
3. Press A to return to the countdown alarm
display screen.
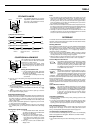
D
A
B
C
P
[Auto-repeat On]
Graphic area
REFERENCE
This section contains more detailed and technical information about watch
operation. It also contains important precautions and notes about the various
features and functions of this watch.
Warning Indicators
Warning indicators appear whenever any of the conditions described below
occur. Appearance of a warning indicator causes any measurement
operation that is currently underway to stop. Warning indicators appear in
the upper display, and this causes --- to replace any direction or
temperature values on the display.
• There may be cause where the ERR or BAT message is cleared
once you change modes. In this case, you can continue using the watch
normally unless the error warning message reappears.
• Whenever there is a sensor malfunction, be sure to take the watch to an
authorized CASIO distributor or service center as soon as possible.
Abnormal Magnetic Field Indicator
This indicator appears whenever the watch has a problem
obtaining a correct direction reading. This condition could
indicate that the watch is within a very high magnetic field,
and so you should try moving to another location. Also,
see “Digital Compass Precautions” for further information
on conditions that cause errors.
Low Battery Indicator
This message indicates that batteries power is too low to
perform the measurement. It appears whenever batteries
power drops below a certain level, or when you try to use this
watch under very cold conditions (below about –10°C/14°F).
If the
BAT message appears because of use under cold conditions, it
should clear (and normal operation should return) after the watch is brought
back to normal temperature.
If batteries power is low (indicated BAT appears under normal
temperatures), you should have the batteries replaced as soon as possible.
Note that replacement of the batteries causes all memory contents to be
cleared.
Sensor Malfunction Indicator
This message indicates malfunction of sensor circuitry.
Whenever a sensor malfunction initially occurs, the
ERR
messages flashes on the display. Note that calibrating the
Digital Compass may cause the ERR message to appear.
In this case, the message does not indicate sensor
malfunction, and should be corrected if you re-calibrate
the Digital Compass.
Auto Return Operations
• After you perform an operation in any mode, pressing D returns to the
Timekeeping Mode.
• If you leave a screen with flashing digits on the display for two or three
minutes without performing any operation, the watch automatically saves
anything you have input up to that point and exits the setting screen.
Data and Setting Scrolling
The B and C buttons are used in various modes and screens to scroll
through data on the display. In most cases, holding down these buttons
during a scroll operation scrolls through the data at high speed.
12-hour/24-hour Timekeeping Formats
The 12-hour/24-hour timekeeping format you select in the Timekeeping
Mode is also applied in the Navigation, World Time, and Alarm Modes.
Backlight Precautions
• The electro-luminescent panel loses illuminating power after very long
use.