Other Functions
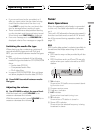
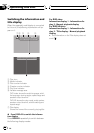
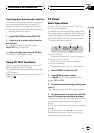
Setting the level indicator
Level indicators can be changed. Style of the
level indicator differs depending on the
source.
% Press EQ and hold to select the level in-
dicator.
Press EQ and hold repeatedly to switch be-
tween the following settings:
iPod
Progress bar—off—Level indicator 1—Level in-
dicator 2—Entertainment
Sources other than iPod
Level indicator 1—Level indicator 2—Enter-
tainment—off
Notes
! When selecting iPod as a source, the progress
bar is displayed as a default setting. When
sources other than iPod is selected, the level
indicator is displayed as a default setting.
! When the source is changed from iPod, the
“progress bar” will be changed to the “level in-
dicator 1”. And then, if the source is changed
to iPod again, the progress bar is displayed.
However, if the level indicator has been chan-
ged, the selected level indicator will be dis-
played even if the source is changed to iPod
again.
! When Entertainment, Level indicator 1 or
Level indicator 2 is selected on the iPod
source, the selected level indicator will be dis-
played even if the source is changed.
! When the optical inputs 1 and 2 on DEQ-
P6600 are occupied and AUX is connected to
this unit, the level indicators may be incor-
rectly displayed.
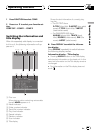
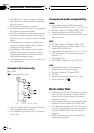
Using the AUX source
This unit can control an auxiliary equipment
such as VCR or portable device (sold sepa-
rately). When connected, auxiliary equipment
is automatically recognized as AUX source
and assigned to AUX.
About AUX connection method
You have two methods to connect auxiliary
equipments to this unit.
Mini pin plug cable (AUX1)
When connecting auxiliary equipment using a
mini plug cable
iPod and portable audio/video player can be
connected to this unit via mini plug cable.
! If an iPod with video capabilities is con-
nected to this unit via 3.5 mm plug (4 pole)
cable (e.g., CD-V150M), you can enjoy the
video contents of the iPod.
! It is possible to connect a portable audio/
video player by using a 3.5 mm plug (4
pole) to RCA cable, which is sold sepa-
rately. However, depending on the cable, re-
verse connection between Red (right side
audio) cable and yellow (video) cable is re-
quired. Otherwise, audio and video may not
be correctly reproduced.
% Insert the mini plug into the micro-
phone/auxiliary input jack on this unit.
IP-BUS-RCA interconnector (AUX2)
When connecting auxiliary equipment using an
IP-BUS-RCA Interconnector (sold separately)
% Use an IP-BUS-RCA Interconnector such
as the CD-RB20/CD-RB10 (sold separetely)
to connect this unit to auxiliary equipment
featuring RCA output.
For more details, refer to the IP-BUS-RCA Inter-
connector owner’s manual.
# You can only make this type of connection if
the auxiliary equipment has RCA outputs.
Operating this unit
En
55
Section
03
Operating this unit