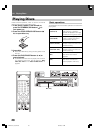
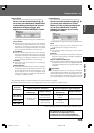
52
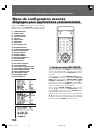
05 Audio and Video Quality Settings
Video adjustments
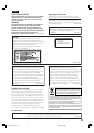
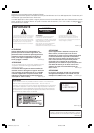
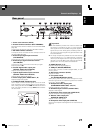
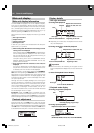
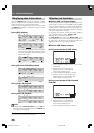
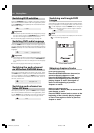
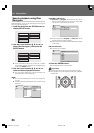
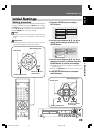
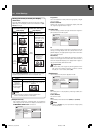
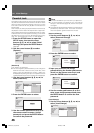
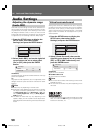
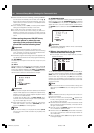
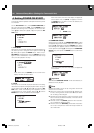
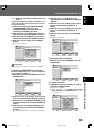
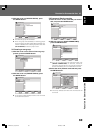
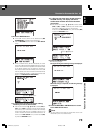
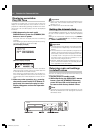
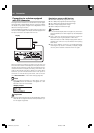
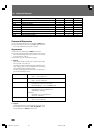
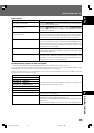
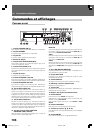
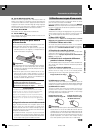
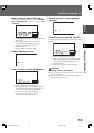
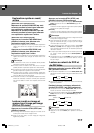
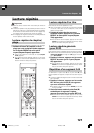
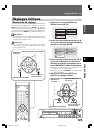
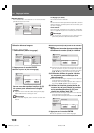
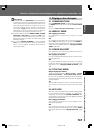
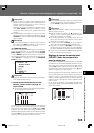
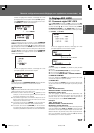
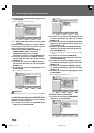
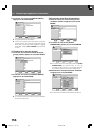
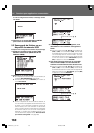
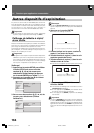
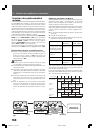
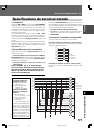
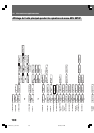
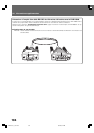
1. Press the SETUP button to display the
SETUP menu, then select [Video Adjust]
and press the ENTER button.
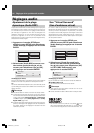
Audio Settings
Play Mode Disc Navigator
Initial Settings
Video Adjust
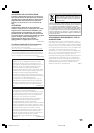
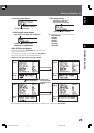
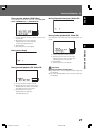
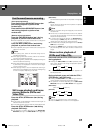
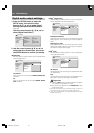
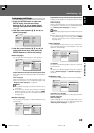
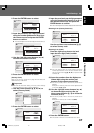
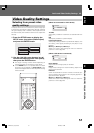
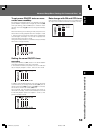
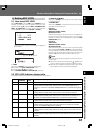
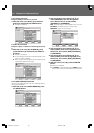
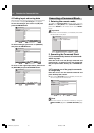
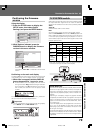
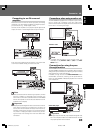
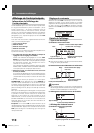
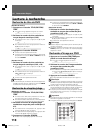
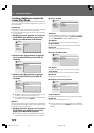
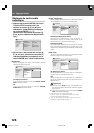
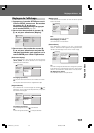
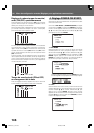
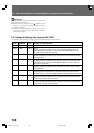
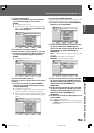
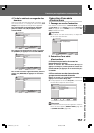
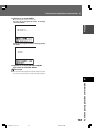
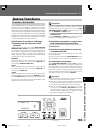
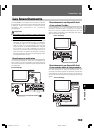
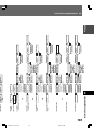
2. Use the left/right cursor buttons (|, \)
to select from [Memory 1], [Memory 2],
or [Memory 3], then press the down
cursor button («); select [Detailed
Settings] and press the ENTER button.
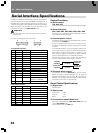
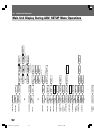
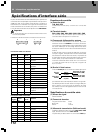
Memory 1
Detailed Settings
Video Adjust
¶ If the ENTER button is not pressed before a certain
period of time has elapsed, the [Video Adjust] menu
screen will disappear and the selection will be canceled.
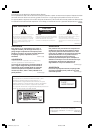
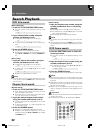
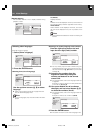
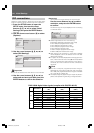
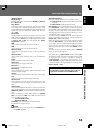
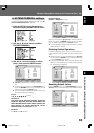
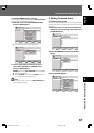
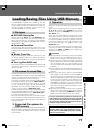
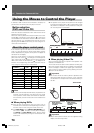
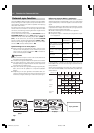
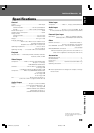
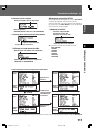
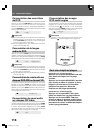
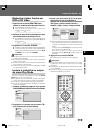
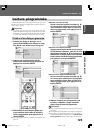
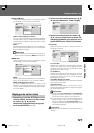
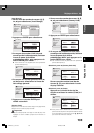
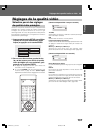
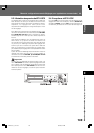
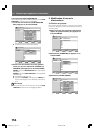
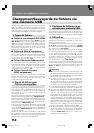
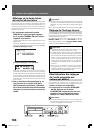
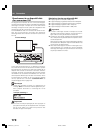
3. Use the up/down cursor buttons (», «)
to select the item, then use the right/left
cursor buttons (|, \) to adjust or select
the value.
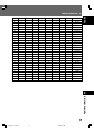
¶ See page 53 regarding the contents of setting items.
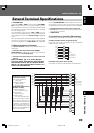
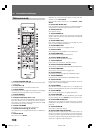
Recall Settings
Prog. Motion
PureCinema
YNR
CNR
Sharpness High
Sharpness Mid
Memory 1
Auto 1
Memory 1
soft fine
off
max
first
slow
off max
soft fine
1/3
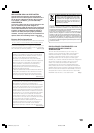
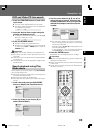
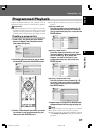
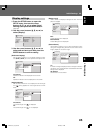
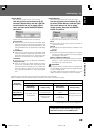
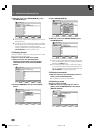
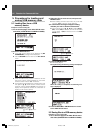
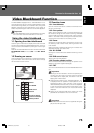
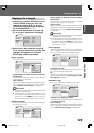
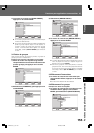
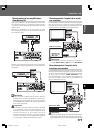
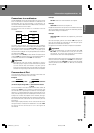
Detail
White Level
Black Level
Black Setup
Gamma
Hue
Chroma Level
0 IRE
Memory 1
off max
min max
min max
– +
green red
min max
2/3
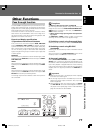
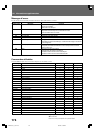
Chroma Delay
HDMI Color Adjust
DVI Detail
Standard
Memory 1
soft fine
– +
3/3
¶ Pressing the DISPLAY button alternates between the
display of the single item selected and the full-screen
display.
4. After selecting/adjusting the necessary
items, press the ENTER button to exit the
menu.
¶ The video memory setting [Memory 1], [Memory 2],
[Memory 3] selected in step 2 will be stored.
¶ If the selected memory bank already has a video
memory setting stored in it, the previous contents will
be erased (overwritten).
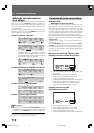
Important
¶ After completing settings, be sure to press the EN-
TER button or SETUP button to confirm the selections.
If any other button is used to exit the setting menu,
the newly set contents will not be stored.
Note
¶ Some settings may not appear obvious, depending on
the disc or display used.
DRE1031C_En_050-053 06.8.25, 9:13 AM52