INF
RMATI
2
Trou
es
ootin
Gui
I
this unit does not per
orm properly when operated as instructed in this manual. Re
er to the
ollowing
INF
RMATI
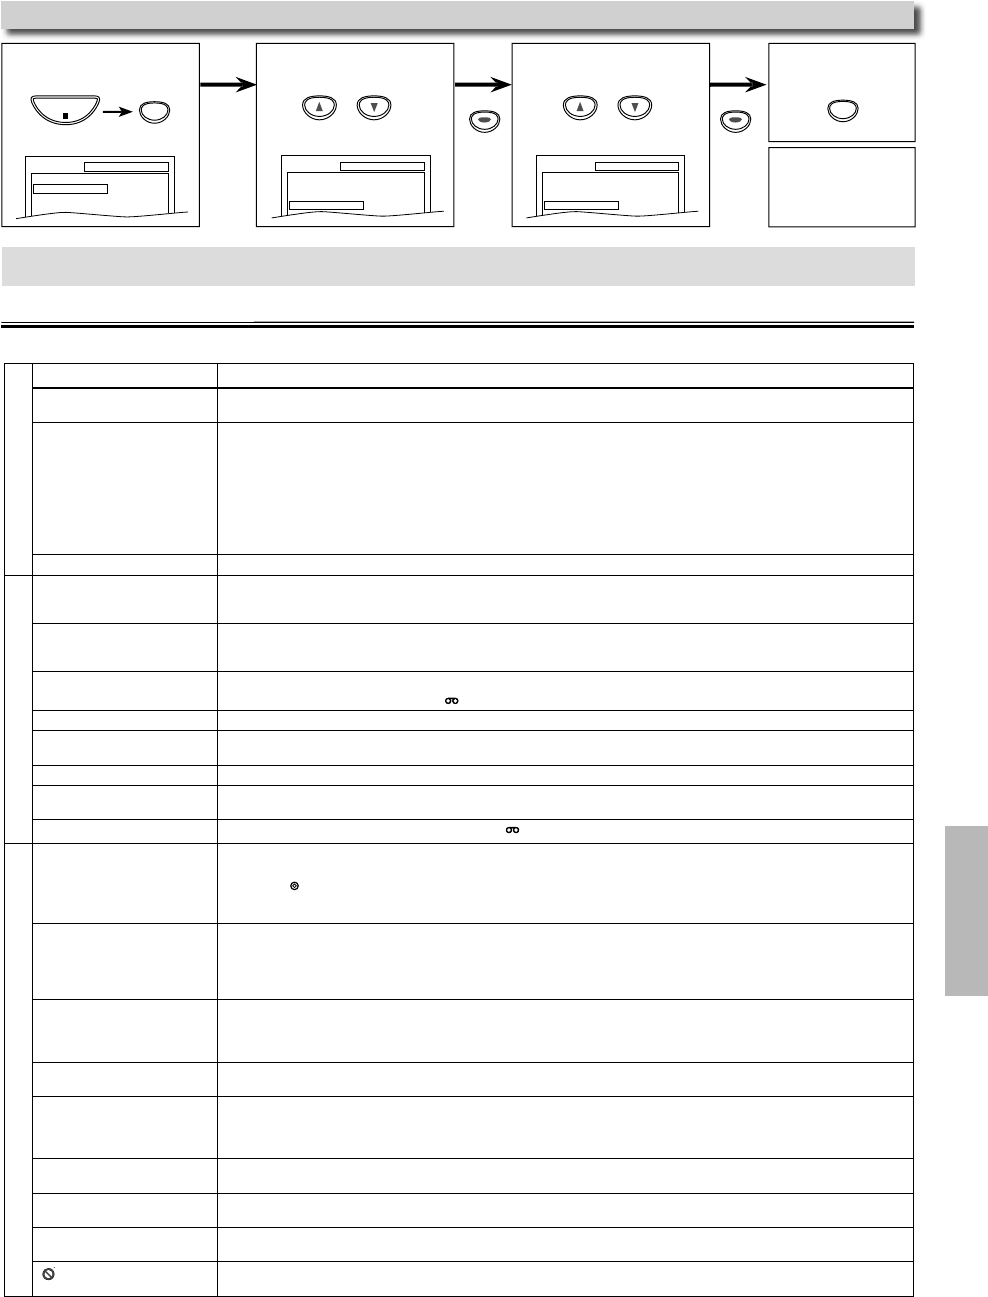
en you
o not wis
o initia
ize, se
ect
NO
at step 3
l
“INITIALIZE”
To exit the men
l
“YE
”
r
SETUP
in
h
sto
mode
Reset to the De
ault Settin
(Except
or PARENTAL Settin
)
SETUP
QUICK
CUSTOM
INITIALIZE
SETUP INITIALIZE
Initialize?
NO
YES
ET
P m
n
r
wi
SETUP
QUICK
CUSTOM
INITIALIZE
VD
VCR
Pro
e
Correct
ve act
on
o power. • Ma
e sure t
e power p
ug is connecte
to an AC out
et
• Ma
e sure t
e power is turne
on
his unit does not res
ond to the
r
m
n
r
l
• Check if the power plu
is connected to an AC outlet
•
h
k
h
ri
in
h
r
m
n
r
l
•
Aim the remote control directl
at the infrared sensor window. If necessar
, remove all the obstacles between the sensor and the remote control
• You have to be within 23 feet
7m
of this unit
• Check if a cassette ta
e is in this unit.
• Tune
our radio to an empt
AM station so that
ou hear a lot of static. Turn up the volume, then if
ou hear some signal sound from
the radio in response to
our pressing buttons on the remote control, the remote control is working.
• Press and hold an
button on remote control toward a digital camera. The remote control is working if
ou confirm infrared light
throu
h the di
ital camera
oor
icture or noise. • Inter
erence signal ma
be received. Change the position and direction o
the unit
R
annot recor
a TV program
• T
is unit
oes not
ave a tuner to receive TV
roa
casting
• You must connect this unit to TV with audio/video output jacks or an external tuner to record TV programs. Re
er to “Recording & One
touc
Timer Recor
ing (OTR)” on page 12 an
“Sate
ite Lin
” on page 14.
imer recor
ing is impossi
e
• Ma
e sure t
e timer program is set correct
y
• Ma
e sure
IMER REC indicator on this unit lights up. I
not, press
TIMER SET
• Ma
e sure t
e VCR c
oc
is set correct
y
Cannot
o into record mode. • Make sure the cassette ta
e has a record tab. If needed, cover the hole with adhesive ta
e
• A
iv
hi
ni
in V
R m
Pr
VC
on the remote control so that the VCR SOURCE li
ht will illuminate
P
a
ac
picture is partia
nois
Adjust tracking control
or a better picture by pressing
TRACKING
n
ni
r
TRACKING
n
r
m
n
r
Cannot view a picture
ut t
e
au
io is OK.
• Head cleaning may be necessary. Re
er to “Auto Head Cleaning”
• Ma
e sure t
e VCR is not in t
e VCR menu mo
e
No or poor, pla
back picture
• Fine tune
our TV
Vi
r
l
r
in
n
wh
n
making a cop
of a cassette tape
• You cannot cop
a cop
righted cassette tape
Cannot remove t
e cassette tape. • Check i
this unit is in the VCR mode. I
not, press
VC
on t
e remote contro
to switc
t
e mo
e
V
No
icture. • Connect the video cable firml
• Insert a correct video disc that can be pla
ed back on this unit
• Pr
DV
on the remote control. Check if the DVD SOURCE light will illuminate. Then tr
other DVD features
• Set “PROGRESSIVE” correctl
in “DISPLAY” menu. Turn it on onl
if
our TV has progressive scan and
ou are using the component
video connections between the unit and the TV. Disable pro
ressive scan for all other connections. Refer to pa
e 6
Disc cannot
e p
a
e
ac
.• In
r
i
•
l
n
h
i
• Place the disc correctl
with the label side up
• Cancel the parental lock or chan
e the control levels
• Handle a disc with special care so that it does not have fingerprints, scratches, or dusts on its surface
No soun
. • Connect the audio cables
irmly
• Turn on the power o
the audio component
• Correct t
e au
io output settings
• Correct t
e input settings on t
e au
io component
No DTS audio is out
ut
• This unit does not su
ort DTS audio
-Thi
i
n
m
lf
n
i
n
Distorted
icture
• Connect this unit directl
to the TV
• There are some cases where pictures ma
be slightl
distorted, and those are not a sign of a malfunction
• Although pictures ma
stop for a moment, this is not a malfunction. Refer to page 15
• Check if the progressive mode is set correctl
according to
our TV. Refer to pages 20-21
Au
io or su
tit
e
anguage
oes
not matc
t
e setting
• The selected language is not available
or audio or subtitles on the DVD
-Thi
i
n
m
l
n
i
n
T
e camera ang
e cannot
e
ange
.
• The DVD does not contain sequences recorded
rom di
erent camera angles
-This is not a mal
unction
Audio or subtitle lan
ua
e
annot be chan
ed
• The DVD does not contain audio source or subtitles in the selected lan
ua
e
-Thi
i
n
m
lf
n
i
n
” appears on t
e TV screen,
pro
i
iting an operation.
• T
at operation is pro
i
ite
y t
is unit or t
e
isc
-This is not a mal
unction
Some functions are not available in s
ecific modes, but this is not a malfunction. Read the descri
tion in this manual for details on correct o
erations
Pla
back from a desired track and random pla
back are not available during programmed pla
back.
Some functions are
rohibited on some discs


