English
127
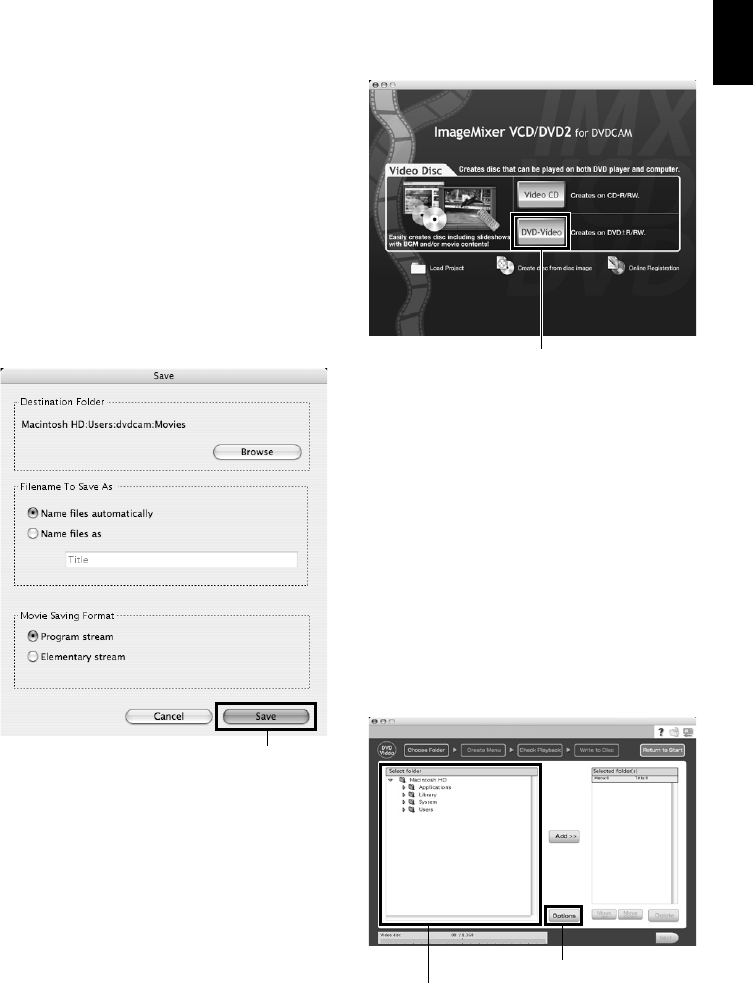
4 Select the video file to be imported and save
it.
The scenes recorded on disc will appear.
Select the scene to be imported into
Macintosh and click “Save”: The save setting
screen will appear.
Clicking “Save” after setting the save
destination, etc. will start import into
Macintosh.
If you wish to import the contents of another
disc after importing is finished, click “Eject”
on drive icons: The cover of disc insertion
block on DVD video camera/recorder will
open so that you can replace the disc.
To import photos recorded on DVD-RAM,
click the PHOTO button: The photos on disc
will appear. Select the desired photo(s) and
click “Save photo”.
When importing video files is complete, start
ImageMixer VCD/DVD2 to create a DVD-
Video using the imported files.
Note:
• When using images on ImageMixer VCD/DVD2, set
the video saving format to “Program stream”.
• When importing the images on a DVD-RAM/DVD-RW
(VR-mode), you can use the MPEG editor to
designate the import range.
• When importing the images on a DVD-RW (VR-
mode)/DVD-R, click the “Chapter” tab to select the
image.
• If you double-click an MPEG file imported by Pixe
VRF Browser EX on Finder, Pixe VRF Browser EX
will start, but it cannot handle the imported MPEG file.
Use the imported MPEG file on ImageMixer VCD/
DVD2.
5 Start ImageMixer VCD/DVD2, and set up the
files to be registered.
Start ImageMixer VCD/DVD2 and click the
“DVD-Video” button.
Note:
• No Video CD can be created or played back on this
DVD video camera/recorder. And no writing to +RW/
+R is possible when creating a DVD-Video.
6 Designate the folder in which the video file to
be registered is stored.
Select the folder that you designated to save
video files, and then click “Add”.
Click “Options” to choose the type of disc (8
cm or 12 cm) to create a DVD-Video.
Be sure to choose “NTSC” for the video
system.
The “PAL” system is used in Europe.
After setting the option, click the “OK”
button, and then click “Next”.
Click
Click
Selecting save destination folder
Click
