English
124
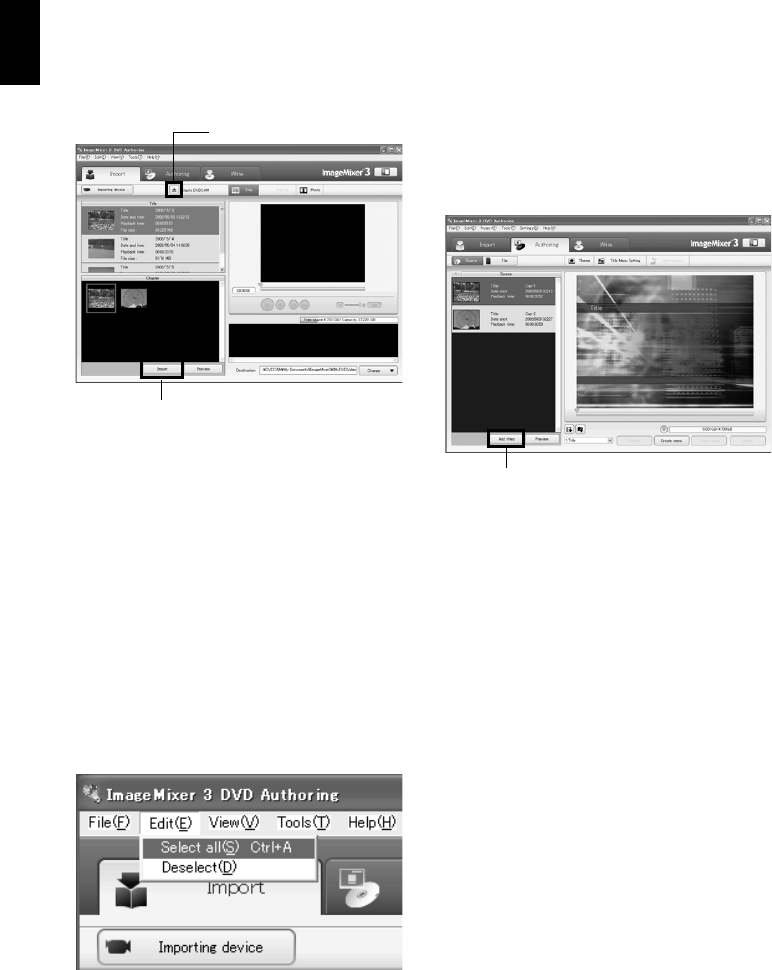
6 Select the images from which you wish to
create a DVD-Video, and then click “Import”.
The image recorded on disc will appear.
Select the chapter to be imported into PC, and
then click “Import”: Importing into PC will
start.
If you wish to import images on another disc
after importing images on one disc, click the
“Eject” button. The disc insertion block of
DVD video camera/recorder will open:
Remove the disc, insert the other disc whose
recorded images you wish to import into the
DVD video camera/recorder, and then close
the disc insertion block. After a short while,
the images on the disc will appear: Perform
the same procedure to import the images.
When the images on DVD-RW (VF-mode)/
DVD-R/+RW are imported, the recording
date/time will not appear.
Note:
• To import all chapters in the title at once, click “Select
all” in the editing menu at the top of screen, and then
click “Import”.
• To import multiple chapters, click the desired chapters
while holding down the Ctrl key.
7 Click “Authoring” and create a DVD-Video
menu.
Clicking “Authoring” will display the editing
screen of DVD-Video menu. The video file
previously imported into PC will appear in
“Source”. Choose the desired video file, and
click “Add titles”: The video file will be
registered.
When using a video file imported into PC
using ImageMixer 3, click “File” to choose the
folder in which the video file will be stored.
Clicking “Theme” or “Set title menu” will
allow you to change the design of DVD-Video
menu.
Choose the type of disc to be created (8 cm/
12 cm/2-layer) using [Set] - [Configuration].
Click
Ejict button
Click
