38 - Adjusting the projection size
Adjusting the projection size
It is possible to adjust the size of the projection and correct any trapezoid distortion.
Point
A function to resize the screen (see page 45) and an E-Zoom function for enlarging certain
areas (see page 47
) are also available.
Zoom Adjustment
1
Rotate the zoom ring to make the required adjustments (enlargment up to a maximum
of 1.3x is possible).
The projection distance must also be adjusted when enlarging the screen. (see page 16
)
Point
If optional lenses are to be used, refer to the relevant instruction manuals for further details.
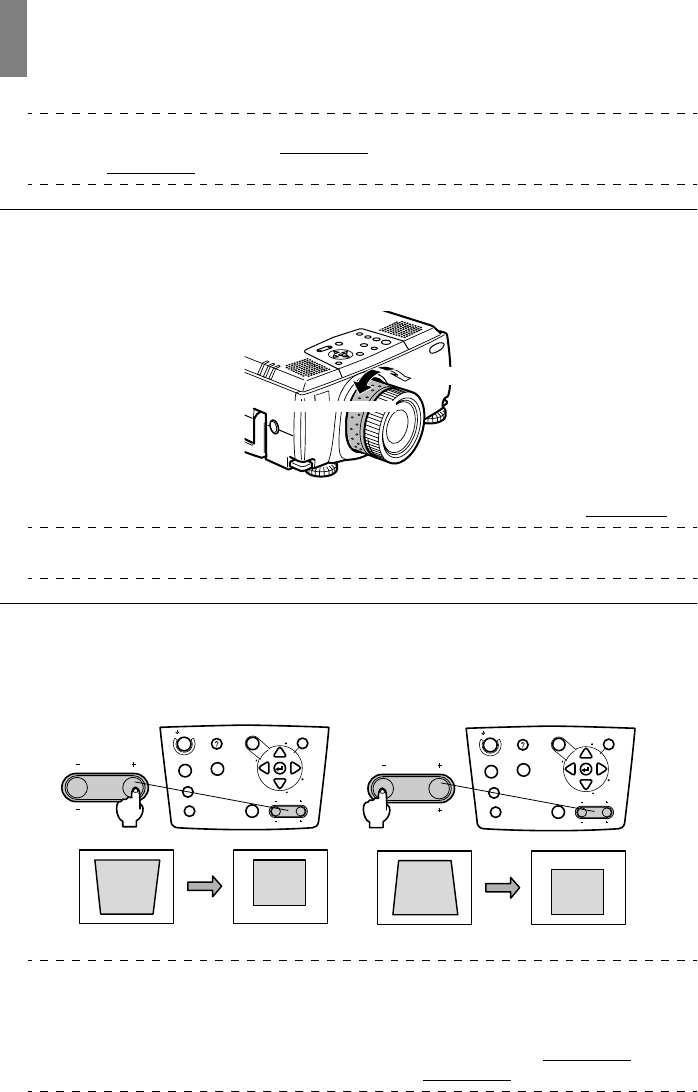
Keystone Adjustment
Make the necessary adjustment when the screen has been distorted into a trapezoid with foot
adjustment.
1
Press the [Keystone +, -] button to lengthen the screen sidewards.
Point
· The screen will be reduced in size when keystone correction has been performed.
· The status of keystone correction will be recorded. Perform readjustments that match the
installation position when the projection position or angle have been changed.
· Reduce the sharpness if blurring occurs after keystone correction. (see page 57
)
· Keystone correction is performed from the menu. (see page 59
)
Becomes smaller
Becomes larger
Power
Video
A/V mute
Resize
Esc
Help
Menu
Shift
Keystone
Volume
Keystone
Volume
S
y
n
c
.
S
y
n
c
.
T
r
a
c
k
i
n
g
T
r
a
c
k
i
n
g
Computer
Power
Video
A/V mute
Resize
Esc
Help
Menu
Shift
Keystone
Volume
Keystone
Volume
S
y
n
c
.
S
y
n
c
.
T
r
a
c
k
i
n
g
T
r
a
c
k
i
n
g
Computer
The corrected screen will shrink in size. The corrected screen will shrink in size.


