• To display an individual image, press the arrow buttons to highlight
the image and press [Enter]. (Press the [Esc] button to return to
the file list screen.)
• To display a slide show of all the images in a folder, press the
arrow buttons to highlight the Slideshow option at the bottom of
the screen and press [Enter].
a
• You can change the image switching time by highlighting
Option at the bottom of the screen and pressing [Enter].
• If any file names are longer than the display area or include
unsupported symbols, the file names may be shortened or
changed only on the screen display.
d
While projecting, use the following commands to control the
display:
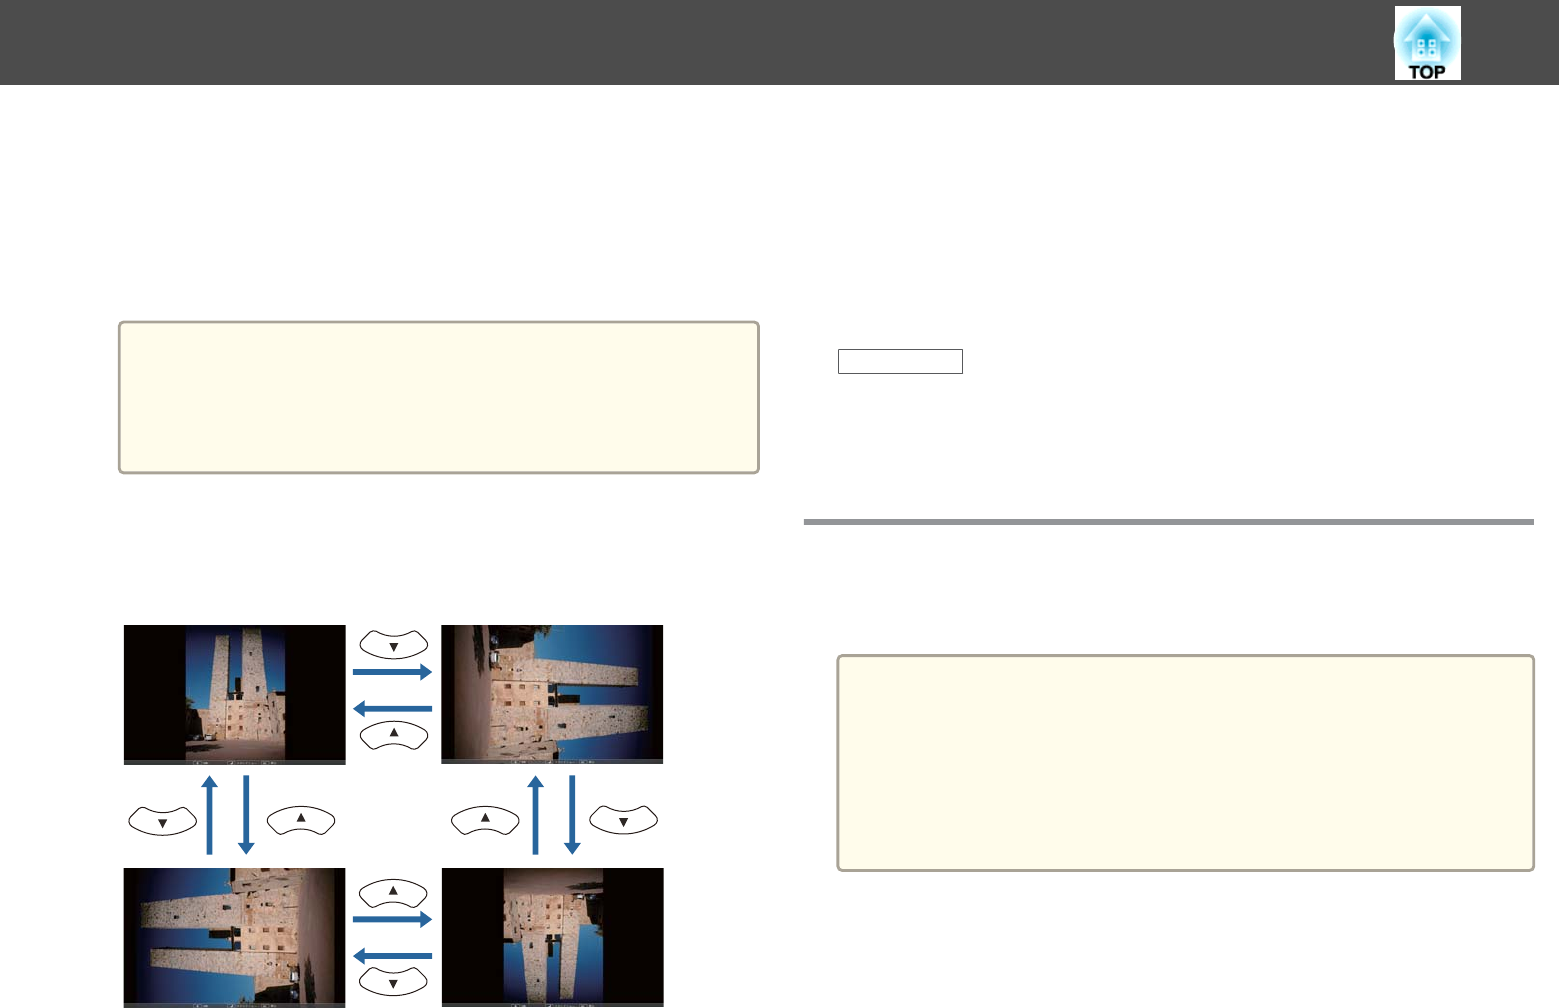
• To rotate a displayed image, press the up or down arrow button.
• To move to the next or previous image, press the left or right
arrow button.
e
To stop the display, follow the on-screen instructions or press
the [Esc] button.
You return to the file list screen.
f
Turn off the USB device, if necessary, and then disconnect the
device from the projector.
Related Links
• "Projecting a PC Free Presentation" p.73
• "Connecting to a USB Device or Camera" p.28
• "PC Free Display Options" p.79
Starting a PC Free PDF File Presentation
After connecting a USB device to the projector, you can switch to the USB
input source and start your PDF file presentation.
a
You cannot do the following while presenting a PDF file from a USB
device:
• Release a password
• Display e-signatures, JPEG2000 images, transparent effects, 3D
artwork, or comments
• Play multimedia content
• Display a PDF file without a .pdf file extension
a
Press the [USB] button on the remote control.
The PC Free file list screen is displayed.
Projecting a PC Free Presentation
75


