Procedure
When your video equipment is connected, start playback before
beginning this operation.
Using the Remote Control Using the Control panel
When two or more pieces of equipment are connected, press the
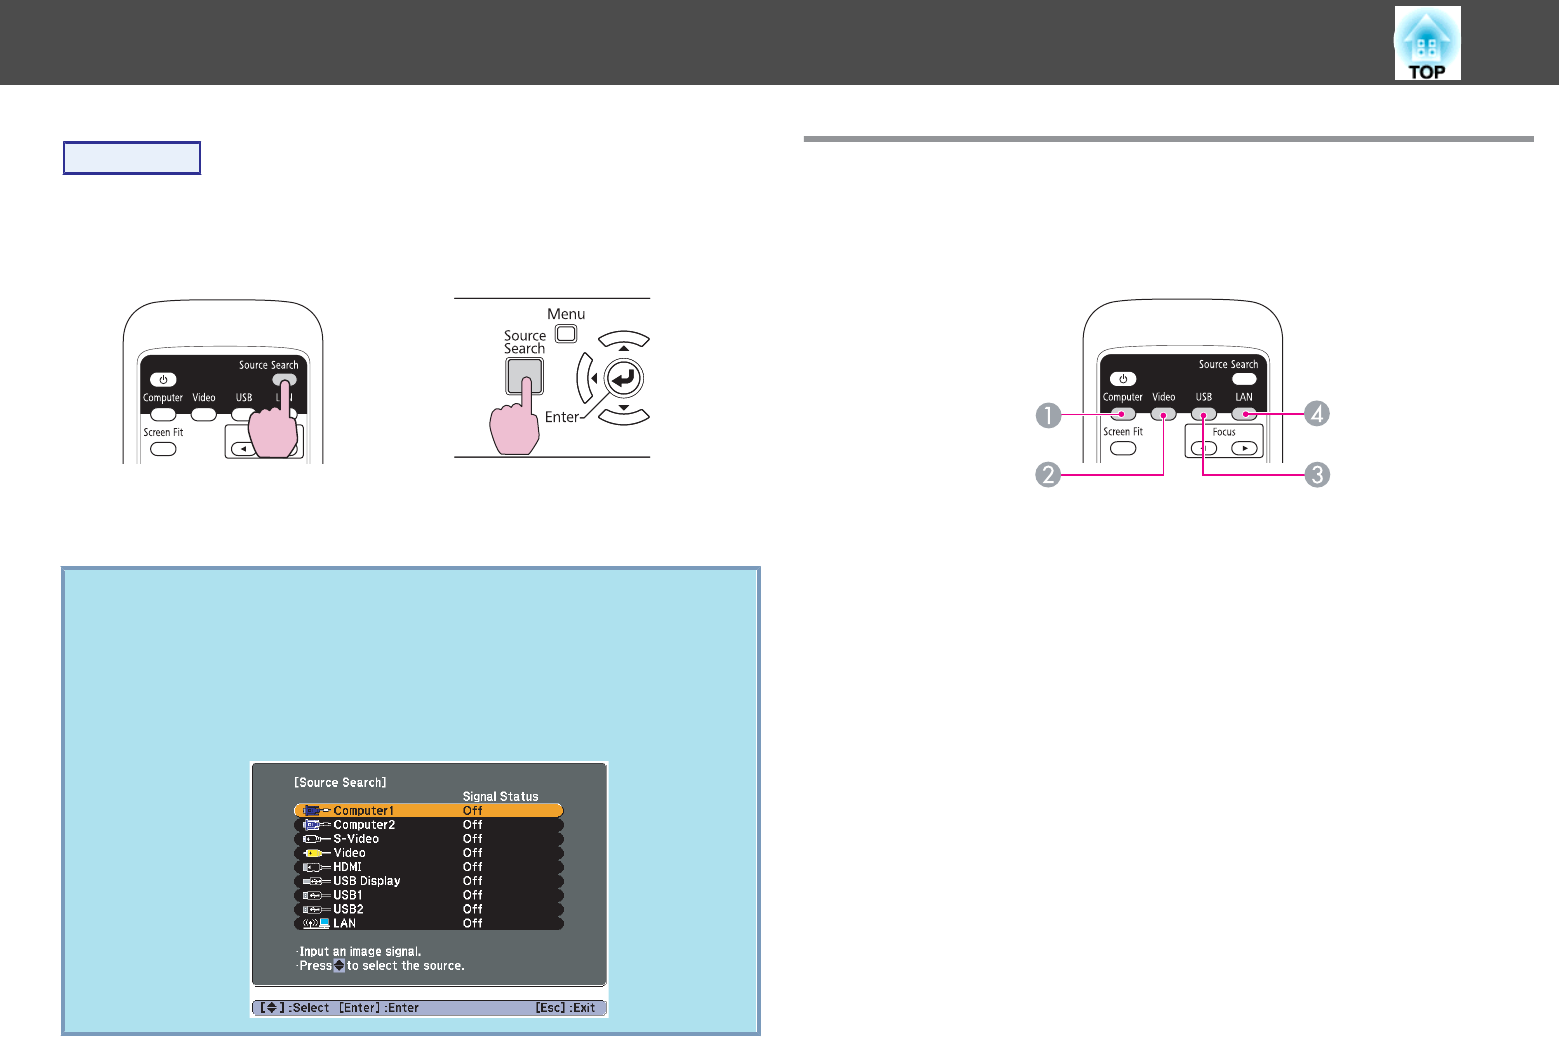
[Source Search] button until the target image is projected.
q
The following screen showing the status of image signals is
displayed when only the image that the projector is currently
displaying is available, or when no image signal can be found. You
can select the input port where the equipment you want to use is
connected. If no operation is performed after about 10 seconds, the
screen closes.
Example: EB-1925W/1915
Switch to the target image by Remote Control
You can change directly to the target image by pressing the following
buttons on the Remote Control.
Remote Control
A
Each time the button is pressed, the image changes from the Computer1
input port to the Computer2 input port. (EB-1925W/1920W/
1915/1910/1830 only)
When using EB-1900, it changes to images from the Computer input port.
B
Each time the button is pressed, the image cycles through Video, S-Video,
and HDMI (EB-1925W/1915 only) input ports.
C
Each time the button is pressed, it cycles through the following images:
• USB Display
• Images from the device connected to USB1 or USB2 port
(EB-1925W/1915 only)
• Images from the device connected to the USB(TypeA) port
(EB-1920W/1910/1830 only)
D
Changes to the image projected with EasyMP Network Projection. When
projecting via Quick Wireless Connection using the optional Quick
Wireless Connection USB Key, this button switches to that image.
(EB-1925W/1920W/1915/1910/1830 only)
When using EB-1900, this does not function even if the button is pressed.
Changing the Projected Image
30


