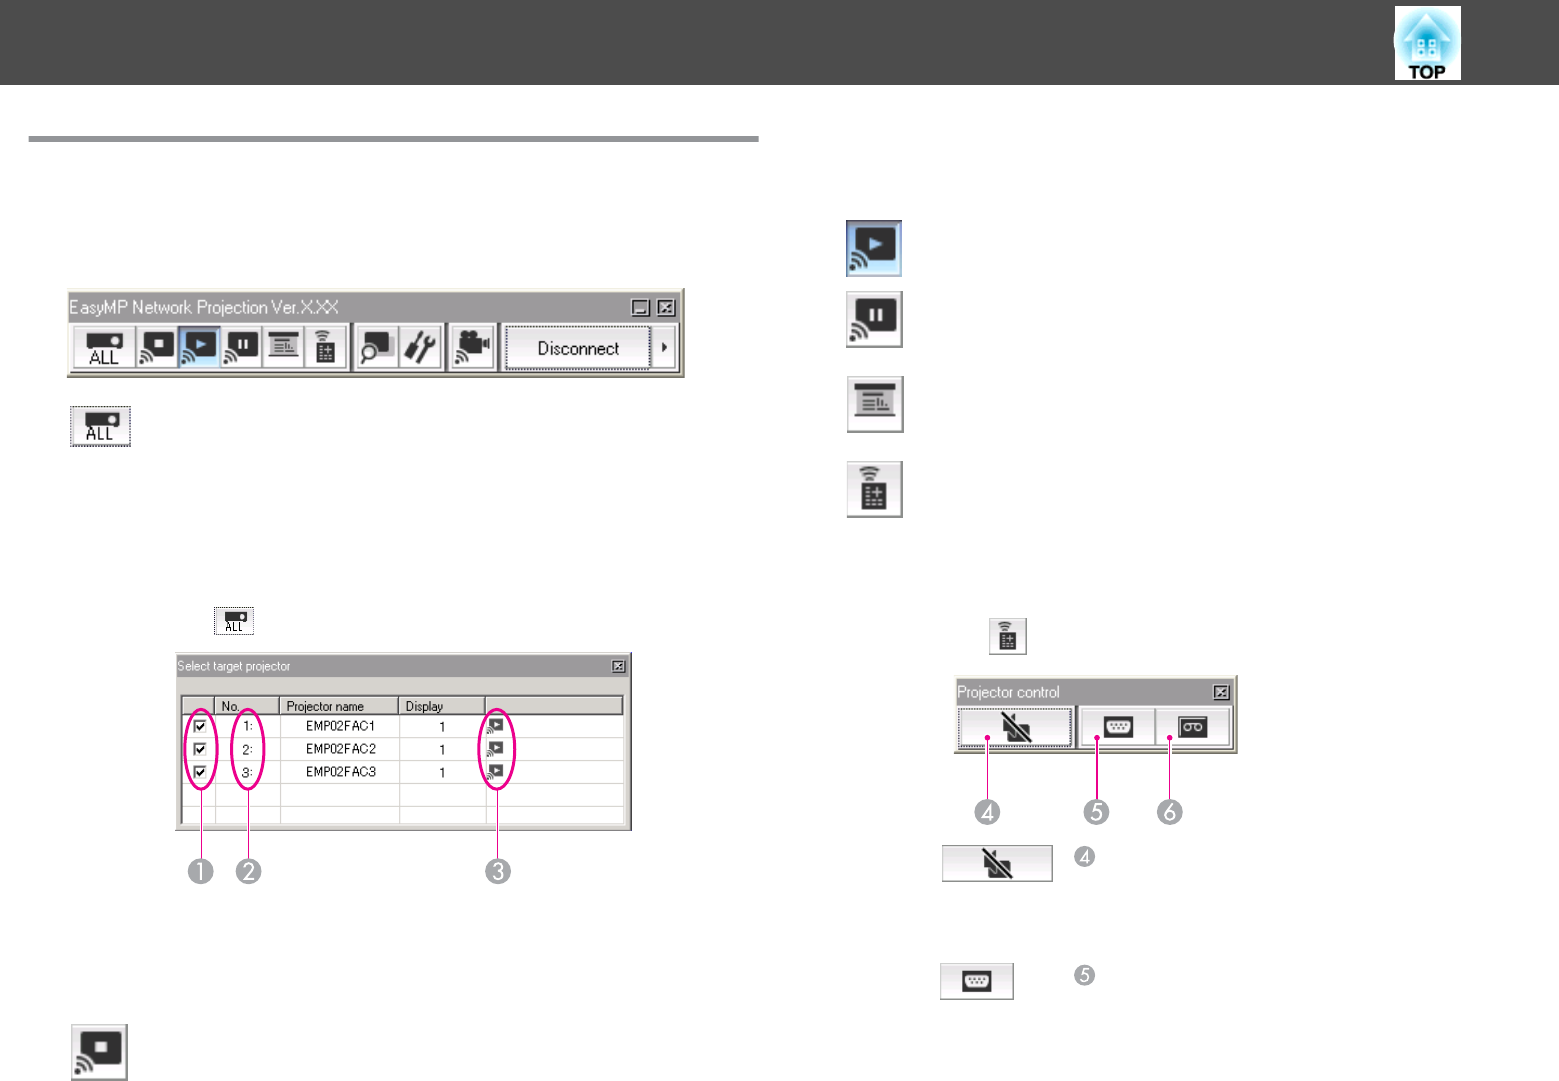
Using the Toolbar
The toolbar is displayed on the computer screen after EasyMP Network
Projection starts and a connection is made with the projector. You can
use this toolbar to operate and make settings for the projector.
Select target projector
Click to limit the projectors operated from the toolbar when projec-
ting from multiple projectors using the distribution function or Mul-
ti-screen display. The indication below the icon shows the projectors
that can be controlled.
ALL indicates that all of the connected projectors can be controlled.
For example, when "1, 3" is displayed, projectors No. 1 and No. 3 can
be controlled.
Click
to display the following screen.
A
Select the projector to be controlled.
B
Indicates the No. of an allocated projector. This No. indicates
the No. of the projector that you can control from the toolbar.
C
Indicates the status of the projector.
Stop
Stops projection while connected to the projector. A black screen is
projected while stopped. Audio does not stop. To stop the audio, or
to display a User's Logo while projection is stopped, use A/V Mute.
Show
Releases Stop or Pause.
Pause
Pauses projected images while connecting to the projector. Audio
does not Pause.
Presentation Mode
Each time this is clicked, Presentation Mode switches between enabled/
disabled.
s
p.19
Projector control
While the projector is connected to the network, the projector's A/V
Mute, Switch PC source and Switch video source functions can be con-
trolled from both the Remote Control and the projector's Control pan-
el.
Click
to display the following toolbar.
A/V Mute
The same function as the [A/V Mute] button on the
Remote Control.
s User's Guide "Remote Control"
Switch PC source
The Source alternates between Computer1,
Computer2, USB Display, USB, and LAN each time
you click.
Connecting to a Projector on a Network and Projecting
16
