‘95-on Kawasaki KDX 200/220 Installation Manual
1. Get a degree in Mechanical and Electrical Engineering. (Just kidding!)
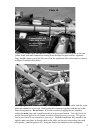
2. Remove the seat, side panels, radiator shrouds, and gas tank.
3. Unplug the taillight from the stock wiring harness, remove the taillight lens, and
remove the taillight socket and wiring.
If you are color blind or even think you might be a little color blind, now is the time to
get someone to assist you. Successful installation of the kit requires good color
recognition. You want to go riding this weekend, don't you?
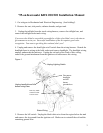
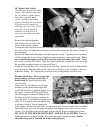
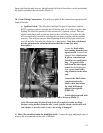
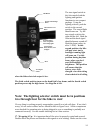
4. Unplug and remove the head light on/off switch from the wiring harness. Detach the
headlight from its wiring at the bulb socket and remove headlight. The headlight wiring
unplugs underneath the tank area. Unplug the red and yellow leads of this wiring,
remove the ground attachment from the ignition coil and remove this wiring.
Un
lu
Li
htin
Switch
Un
lu
headli
ht and kill
button wirin
here.
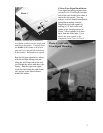
Fi
ure 1
Stator Wirin
Disconnect
headlight
and kill
button
rounds here
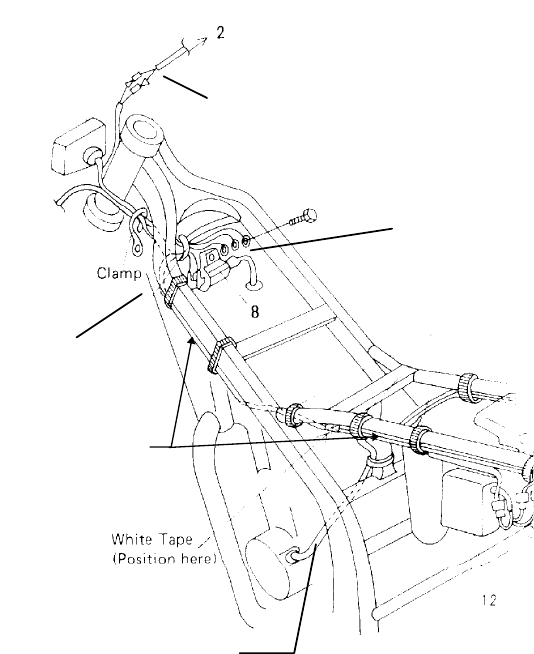
Run Gray Multi-
conductor cable
as shown here.
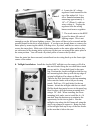
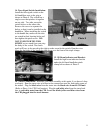
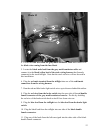
5. Remove the kill switch. Unplug the black/white wire from the region below the tank
and remove the its ground from the ignition coil. Make sure to reinstall the coil and the
remaining ground wire.
3