


6
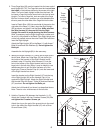
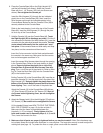
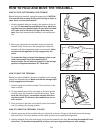
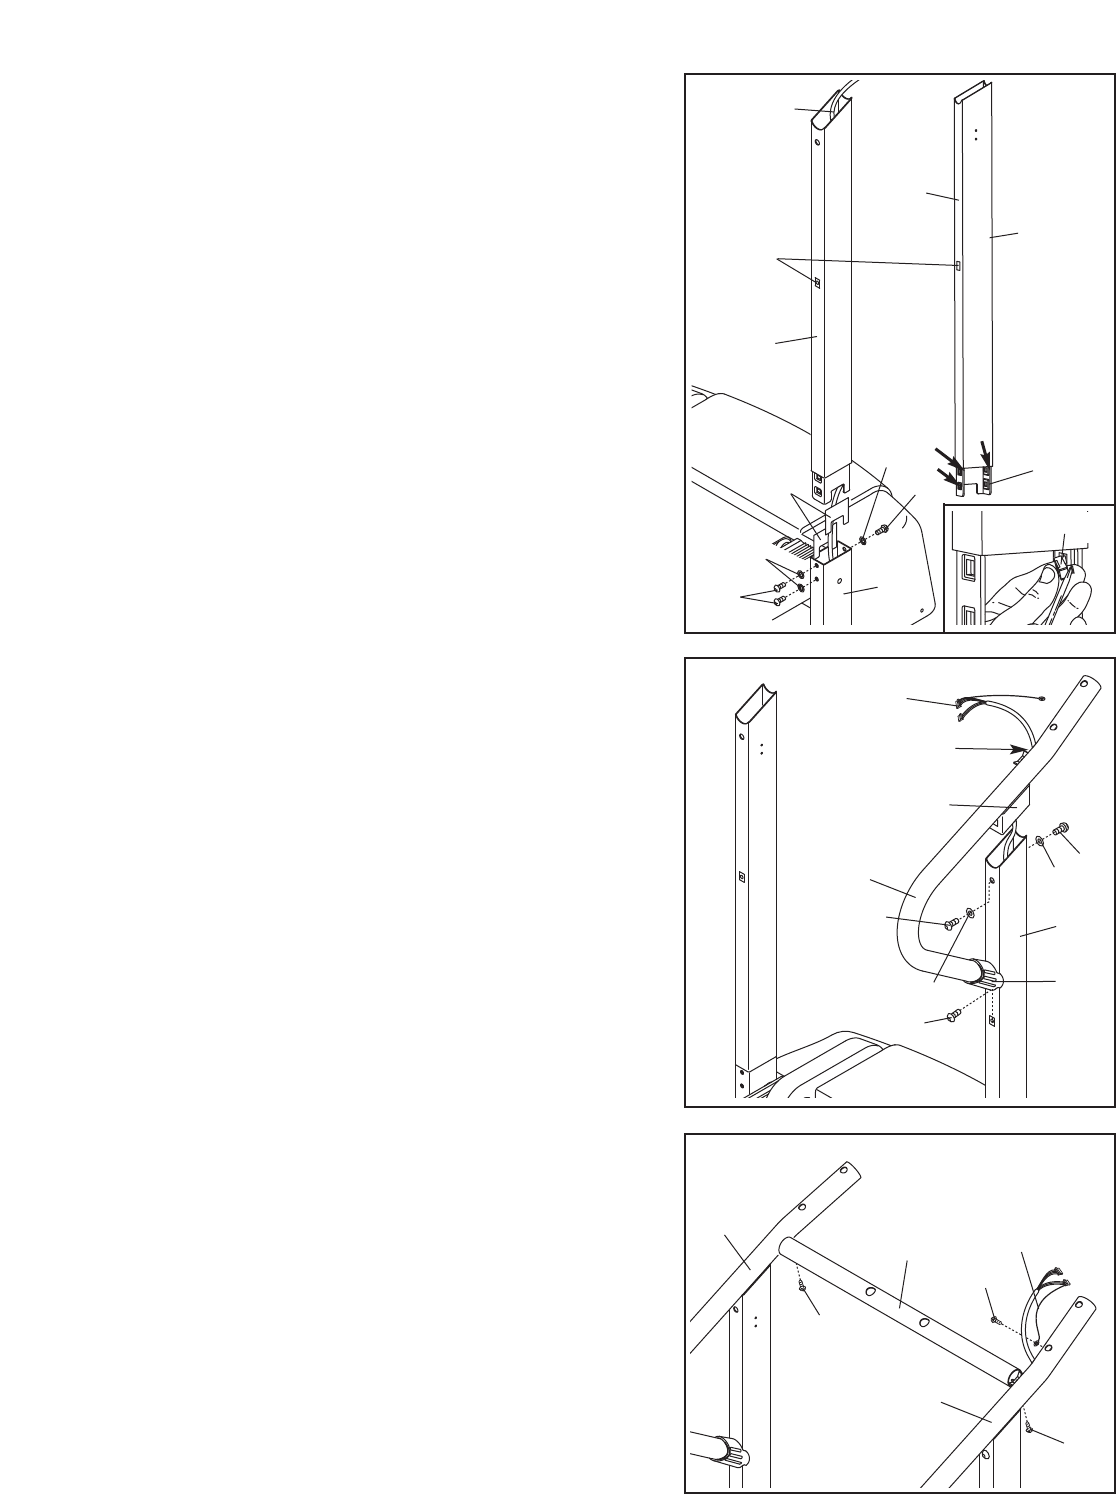
4. Identify the Right Handrail (47), which has a large hole in
the left side. Attach two Cage Nuts (35 [not shown]) to
the inside of the bracket on the Right Handrail as de-
scribed in step 3. Feed the Wire Harness (21) into the
hole in the bottom of the Right Handrail and out of the
large hole in the left side. (Note: It may be helpful to use
needlenose pliers to pull the Wire Harness out of the
large hole.) Press a Handrail Cap (41) onto the lower end
of the Right Handrail as shown.
Insert the bracket on the Right Handrail (47) into the top
of the Right Upright (62) so the Handrail Cap (41) is
against the Right Upright. Attach the Right Handrail and
the Handrail Cap with three 1” Bolts (8) and two Washers
(57) as shown.
Do not tighten the Bolts yet.
Attach the Left Handrail (not shown) as described above.
Note: There is not a wire harness on the left side.
5. Hold the Crossbar (34) between the Handrails (1, 47).
Attach the Crossbar with two Crossbar Screws (53).
Do
not tighten the Crossbar Screws yet.
Attach the ring on the end of the ground wire to the small
hole in the side of the Right Handrail (47) with a Silver
Ground Screw (104).
Large
Hole
Bracket
41
47
62
21
62
21
103
9
34
Ground
Wire
1
53
104
53
47
3
4
5
9
57
57
11
8
8
8
8
These
holes
must be
on this
side
No Cage
Nut
Front of
Upright
76
35
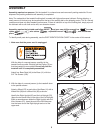
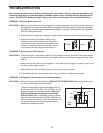
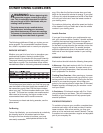
3. Three Cage Nuts (35) must be inserted into the lower end of
each Upright (62, 76). The Cage Nuts must be inserted from
the inside,
in the locations shown by the arrows at the right.
(Note: The front of each Upright is taller than the back. Do
not insert a Cage Nut into the lower hole in the front of each
Upright.) To insert a Cage Nut, hook one side of the Cage
Nut into a hole as shown, and then use a flat-bladed screw-
driver to press the other side of the Cage Nut into the hole.
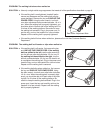
Insert a Plastic Shim (103) into each side of the post on the
right side of the Base (11). Next, orient the Right Upright
(62) as shown, and insert it into the Base.
Make sure that
the Wire Harness (21) does not fall into the Right
Upright. Be careful to avoid pinching the Wire Harness.
Note: If necessary, tap the Right Upright with a rubber mal-
let until it is fully seated in the Base. If the Right Upright can-
not be fully seated, remove the outer Plastic Shim and then
insert the Right Upright.
Attach the Right Upright (62) to the Base (11) with three 1”
Bolts (8) and three Star Washers (9).
Do not tighten the
Bolts yet.
Assemble the Left Upright (62) in the same way.