


15
30
31
1
Resistance
Bars
6
7
3
44
“U”-Channel
“U”-Channel
80
10
13
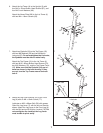
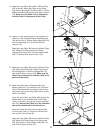
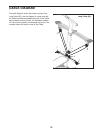
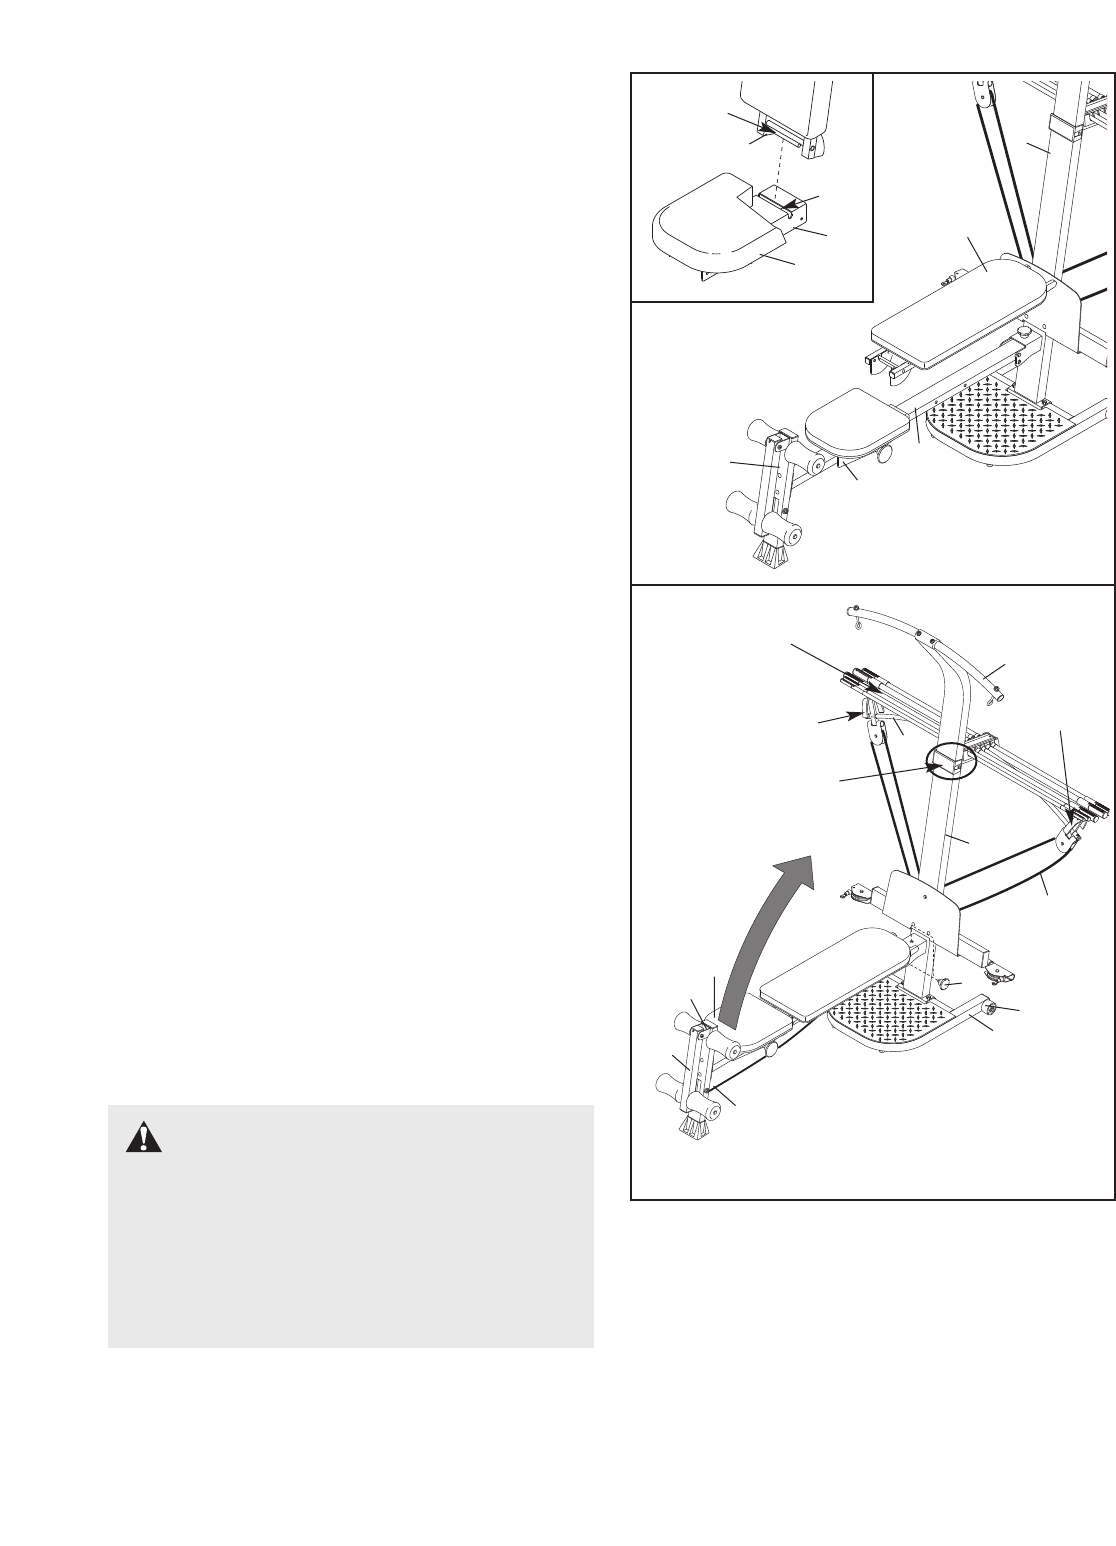
STORING THE RESISTANCE SYSTEM
To store the resistance system, slide the ends of the
Leg Lever Cable (32) onto the hook on the bottom of
the Bench Rail (5). Make sure that the Seat (13) is in
the position closest to the Front Leg (6) (see ADJUST-
ING THE SEAT on page 13). Next, remove the
Storage Knob (30) from the Upright (3). Lift the Front
Leg toward the Top Frame (10), and tighten the
Storage Knob into the side of the Upright and the
Bench Rail. Remove all of the resistance bars from
the “U”-channels on the 10-pound Center Resistance
Bar (44) (see ADJUSTING THE RESISTANCE on
page 14).
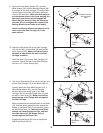
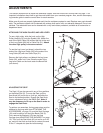
To move the resistance system, place the toe of your
shoe on the end of the Base (1) and hold the resist-
ance system in the indicated area. Tilt the resistance
system back onto the Wheels (31) and roll it to the
new location.
Be careful not to let the Front Leg (6)
or the Leg Lever (7) pinch your hands when you
tilt the system back.
WARNING: Make sure that all of
the resistance bars are removed from the “U”-
channels before moving the resistance bar
assembly to the stored position.
Make sure that the Storage Knob (30) is in
place and fully tightened each time the resist-
ance system is used.
32
14
15
1
2
13
Rod
Slot
5
12
6
3
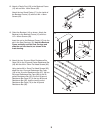
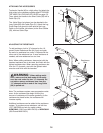
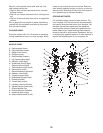
ADJUSTING THE BACKREST
T
he Backrest (14) can be used in a level position or
one of three inclined positions. To use the Backrest in
a
level position, secure the Seat Carriage (12) to the
adjustment hole in the Bench Rail (5) next to the Front
Leg (6) (see ADJUSTING THE SEAT on page 13).
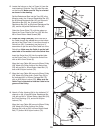
To use the Backrest (14) in an inclined position,
secure the Seat Carriage (12) to one of the other
three adjustment holes in the Bench Rail (5). Rest the
Backrest against the Upright (3).
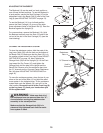
For row exercises, remove the Backrest (14). Hold
the Backrest vertically over the Seat (13) and lift the
rod out of the slot in the Seat Carriage (12) (see the
inset drawing).
Hold in
this area