


7
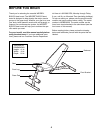
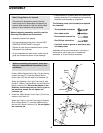
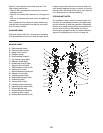
3. Press two 50mm Round Outer Caps (12) onto the
ends of the other Stabilizer (4).
Attach the Stabilizer (4) to the Rear Leg (3) with
two M10 x 60mm Carriage Bolts (18) and two M10
Nylon Locknuts (19). Be sure the indents and the
decal on the Stabilizer are oriented as shown.
Do not tighten the Locknuts yet.
Attach the Rear Leg (3) to the Frame (1) with two
M10 x 25mm Bolts (25) and two M10 Washers
(20).
Tighten the M10 Nylon Locknuts (19) used in
steps 1–3.
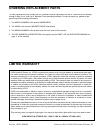
5. Slide the Pivot Bracket (6) through the slot in the
Frame (1).
Lubricate the M10 x 85mm Bolt (23). Attach the
Backrest Frame (5) to the Frame (1) with the Bolt
and an M10 Nylon Locknut (19). Do not over-
tighten the Locknut; the Backrest Frame must
be able to pivot easily.
Insert the Locking Pin (21) into the Frame (1) and
through an adjustment hole in the Pivot Bracket
(6).
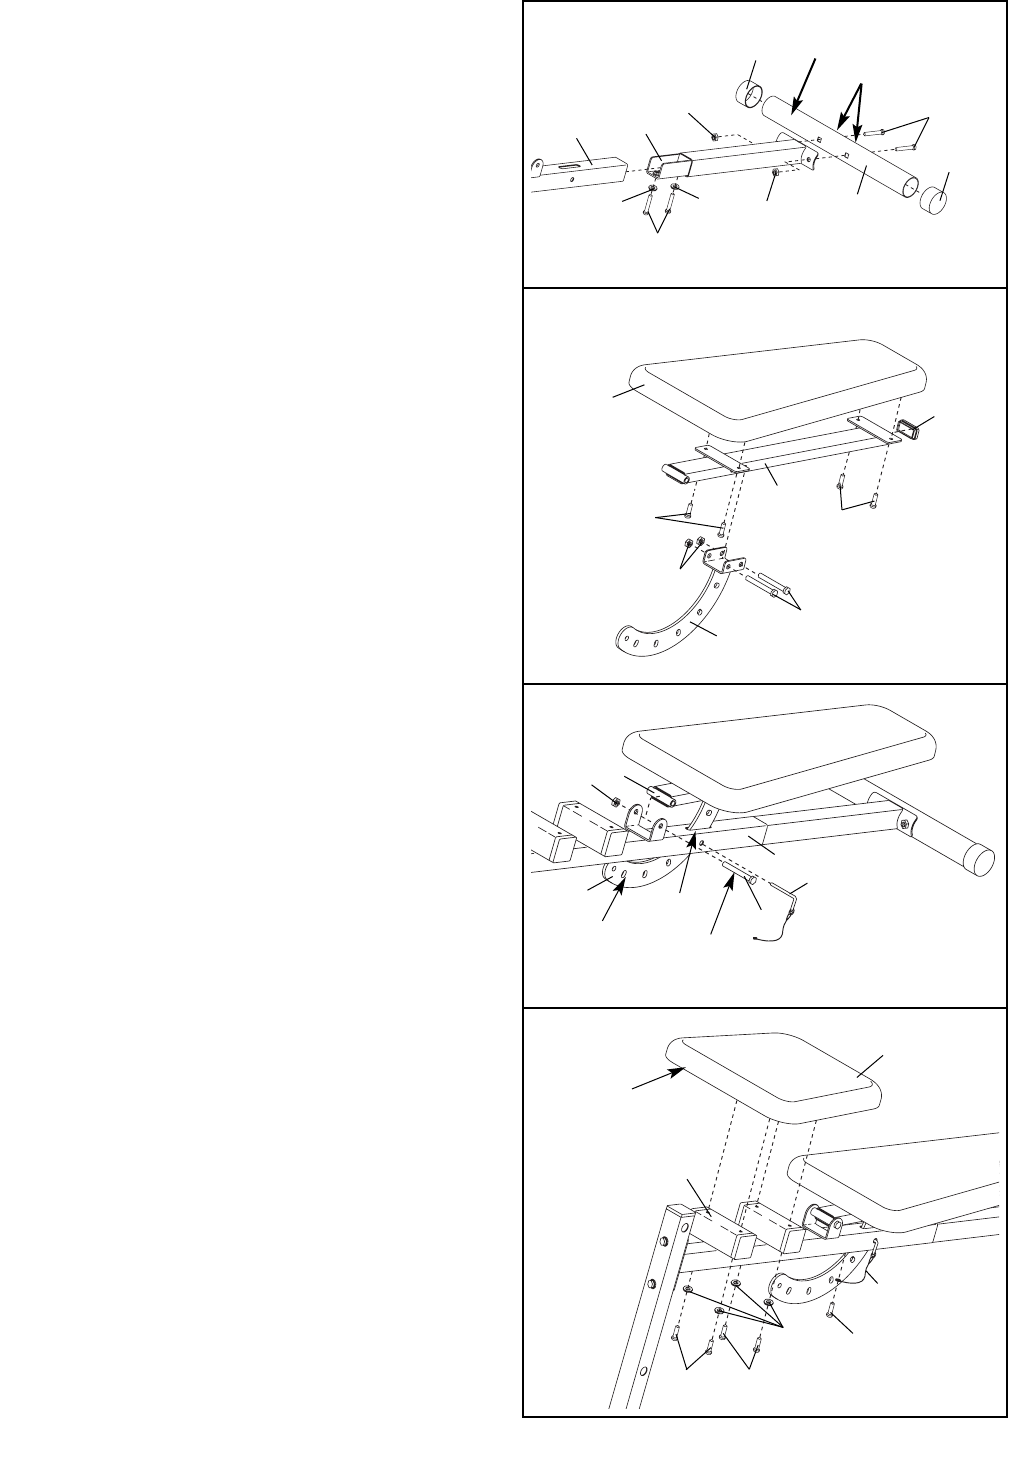
6. Attach the tether on the Locking Pin (21) to the
bottom of the Frame (1) with the M4 x 16mm
Screw (28).
Attach the Seat (8) to the Frame (1) with four M6
x 45mm Bolts (16) and four M6 Washers (22). Be
sure the wide end of the Seat is on the side
shown.
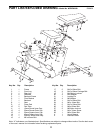
4. Press the 25mm x 50mm Inner Cap (15) into the
end of the Backrest Frame (5).
Attach the Pivot Bracket (6) to the Backrest
Frame (5) with two M8 x 65mm Bolts (26) and
two M8 Nylon Locknuts (27). Be sure the Pivot
Bracket is oriented as shown.
Attach the Backrest (7) to the Backrest Frame (5)
with four M6 x 16mm Bolts (24). Be sure the
Backrest is oriented as shown.
3
4
5
6
20
25
19
19
4
18
3
1
20
12
12
7
5
15
24
24
27
26
6
21
23
8
1
16
16
22
28
21
6
5
19
1
Slot
Lubricate
Adjustment
Holes
Wide
End
Warning
Decal
Indents