


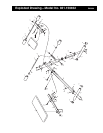
9
This section explains how to adjust the weight bench. See the EXERCISE GUIDELINES on page 10 for impor-
tant information on how to get the most benefit from your exercise program. Also, refer to the accompanying
exercise poster to see the correct form for each exercise.
Inspect and tighten all parts each time you use the weight bench. Replace any worn parts immediately. The
weight bench can be cleaned with a damp cloth and a mild, non-abrasive detergent. Do not use solvents.
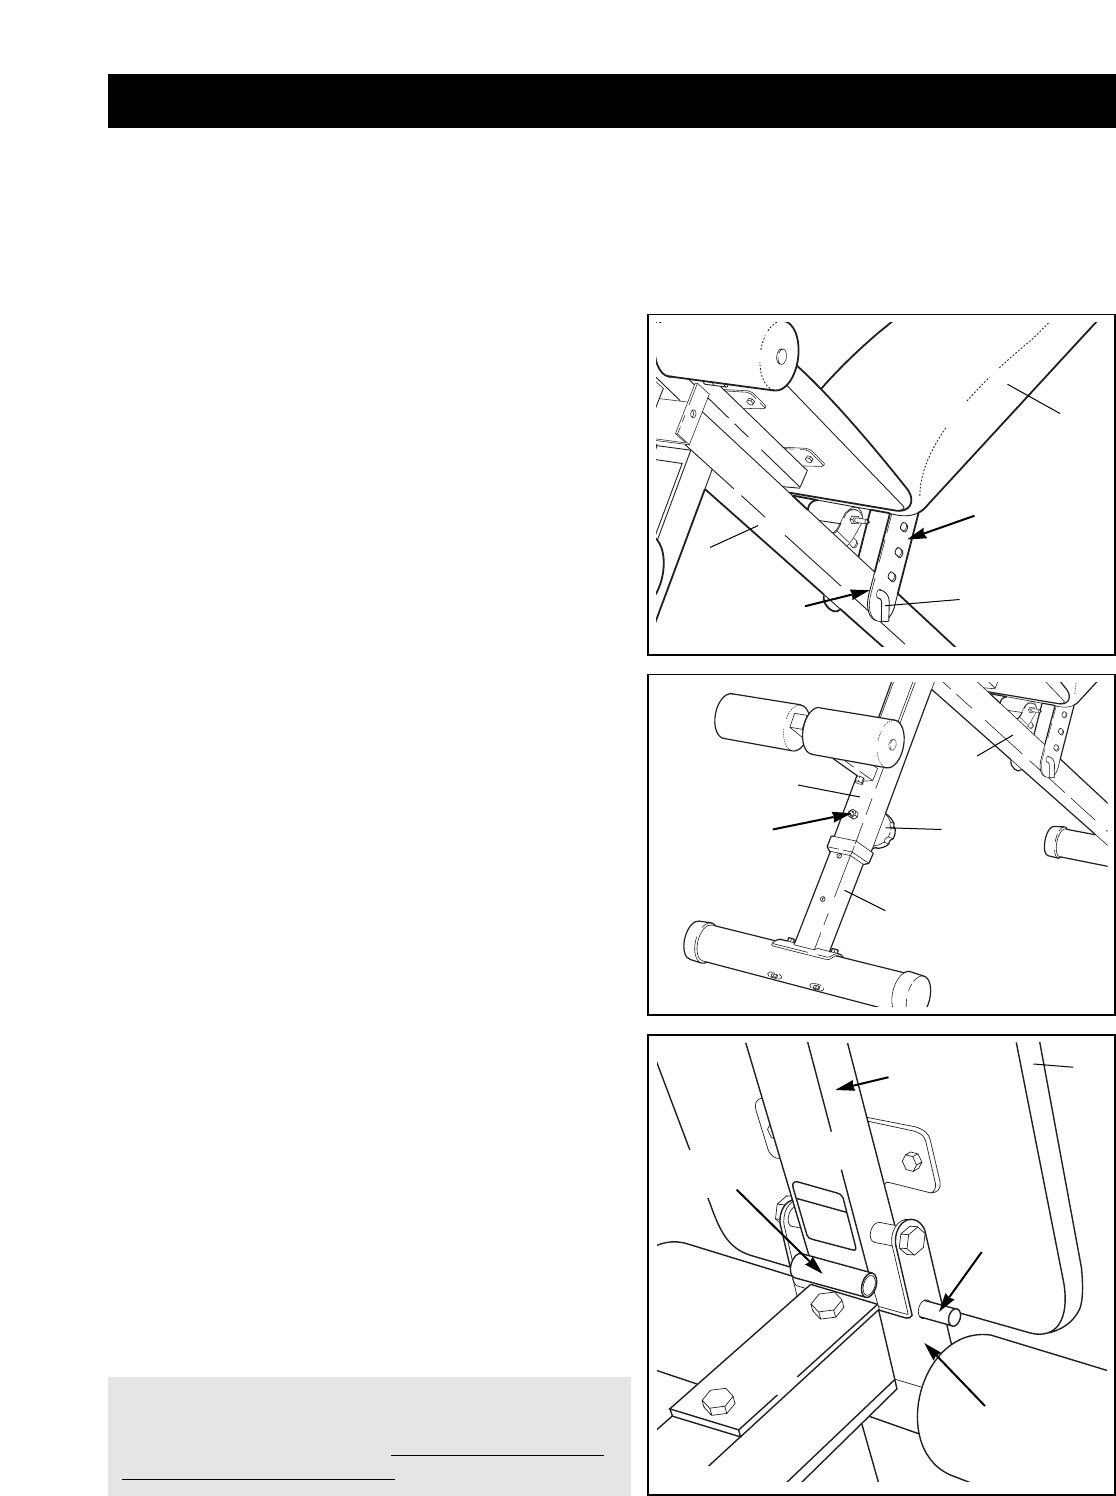
Adjusting the Weight Bench
SETTING UP THE WEIGHT BENCH FOR ROMAN
CHAIR EXERCISES
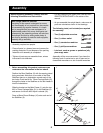
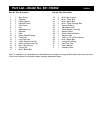
To set up the bench for roman chair exercises, turn the
Seat Frame (5) to the upright position. Insert the Locking
Pin/w Ring (30) through the indicated hole in the adjust-
ment bracket and the hole in the Seat Frame. Now adjust
the height of the weight bench as described above, so the
Seat (9) is in a comfortable position.
Note: When the Seat (9) is in the lower position, insert the
Locking Pin/w Ring (30) through the welded tube to pre-
vent the seat from pivoting during exercises.
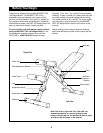
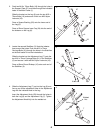
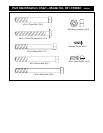
ADJUSTING THE HEIGHT OF THE WEIGHT BENCH
To adjust the height of the weight bench, unscrew the
Adjustment Knob (23) and raise or lower the Main Frame
(1) to the desired position. Line up the hole in the Leg (6)
with one of the adjustment holes in the Adjustment Leg
(7). Re-insert the Adjustment Knob and tighten it fully into
the welded nut.
23
6
1
7
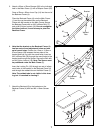
WARNING: When the seat is tilted to the upright
position, always insert the locking pin into the hole
in the seat frame as shown. Do not insert the lock-
ing pin into the welded tube.
Welded
Nut
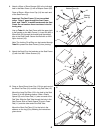
ADJUSTING THE BACKREST
The Backrest (8) can be used in a level position, two
inclined positions and a declined position. To adjust the
Backrest to a level position or an inclined position, insert
the Locking Pin (16) through one of the adjustment holes
in the backrest adjustment bracket and through the weld-
ed tube in the Main Frame (1).
To use the Backrest (8) in a declined position, remove the
Locking Pin (16) and lower the Backrest until it rests
directly on the Main Frame (1). Re-insert the Locking Pin.
16
8
1
Welded Tube
Adjustment
Bracket
Locking
Pin (30)
Welded
Tube
Seat
Frame (5)
Adjustment
Bracket
9