


7
3
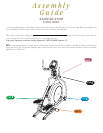
STEP
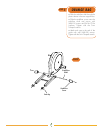
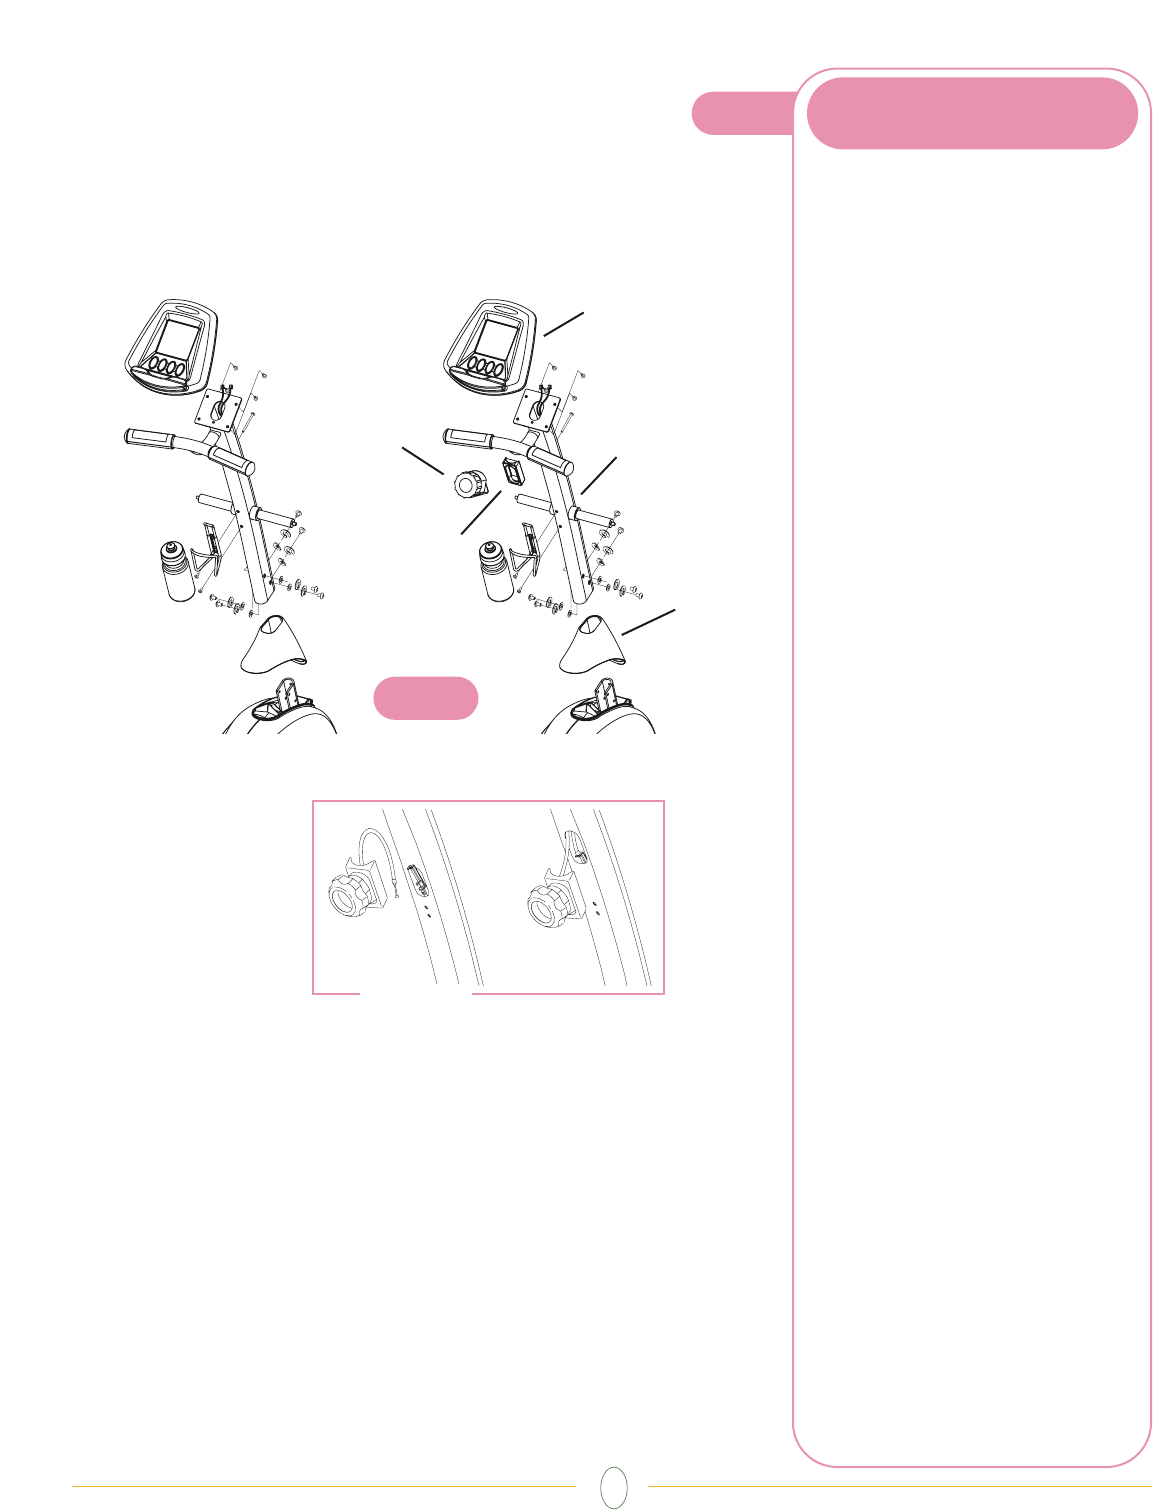
• With the screwdriver remove the
screws for the water bottle cage in the
center of the console mast. Slide the
rubber boot onto the console mast.
• Unfold the wire harness located in
the frame bracket. Wrap the end of
the wire tie, located at the bottom of
the console mast, around the end of
the wire harness. Pull the wire tie and
wire harness up through the console
mast while simultaneously sliding the
mast over the frame bracket.
NOTE: For the X1400 the tension
cable should also run up through the
console mast.
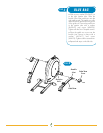
• Slide a lock washer (SW8) fol-
lowed by a flat washer (8x17x1T)
onto four of the screws (M8x15L).
Insert these screws through the side of
the mast to secure the mast to the
frame. Slide a lock washer (SW8) fol-
lowed by a arc washer (8x18x1T)
onto the two remaining screws
(M8x15L). Insert these screws through
the holes in front of the mast. Tighten
all screws with the 5mm T-shaped
wrench.
• Slide the rubber boot down the
console mast and snap it in place
over the side covers.
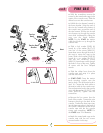
• X1400 ONLY: Snap the tension
knob mounting support onto the
tension knob. Turn the tension knob to
level 16. Connect the knob cable to
the tension cable in the console mast.
Secure the tension knob to the console
mast with the washer (5x10x1T) and
screw (M5x70L). Tighten with the
screwdriver.
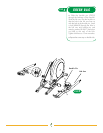
• Remove the four screws from the
back of the console. Connect the wire
harness to the plug in the back of the
console. Connect the heart rate wires
into the heart rate plugs in the back of
the console. Attach the console to the
console mast with the four console
screws and screwdriver. NOTE: For
the X1400 insert 2 AA Batteries.
• Attach the water bottle cage to the
console mast with the two screws
removed earlier in this step.
PINK BAG
X1400
X1500
3
STEP
Console
Mast
Tension
Knob
Tension Knob
Bracket
Console
Boot
X1400 ONLY