


5. Press START/SPLIT (+) or STOP/RESET (-) to increase or decrease
setting values.
6. Press MODE (NEXT) to advance to the next setting option.
7. Press SET (DONE).
8. To complete calibration for the selected reference, hold
STOP/RESET until watch beeps.
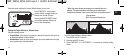
Once you have set the altitude or barometer, then you will need to synchronize
the weather icon to current weather conditions.
1. In CAL mode, press SET to begin calibration.
2. Press START/SPLIT (+) or STOP/RESET (-) to scroll to WEATHER.
3. Press MODE (NEXT) to begin the setting process.
4. Press START/SPLIT (+) or STOP/RESET (-) to scroll among weather options.
5. Press SET (DONE).
6. To calibrate the weather to the preselected data, hold
STOP/RESET until the watch beeps.
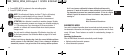
3. Keeping the watch level and facing up, rotate it twice (taking at least
15 seconds per revolution) and then press MODE.
4. Press START/SPLIT (+) or STOP/RESET (-) to increase or decrease setting
values to match your chosen declination angle.
5. Press MODE to advance to the next setting option.
6. Press SET to finish.
If you see CAL OK at the end of the calibration process you have successfully
calibrated the compass. If you see CAL FAIL, repeat the calibration process.
Calibrating Altitude or Barometer and Setting the Weather
You should calibrate either the Altimeter (HOME) or the Barometer (BARO), and the
Weather Icon (WEATHER) prior to first use. You should calibrate the watch to the
most accurate information you have.
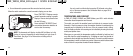
1. Press MODE until CAL appears.
2. Press and hold SET to begin the calibration.
3. Press START/SPLIT (+) or STOP/RESET (-) to scroll among the reference point
settings and choose either HOME or BARO.
4. Press MODE (NEXT) to begin the setting process.
13
12
ENGLISH QUICK START
TMX_W253_WS4_EN:Layout 1 9/3/09 8:38 AM Page 12