October, 2012 (Version 7) STAR TRAC PERSONAL VIEWING SCREEN OWNER’S GUIDE
5
1) LCD Personal Viewing Screen
2) Manual
G
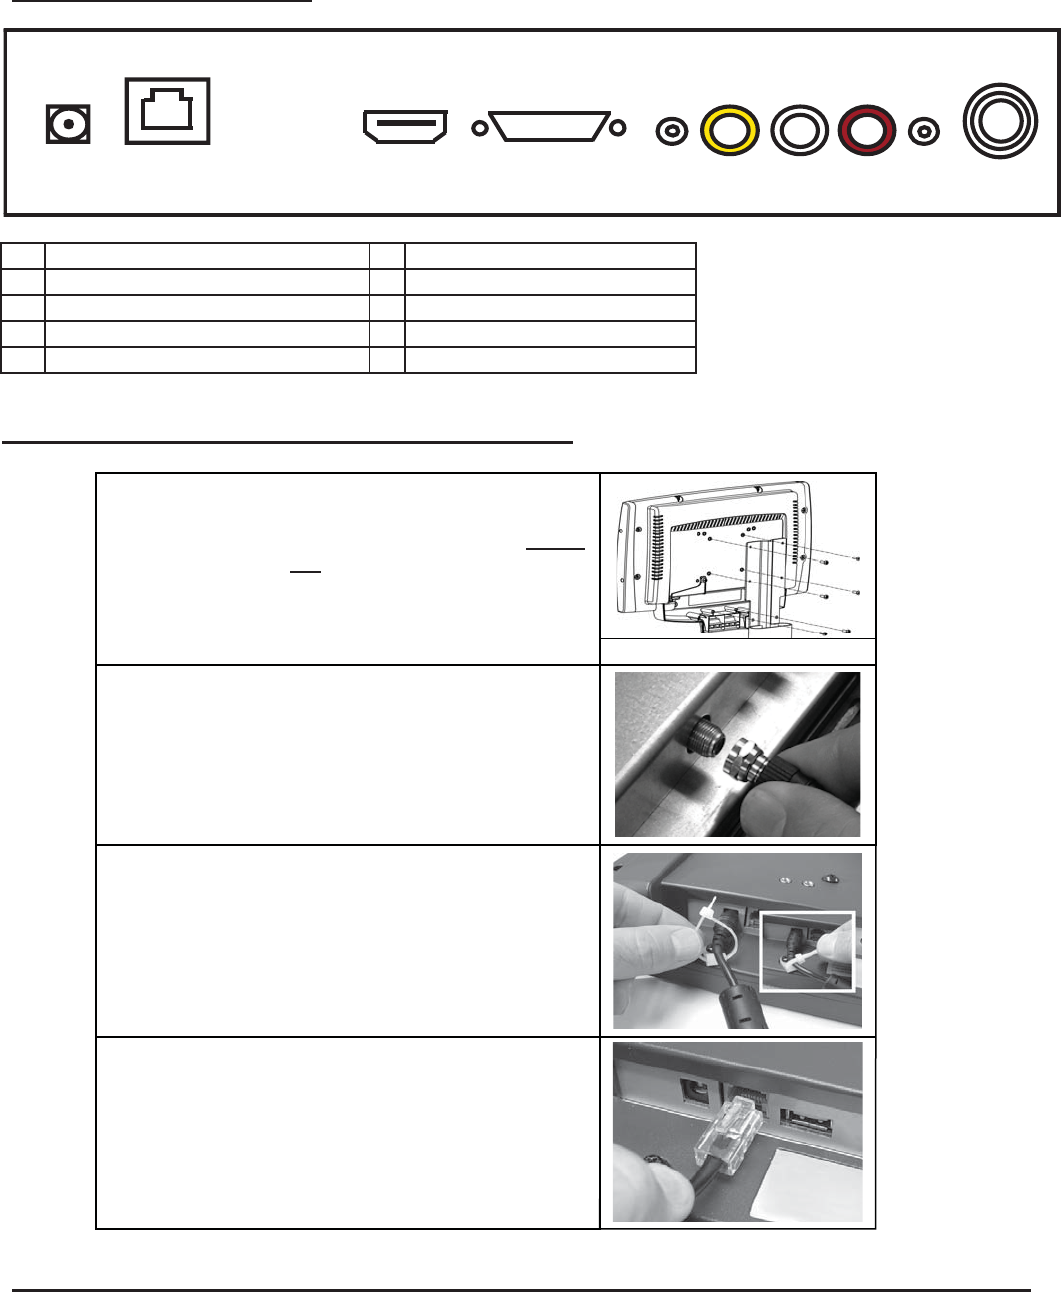
CONNECTION IDENTIFICATION
GGGG
1 DC Power In. 2.5mm DC jack 6 AUX Audio/Video Input. RCA jacks
2 AUX TV Controller Cable port. RJ45 jack 7 AUX Audio Output. 2.5mm stereo jack
3 Firmware Download USB jack 8 RF Signal Input. TYPE “F Connector
4 AUX RGB In. HD-15 jack
5 AUX Audio Input. 2.5mm stereo jack
Mounting the Screen and Making the Connections
IN THE BOX…
1 2 3 4 5 6 7
8
Use the four screws (included) to fasten the screen to
the mount. Using screws other than those supplied,
may result in damage to the screen. It is highly
recommended to not use a power tool when
tightening these screws, as this may result in
damage to the screen. Use a #2 Phillips screwdriver,
taking care not to over-tighten! (SEE PAGE 24)
SCREEN MOUNTING SCREWS
Fasten the F-connector of the coaxial cable on to the
fitting on the rear of the screen. It is important that
care be taken with this connector, as
over-tightening will result in serious damage to
the screen. This connector should be started using
only fingers and then tightened to 20 inch-pounds of
torque, slightly more than finger-tight.
For Strain Relief slide the DC power plug through the
pre-installed wire tie and insert it into the DC jack on
the TV. Pull the nylon tie snug around DC cable. This
will also prevent the cable from becoming accidentally
unplugged during use.
When the Star Trac TV secondary TV controller is
installed, insert the controller cable’s RJ45 plug into
the jack on the back of the TV. Confirm that the plug’s
spring clip snaps into place and the plug is seated
properly and securely in place.


