


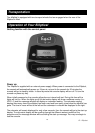
EL1 Elliptical
8
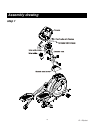
STEP 3: CONNECTING ARM ASSEMBLY
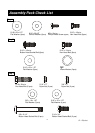
1. Align the hole in the end of the Connecting arms (L&R)(pivoting rod end) with the hole
in the bracket of the Lower Handle Bars (L&R). The rod end should be on the inside of
the Lower Handle Bars (L&R) bracket. Take 2pcs of 5/16" x 1-1/4" Hex Head Screws
and install it through the Lower Handle Bars (L&R) bracket and the rod end. Install
2pcs of 5/16" x 20 x 1.5T Flat Washers, 2pcs of 5/16" x 7T Nyloc Nuts tighten firmly
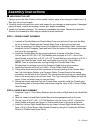
using the 12m/m Wrench on the 5/16" x 7T Nyloc Nut and one on the 5/16" x 1-1/4"
Hex Head Screw.
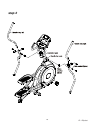
2. Install the 2 pcs of Rails into the receiving bracket in the end of Main Frame with 2 pcs
of 3/8 x 2-1/4 Button Head Socket Screws, 2pcs of 3/8" x 19 x 1.5T Flat Washers and
2 pcs of 3/8" x 7T Nyloc Nut by using 2 pcs of 13/14m/m Wrench.
3. Put the Lug Covers (L&R) onto the Rail Strap. Slip the Rail Strap through the slots in the
Lug Covers, then Install onto the Rails with 2 pcs of 5/16 x 3/4 Button Head Socket
Screws and 2 pcs of 5/16" x 20 x 1.5T Flat Washers by using Combination M5 Allen
Wrench & Phillips Head Screw Driver.
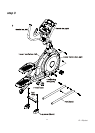
STEP 4: PLASTICS ASSEMBLY
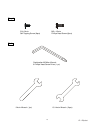
1. Install the Connecting Arm Covers (L & R) over the connection of the rod end and
Lower Handle Bars (L & R) with 4pcs of M5 x 15m/m Phillips Head Screws and 2pcs of
3.5x12m/m Self Tapping Screws by using the Combination M5 Allen Wrench & Phillips
Head Screw Driver.
2. Install the 2pcs of Wheel Covers using the 4pcs of M5x15m/m Phillips Head Screws.
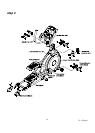
3. Install the Front Handle Bar Cover (L & R) and Rear Handle Bar Cover (L & R) over the
Handle Bars axle connections with the 6 pcs of 3.5x12m/m Self Tapping Screws by
using Phillips Head Screw Driver.
PLEASE ENSURE ALL FASTENERS ARE TIGHT AFTER THE COMPONENTS HAVE
BEEN ASSEMBLED.
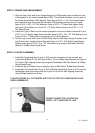
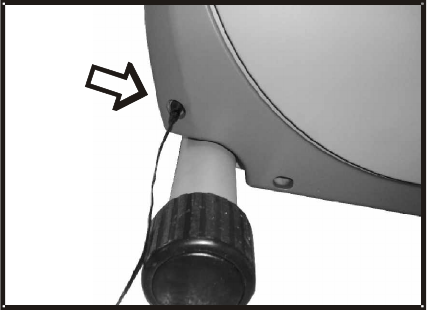
POWER CONNECTOR LOCATED ON
FRONT, LEFT HAND SIDE OF UNIT.