


6
2
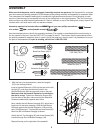
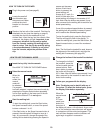
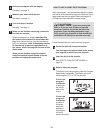
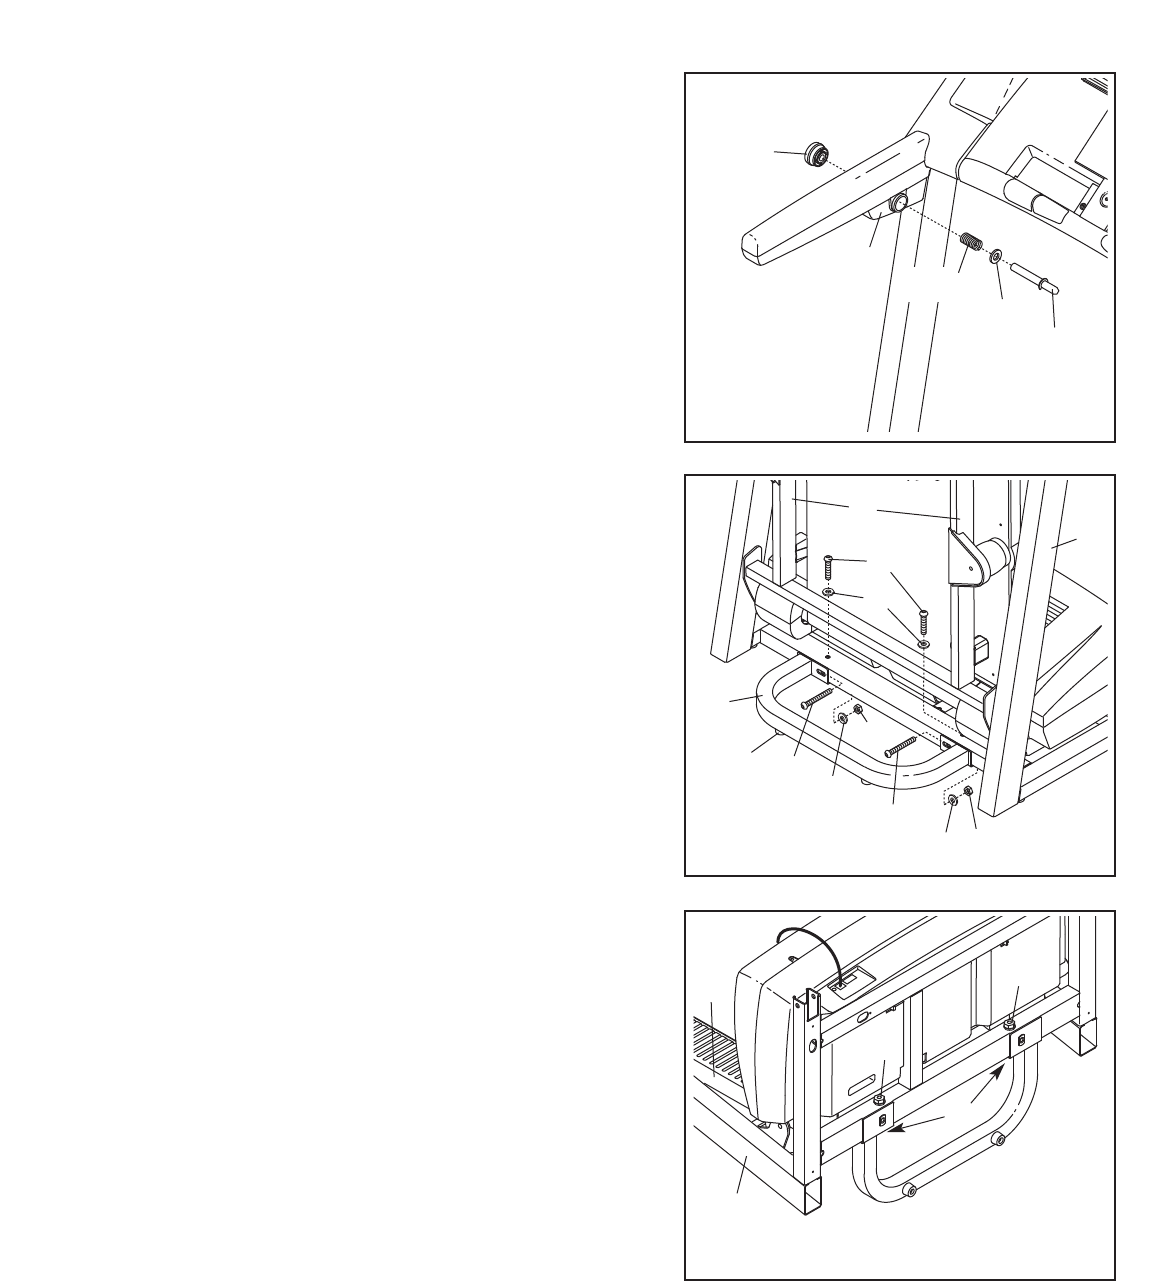
. Remove the knob from the pin. Make sure that the collar
and the spring are on the pin.
Insert the pin into the Left Bottom Handgrip (43), and
t
ighten the knob back onto the pin.
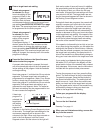
Place the treadmill in the storage position (see HOW TO
FOLD THE TREADMILL FOR STORAGE on page 21).
4
3
Pin
Collar
Knob
Spring
2
3
4
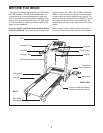
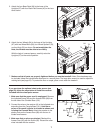
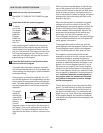
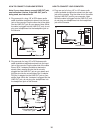
4. Lower the treadmill Frame (59) (see HOW TO LOWER
THE TREADMILL FOR USE on page 21). With the help
of a second person, carefully tip the Uprights (97) down
as shown.
Firmly tighten the two Nuts (20) on the 3” Bolts (86).
97
20
20
59
86
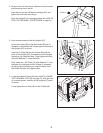
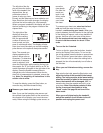
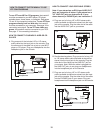
3. Have a second person hold the Uprights (97).
Orient the U-base (89) so the Base Pads (99) are un-
derneath it, and position the U-base against the base of
the Uprights (97) as shown.
Insert two 3" Bolts (86) into the U-base (89) and the
base of the Uprights (97); if necessary, tip the Uprights
forward as you insert the Bolts. Finger tighten two Nuts
(20) with Washers (71) onto the Bolts.
Next, insert two 1 3/4” Bolts (76) with Washers (71) into
the base of the Uprights and the U-base; if necessary,
tip the Uprights forward as you insert the Bolts. Start
both Bolts and then firmly tighten them.
89
99
97
76
86
86
71
71
20
20
71
59