


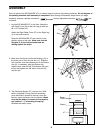
Place all parts of the AIR WALKER XT in a cleared area and remove the packing materials. Do not dispose of
the packing materials until assembly is completed. Read through all assembly steps before you begin.
Assembly requires a phillips screwdriver and two adjustable wrenches (not
included).
4
ASSEMBLY
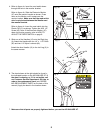
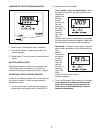
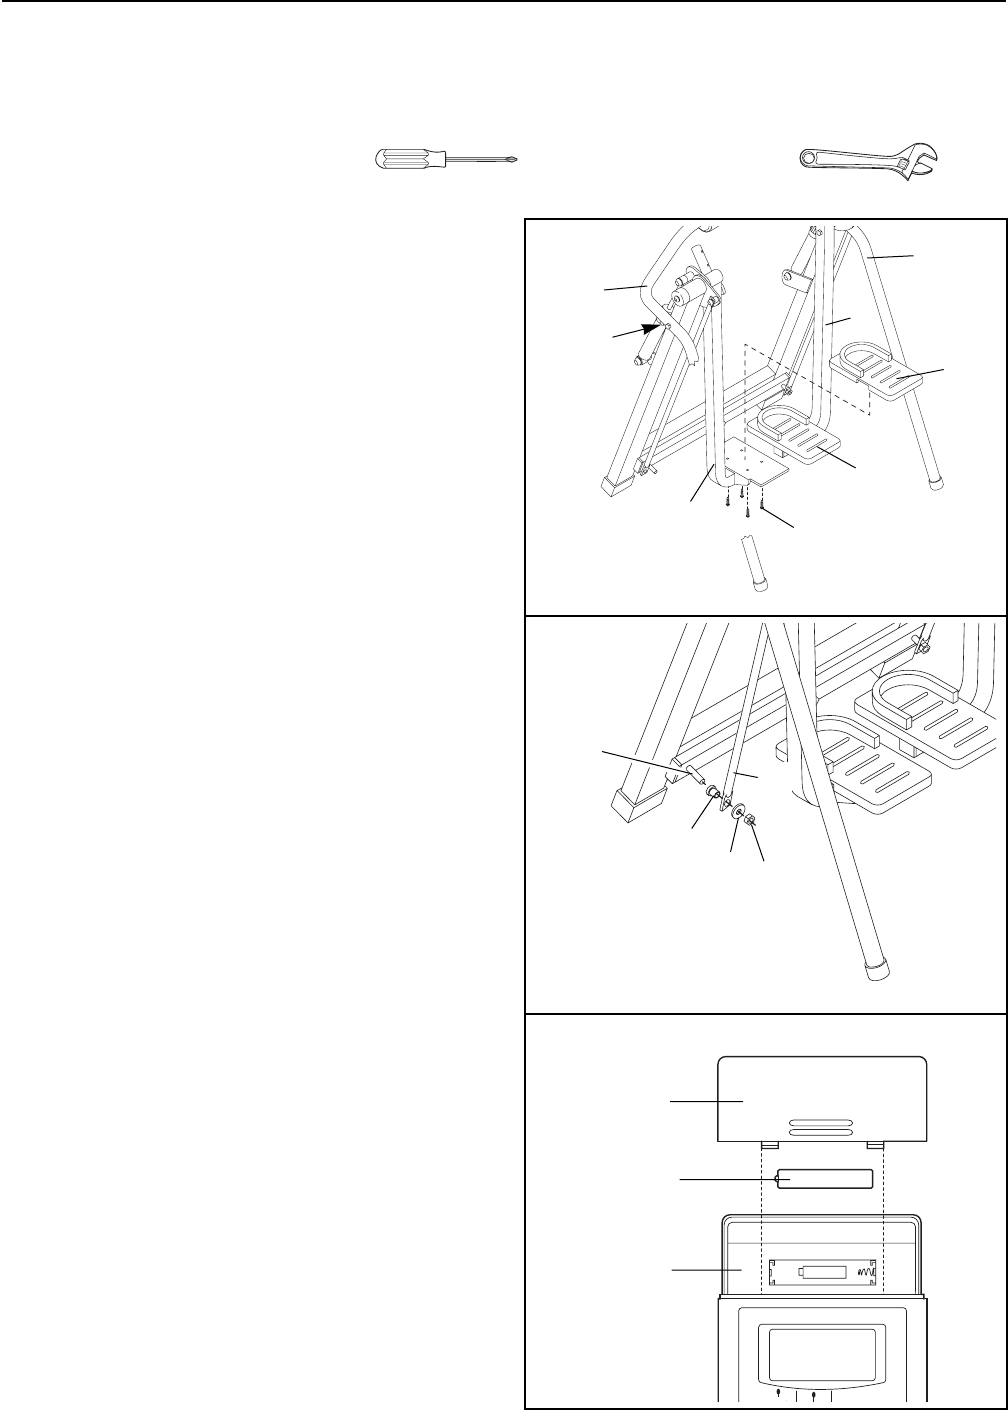
2. Make sure that there is a Bronze Bushing (16) in
the lower end of the Left Link Arm (11). Slide the
Left Link Arm onto the indicated pin on the Rocker
Arm (9). If necessary, pivot the Rocker Arm
slightly. Next, slide the 3/8Ó Flat Washer (39) onto
the pin and tighten the 3/8Ó Nylon Locknut (43)
onto the pin.
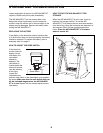
3. The Electronic Monitor (47) requires one ÒAAAÓ
battery (included). Firmly press on the battery
cover and slide it upward to remove it from the
Monitor. Insert the battery into the Monitor. Make
sure that the battery is turned so the negative
end (marked ÒÐÓ) is touching the spring.
Reattach the battery cover.
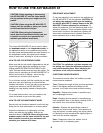
1. Lay the AIR WALKER XT on the floor. Attach the
Left Pedal Cover (25) to the Left Leg (3) with four
#8 x 1/2Ó Screws (45).
Attach the Right Pedal Cover (27) to the Right Leg
(4) in the same manner.
Raise the AIR WALKER XT and unfold it to the
position shown at the right. Make sure that the
Uprights (5, 6) are fully extended and are
resting against the stops.
Fig. 2
Fig. 3
47
Battery
Cover
Battery
43
11
16
39
Fig. 1
27
Stop
3
45
5
6
4
25
9