18
If you press one of the numbered Quick Speed but-
tons, the walking belt will gradually change speed
until it reaches the selected speed setting. To se-
l
ect a speed setting that includes a decimal—such
as 3.5 mph—press two numbered buttons in suc-
c
ession. For example, to select a speed setting of
3.5 mph, press the 3 button and then immediately
press the 5 button.
To stop the walking belt, press the Stop button. To
restart the walking belt, press the Start button.
4. Change the incline of the treadmill as desired.
To change the incline of the treadmill, press the
Incline increase and decrease buttons or one of
the numbered Quick Incline buttons. Each time you
press one of the buttons, the incline will gradually
change until it reaches the selected incline setting.
5. Monitor your progress.
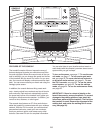
The console offers several display modes. The dis-
play mode that you select will determine which
workout information is shown. To select the de-
sired display mode, repeatedly press the Display
increase or decrease button on the screen.
As you walk or run on the treadmill, the screen can
show the following workout information:
• The elapsed time
• The approximate number of calories you have
burned
• The distance that you have walked or run
• The incline level of the treadmill
• The speed of the walking belt
• A track representing 1/4 mile (400 meters)
• The time to complete one lap at the current
speed setting
• Your current lap number
• The time remaining
• The approximate number of calories burned per
hour
• The number of vertical feet you have climbed
• Your pace in minutes per mile
• Your heart rate (see step 6 on page 19)
The displays at the top of the screen can show two
pieces of information. Press each display until the
display shows the desired information. Note: The
manual mode does not have a time remaining
countdown.
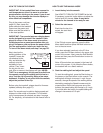
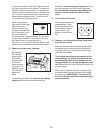
If desired, adjust the vol-
ume level by pressing
the Volume increase
and decrease buttons
on the console.
Volume Decrease
Volume Increase


