


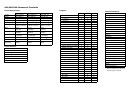


C9x6i Commercial Treadmill Assembly Guide 6
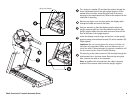
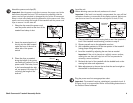
Level the unit.
Before allowing users on the unit, make sure it is level.
Important: If the load is not equally compensated, the user will feel
excessive vibration or movement at the display console. Adjust one
rear foot at a time. Do not raise the unit beyond ¾-inch (2 cm).
1. Place a bubble level on the running belt to see if the treadmill is
level. If the treadmill needs leveling, continue to step 2.
2. Situate yourself next to the adjustable rear feet.
3. Ask a capable assistant to lift the rear portion of the treadmill
(using proper lifting techniques).
4. Level the treadmill by adjusting the rear feet as needed.
Important: If the unit is placed on a slightly uneven surface,
rotating the rear feet can help, but will not compensate for
extremely uneven surfaces.
5. Recheck the level of the treadmill with the bubble level on the
running belt after each adjustment.
6. Make adjustments to the rear feet so that the user’s weight on
the treadmill is distributed evenly.
Adjustable
rear foot
Bubble
level
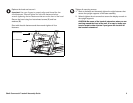
Plug the power cord into an appropriate outlet.
Important: The treadmill requires a dedicated, grounded circuit. A
20-amp circuit is recommended. Refer to Grounding Instructions in
the Product Owner’s Manual.
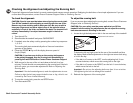
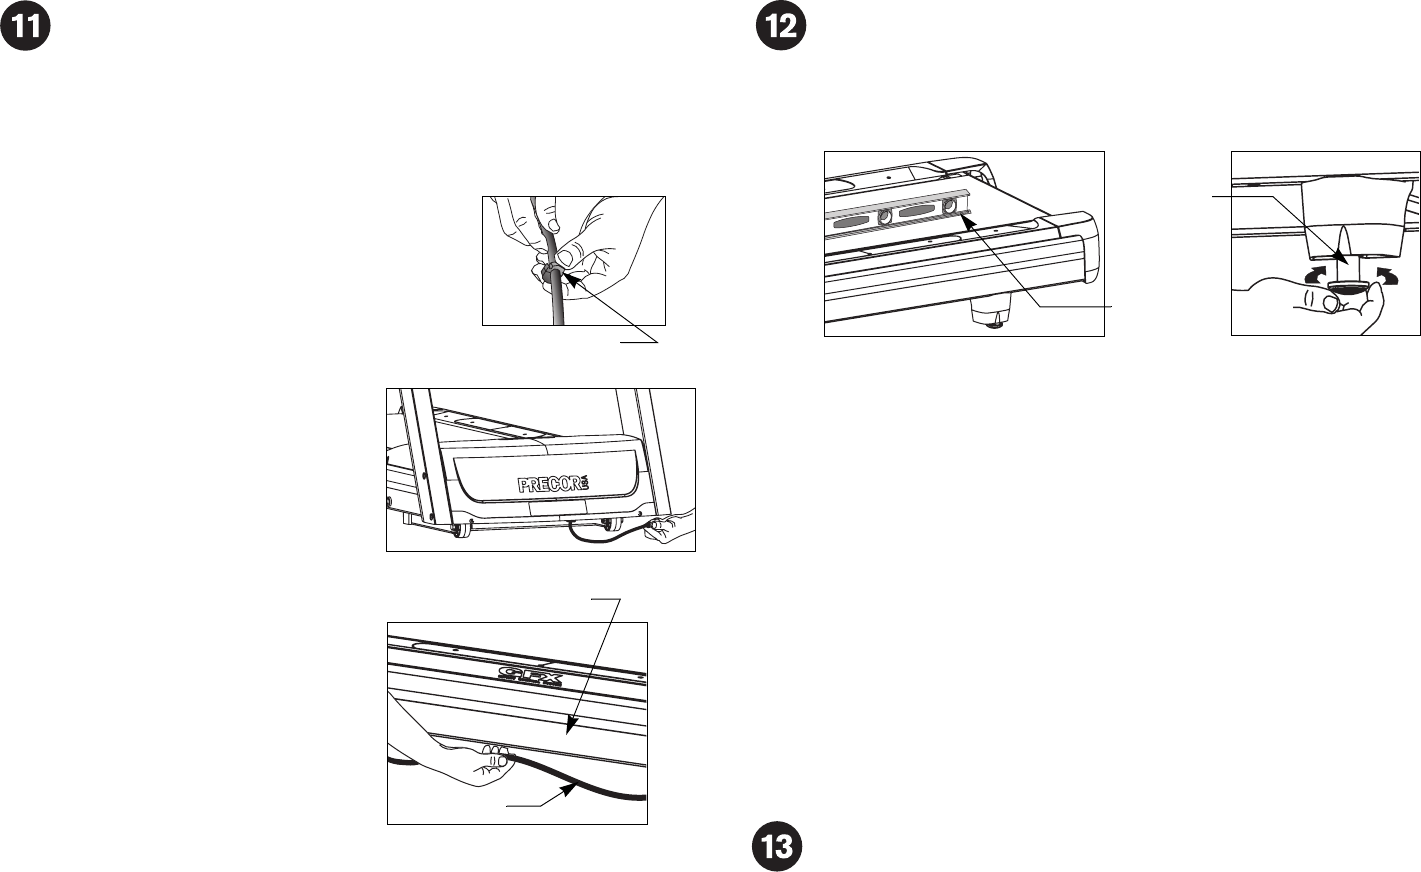
Attach the power cord clips (G).
Important: Use the power cord clips to secure the power cord to the
base frame beneath the hood. This reduces the possibility that the
power cord will get pinched or damaged by the incline lift movement.
Keep in mind users safety and the placement of the power cord. If the
power cord runs along the length of the treadmill use the power cord
clips to secure it to the side rail.
1. Wrap the clip around the power cord
near the power switch at the front of the
treadmill and clamp it shut.
2. Insert the serrated portion of
the clip into the hole located
under the front of the unit on
either side of the power
switch.
3. Place the clips, as needed,
along the length of the power
cord while you redirect it to the
power outlet. The holes, found
in the frame beneath the side
rail, are spaced 12 inches (31
cm) along the length of the
side rail.
Power cord clip
Power cord
Side rail