


9−1/2"
5
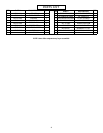
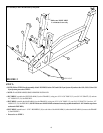
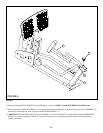
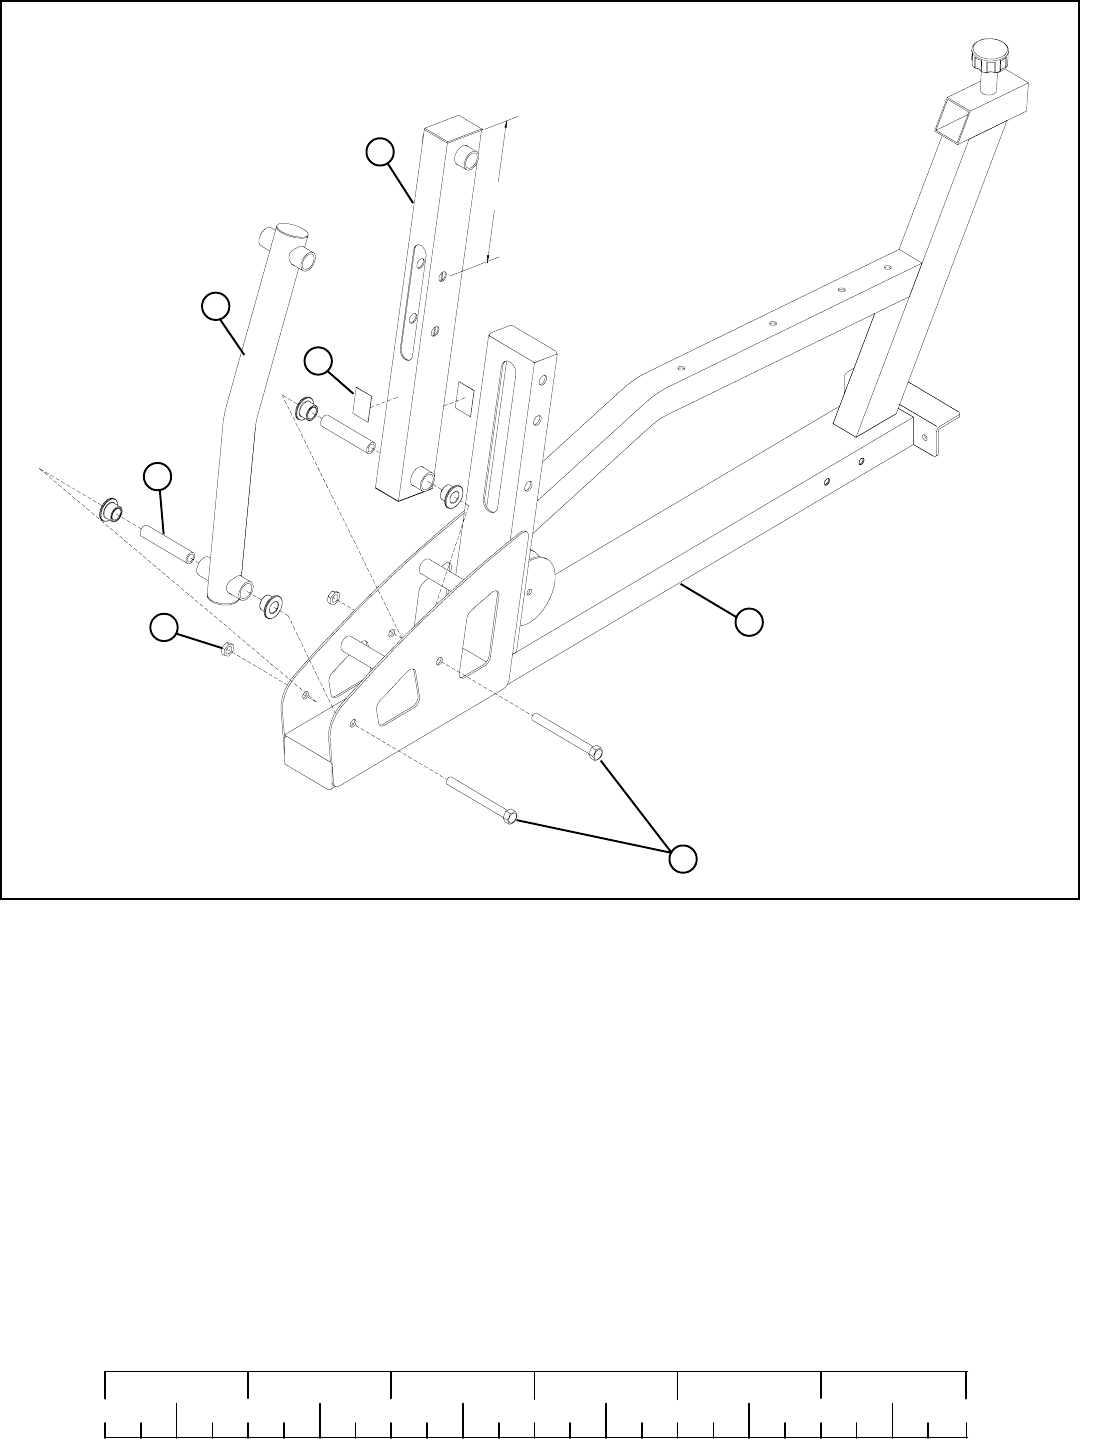
FIGURE 1
STEP 1:
• SECURELY assemble the SECOND ARM (5) to the FRAME (1) using one 1/2 X 4-3/4” BOLT (12), one 3/4 X 4” SHAFT (15)
and one 1/2” LOCK NUT (13). See FIGURE 1.
0
1
2
345
6
1/2 1/2 1/2 1/2 1/2 1/2
12 1/2 X 4-3/4”
1
13
15
4
5
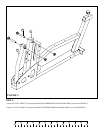
• SECURELY assemble the MAIN ARM (4) to the FRAME (1) using one 1/2 X 4-3/4” BOLT (12), two 3/4” FLANGE BEARINGS (14), one
3/4 X 4” SHAFT (15) and one 1/2” LOCK NUT (13). See FIGURE 1. (NOTE: Make sure MAIN ARM is orientated correctly, top hole
should be 9-1/2” from the top of arm as shown in FIGURE 1.)
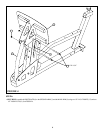
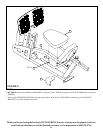
• NOTE: Follow STEP 1 for the assembly of the LEG PRESS to the GS1, GS2, GS4 and GS8 Gym Systems. If you have the CM3 or GS6
Gym System proceed to STEP 2.
• Proceed to to STEP 3.
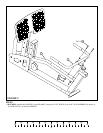
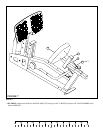
• SECURELY assemble two 1-1/2 X 2 “ BUMPERS (16) to each side of the MAIN ARM (4) where the MAIN ARM (4) contacts the FRAME
(1) See FIGURE 1.
16
For assembly to the GS1, GS2, GS4, GS8 Gym Systems .
Make sure MAIN ARM
is orientated correctly
• NOTE: FLANGE BEARINGS SHOULD BE PRE-INSTALLED