


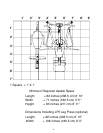

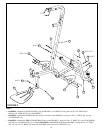
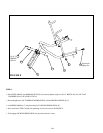

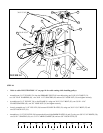
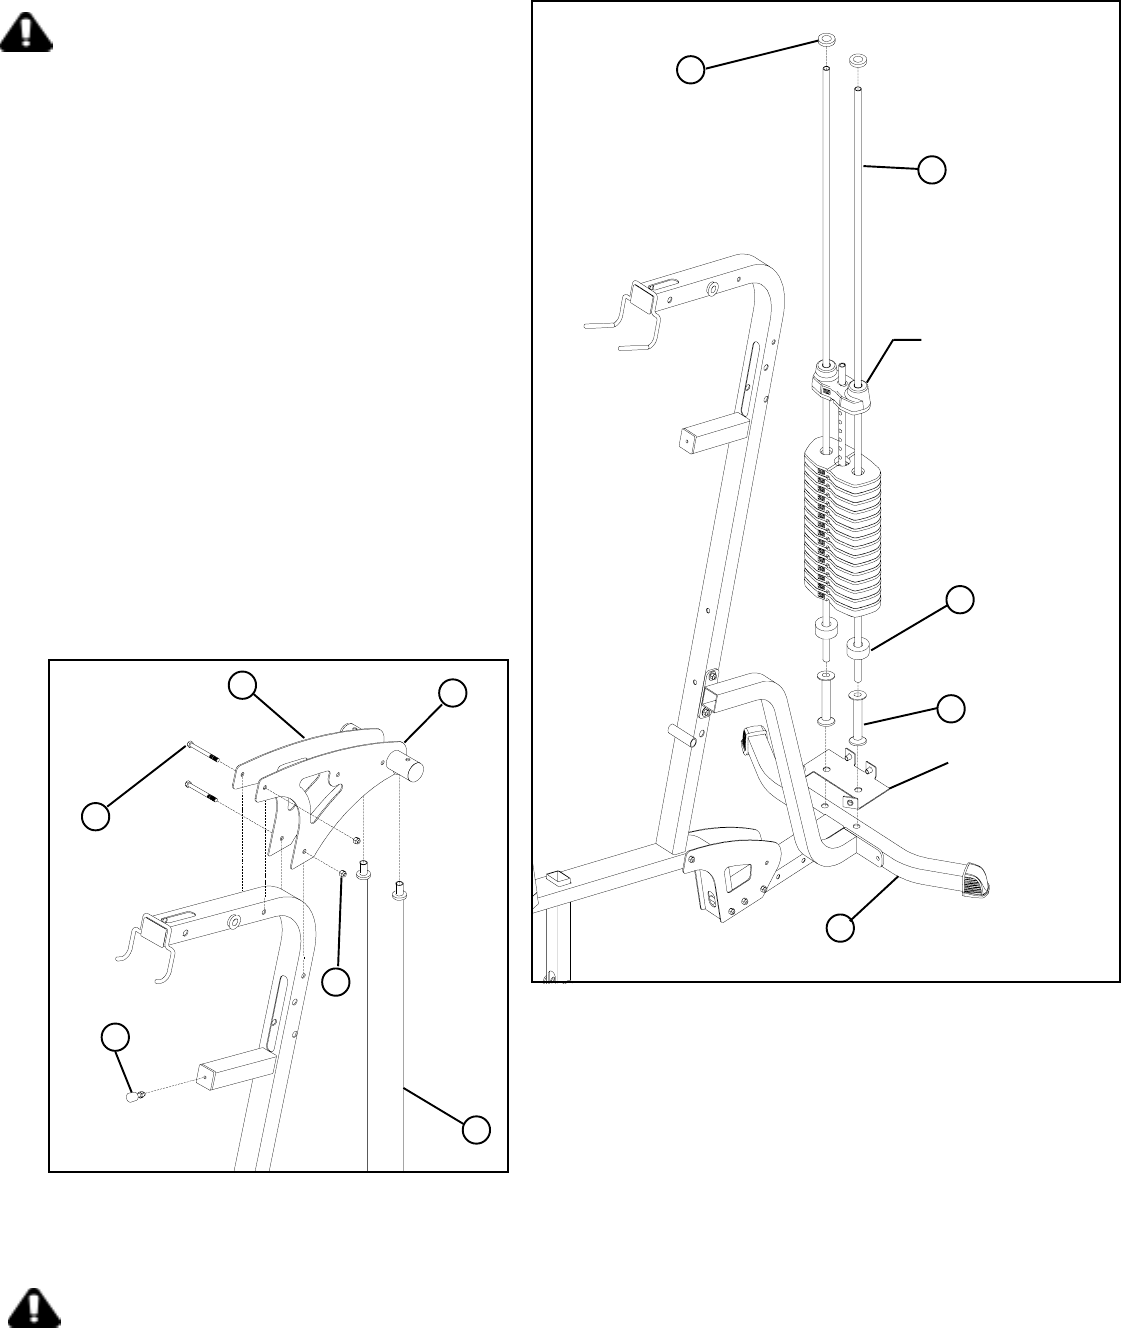
• Insert two GUIDE RODS (16) into the BASE (2) as
shown on FIGURE 4. (NOTE: If the GS2 SHROUD
OPTION was purchased, place the GUIDE RODS
(16) through the BOTTOM SHROUD BRACKET
(FOUND IN THE SHROUD KIT BOX) into the BASE
(2), as shown in FIGURE 4.
• Using EXTREME CARE slide all fifteen
WEIGHT PLATES (22) down the GUIDE RODS (16)
onto the WEIGHT STACK CUSHIONS (46). Make sure
that the keyholes of the WEIGHT PLATES (22) are all
facing the right way.
• Slide the head plate assembly down GUIDE RODS
(16) onto the weight stack.
• Slide one SHAFT COLLAR (48) down each
GUIDE ROD (16).
FIGURE 4
2
46
16
48
45
• Slide the following items in order down each GUIDE
ROD (16), one WEIGHT STACK SPACER (45), and
one WEIGHT STACK CUSHION (46)
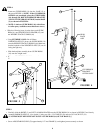
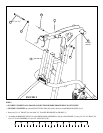
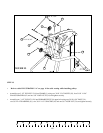
STEP 5:
• Carefully slide the RIGHT (5) and LEFT (4) BOOM PLATES onto the GUIDE RODS (16 )as shown in FIGURE 5 and loosely
assembly BOOM PLATES (5), (4) to frame (1) using two 3/8 x 3-3/4” BOLTS (30) and two 3/8” LOCK NUT (34)
[CAUTION MUST BE TAKEN NOT TO PULL GUIDE RODS (16) OUT OF BASE (2)]
• Screw ADJUSTABLE GLIDE (53) approximately 1/2” into FRAME (1) and tighten jam nut securely as shown
FIGURE 5
STEP 4:
53
34
4
5
30
16
3/8 X 3-3/4
8
HEAD
PLATE
ASSY
• (NOTE: Lubricate GUIDE RODS (16) with silicon
or teflon spray available at most hardware stores.)
GS2 SHROUD
BRACKET
OPTION ONLY