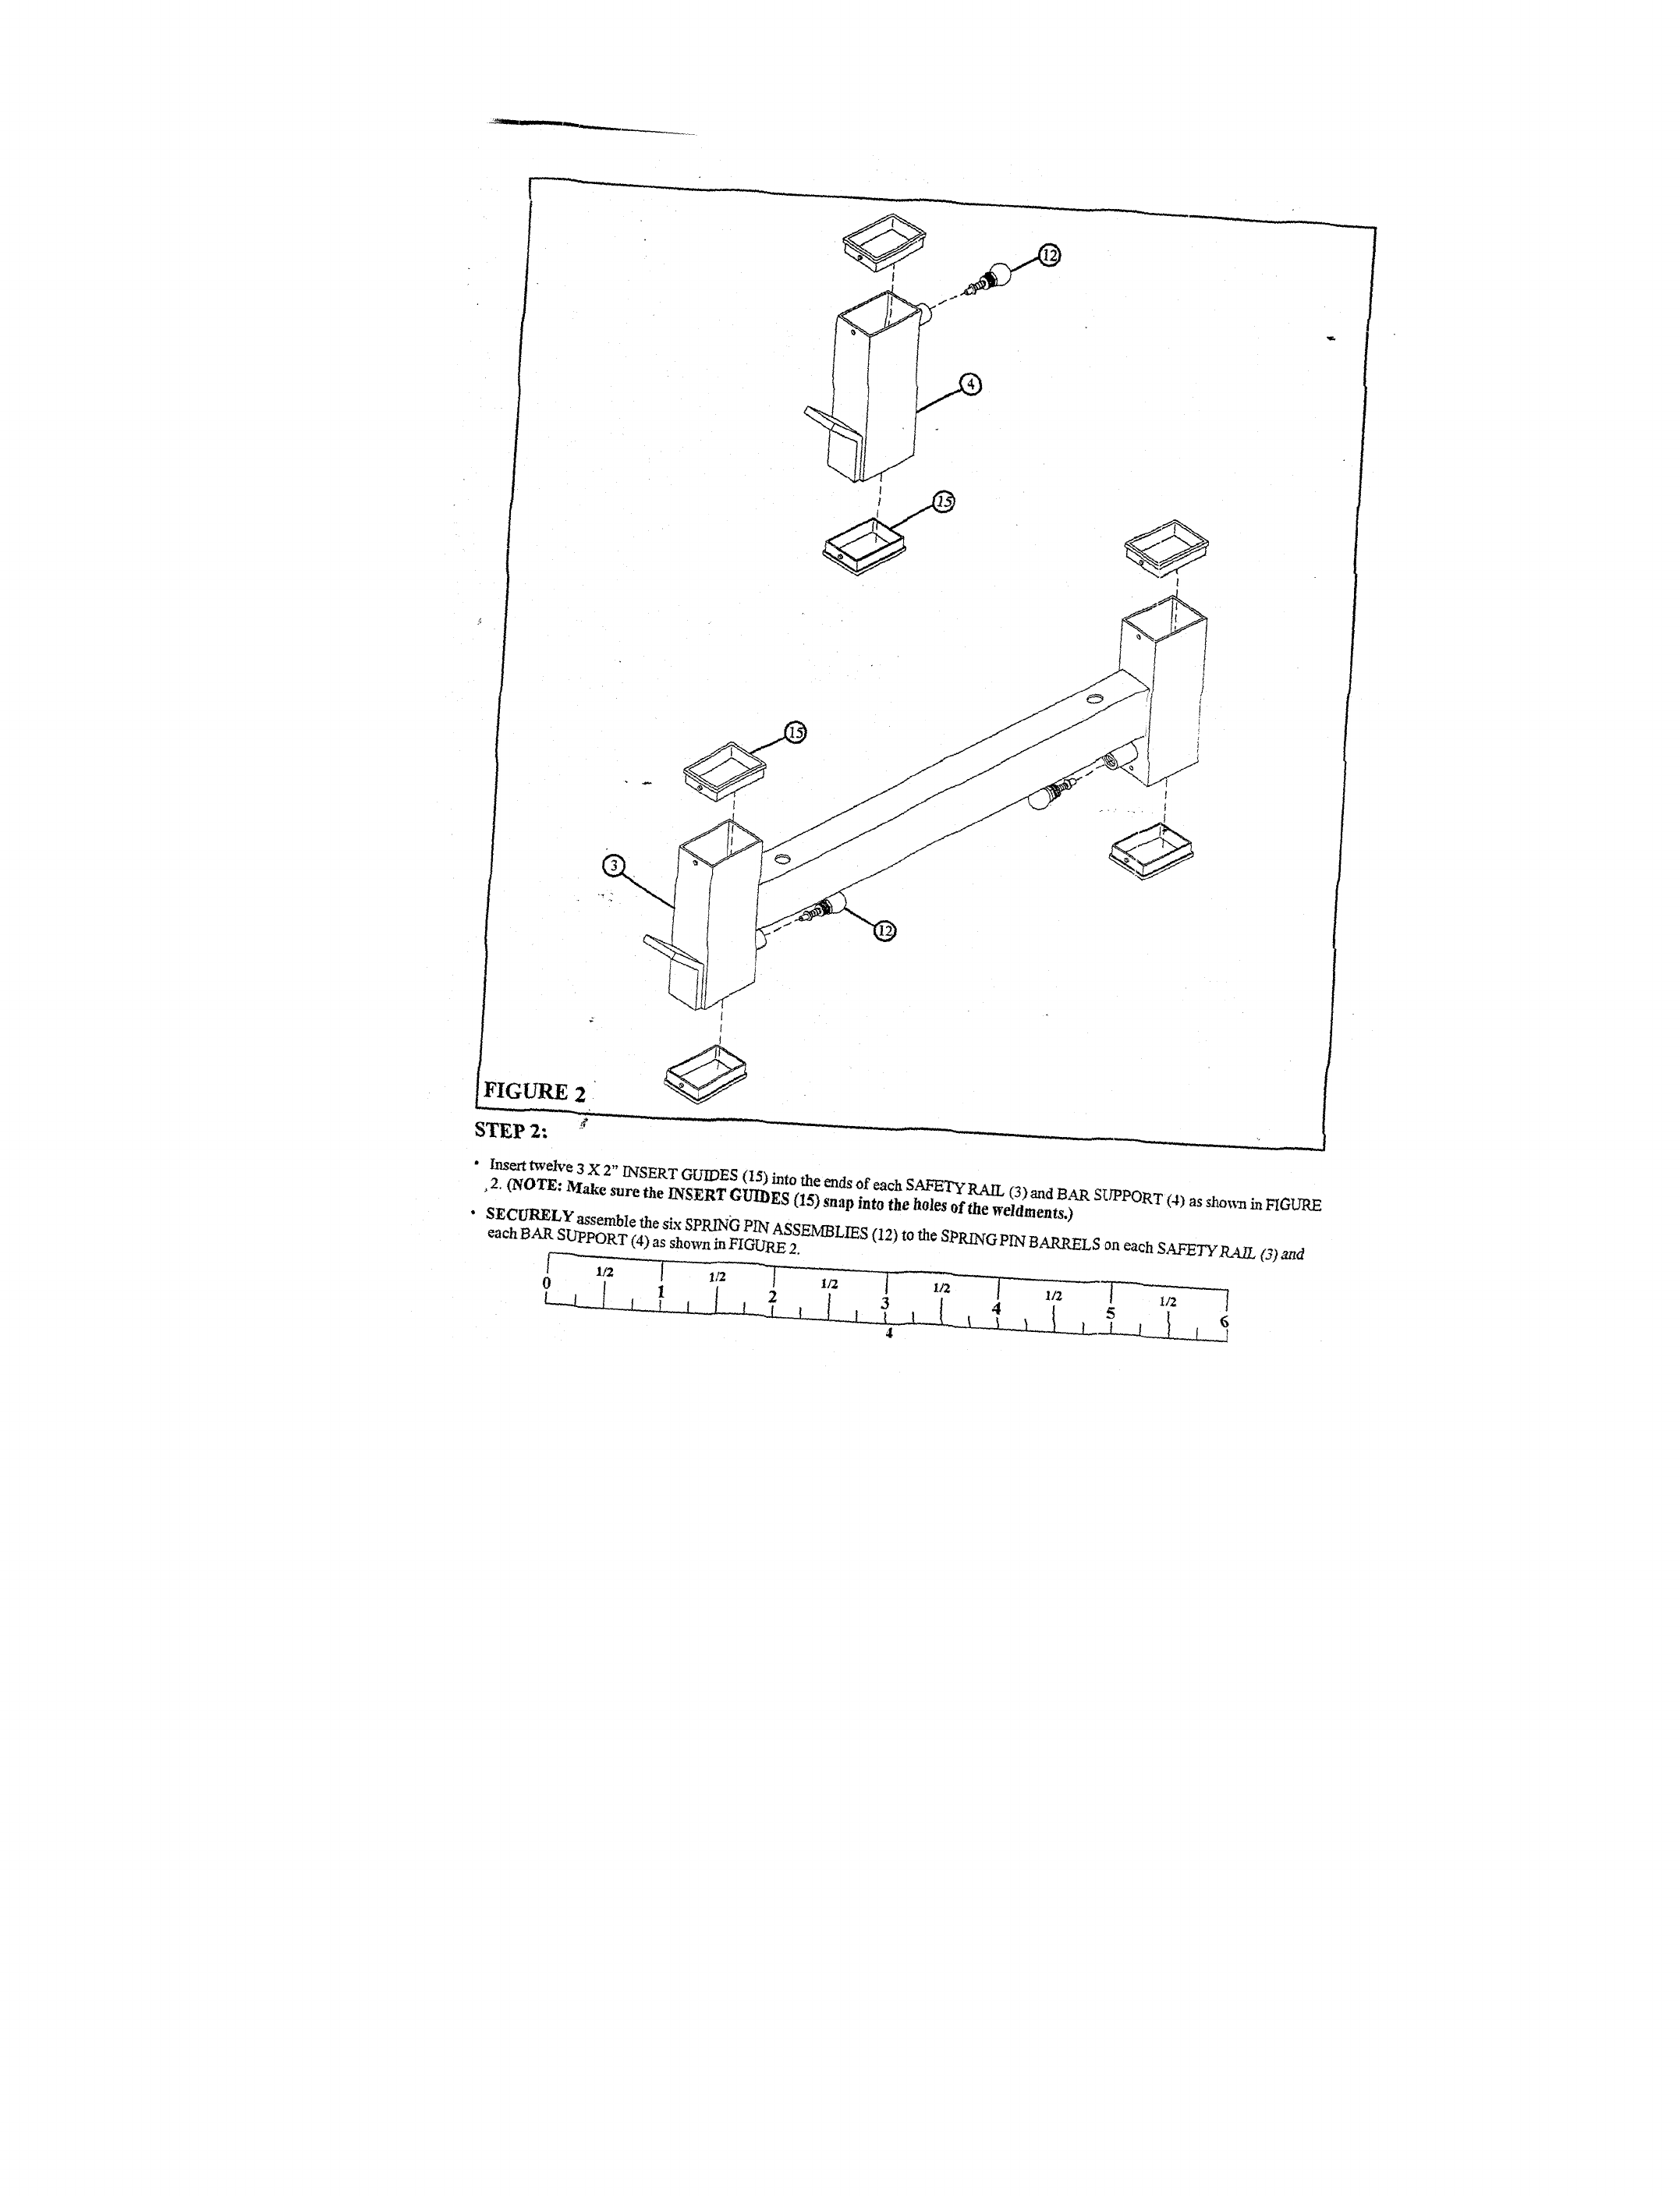
FIGURE 2
STEP 2:
Insert tweJve 3 X 2"/NSERT GUH3ES (15) into the ends of each SAFETy/LML
,2. (NOTE: Make sure the INSERT GUIDES (I5) snap into the holes of the weldments.)(3) and
BAR
SUPPORT
FIGUR~
SECURELY assemble the six SPRING PIN ASSEIVIBLI~S (12) to the
each BAR SUPPOKT (4) as shown in FIGURE 2. SPRING PIN BARRELS on each SAFETYRA./L


