


4
ASSEMBLY
P
lace all parts of the interactive stand in a cleared area and remove the packing materials. Do not dispose of the
packing materials until assembly is completed. Assembly requires a Phillips screwdriver .
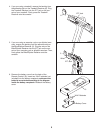
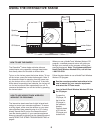
1. Before assembling the interactive stand, see the
l
ist of compatible exercise equipment on page 8
and make sure your exercise equipment is com-
patible.
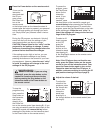
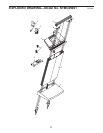
Orient the Upright (2) as shown in the inset drawing.
Have another person hold the Upright near the Base
(1).
Connect one end of the Wire Harness (7) to the wire
harness on the Base (1). Attach the Upright (2) to the
Base with eight #10 x 1 1/2” Screws (8).
Make sure
the wire harnesses are not pinched between the
Upright and the Base.
1
2
2
1
1
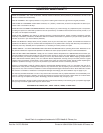
2. Remove the Ionizer (3) from the Console (4).
Connect the Wire Harness (7) to the wire harness on
the Console (4). Attach the Console to the Upright (2)
with eight #10 x 1 1/2” Screws (8).
Make sure the
wire harnesses are not pinched between the
Console and the Upright.
Press the Ionizer (3) back onto the Console (4). Make
sure the Ionizer is fully seated.
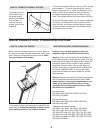
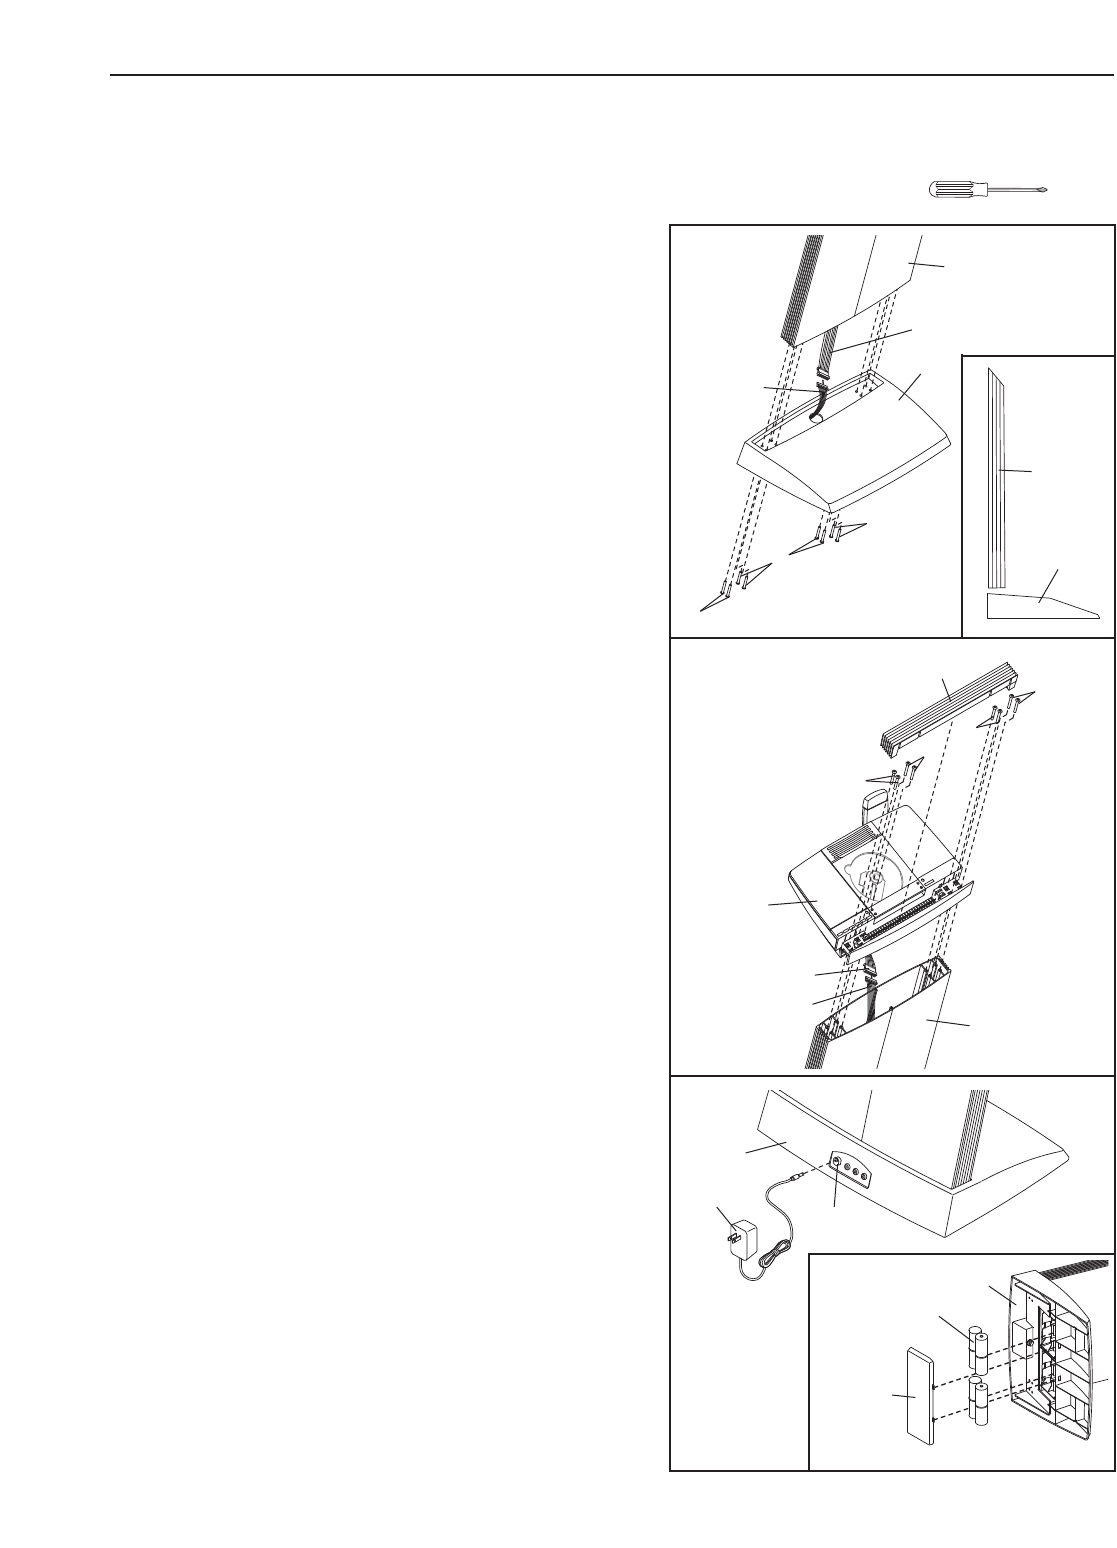
3. Plug one end of the Power Supply (A) into the indicated
jack on the Base (1). Plug the other end of the Power
Supply into an appropriate outlet that is properly
installed in accordance with all local codes and ordi-
nances.
Note: The Console (not shown) can be operated with
batteries (not included) instead of the Power Supply
(A) if desired. T
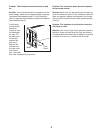
o install batteries, first tip the Base (1)
onto its side and remove the battery cover. Insert
eight D-cell batteries (not included) into the battery
receptacles.
Make sure the batteries are oriented
as shown by the diagram inside the battery recep
-
tacles. Reattach the battery cover.
3
8
8
7
8
8
2
A
1
Jack
4
2
3
7
Wire
Harness
Wire
Harness
8
8
8
1
Batteries
Battery
Cover