


19
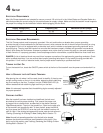
4 SETUP
ELECTRICAL REQUIREMENTS
Most Life Fitness treadmills are intended for use on a normal 120 volt circuit in the United States and Canada. Below is a
table that provides the current rating for this product based on supply voltage. Make sure that the treadmill model supports
the proper line voltage for the installation location before plugging into the outlet.
Supply Voltage (VAC) Frequency (Hz) Maximum Current (Amps)
120 50 / 60 12
230 50 / 60 10
ELECTRICAL GROUNDING REQUIREMENTS
This Life Fitness product must be properly grounded. If the unit malfunctions or breaks down, proper grounding
provides the path of least resistance for the electric current, which reduces the risk of shock to anyone touching or using
the equipment. Each unit is equipped with an electrical cord, which includes an equipment grounding conductor and a
grounding plug. The plug must be inserted into an outlet that has been properly installed and grounded in accordance
with all local codes and ordinances. A temporary adapter must not be used to connect this plug to a two-pole receptacle
in North America. If a properly grounded, correct amperage outlet is not available, a qualifi ed electrician must install one.
DANGER: A risk of electrical shock may result from improper connection of the equipment’s grounding conductor. Check
with a qualifi ed electrician if you are unsure about proper grounding techniques. Do not modify the plug provided with
this product. If it will not fi t an electrical outlet, have a proper outlet installed by a qualifi ed electrician.
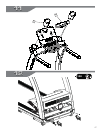
TURNING THE UNIT ON
To turn the treadmill on, locate the ON/OFF power switch at the front of the treadmill near the power cord and switch it to
ON.
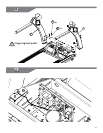
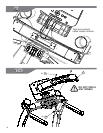
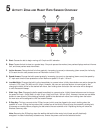
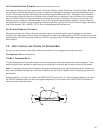
HOW TO STABILIZE THE LIFE FITNESS TREADMILL
After placing the unit where it will be used, check its stability. If there is even
a slight rocking motion or the unit is not stable, determine which stabilizing
leg is not resting on the fl oor. To adjust, turn the STABILIZING LEG (A)
motion ceases and both stabilizing legs rest fi rmly on the fl oor.
Note: It is extremely important that the stabilizing leg be correctly adjusted
for proper operation.
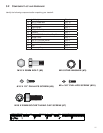
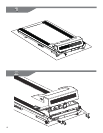
CHECKING THE BELT
After the treadmill has been installed and stabilized, the belt must
be checked to confi rm proper tracking. First, ensure the power cord
is plugged into a suitable outlet, as described in the above Electrical
Requirements section. Then turn the treadmill on. Stand on the side rails
of the treadmill and straddle the belt. To start the belt, press the WALK
key, then press the SPEED UP arrow key until the treadmill reaches 4.0
mph/ 6.4 kph. If the striding belt appears off-center, see the instructions in
Tracking (Centering) An Existing Or New Striding Belt in Section 7.3.
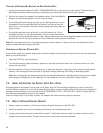
Note: Normal belt operating position is for the belt to be located
between the aluminum extrusions (see illustration to the right). If the
belt is not in this position, see Tracking (Centering) An Existing Or New
Striding Belt in Section 7.3.
A
A
8.25
DETAIL A
SCALE 1 : 6