INSTALLATION
16
MODELS 95CI, 93C, 90C UPRIGHT LIFECYCLE
®
EXERCISE BIKES
TOOLS REQUIRED: Metric Hex Key Set, Side Cutters
NOTE: Proceed with the following steps before attaching the DISPLAY CONSOLE and ACCESSORY TRAY as
described in the Assembly Instructions.
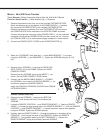
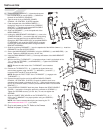
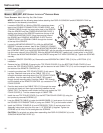
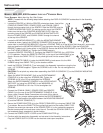
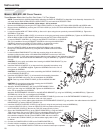
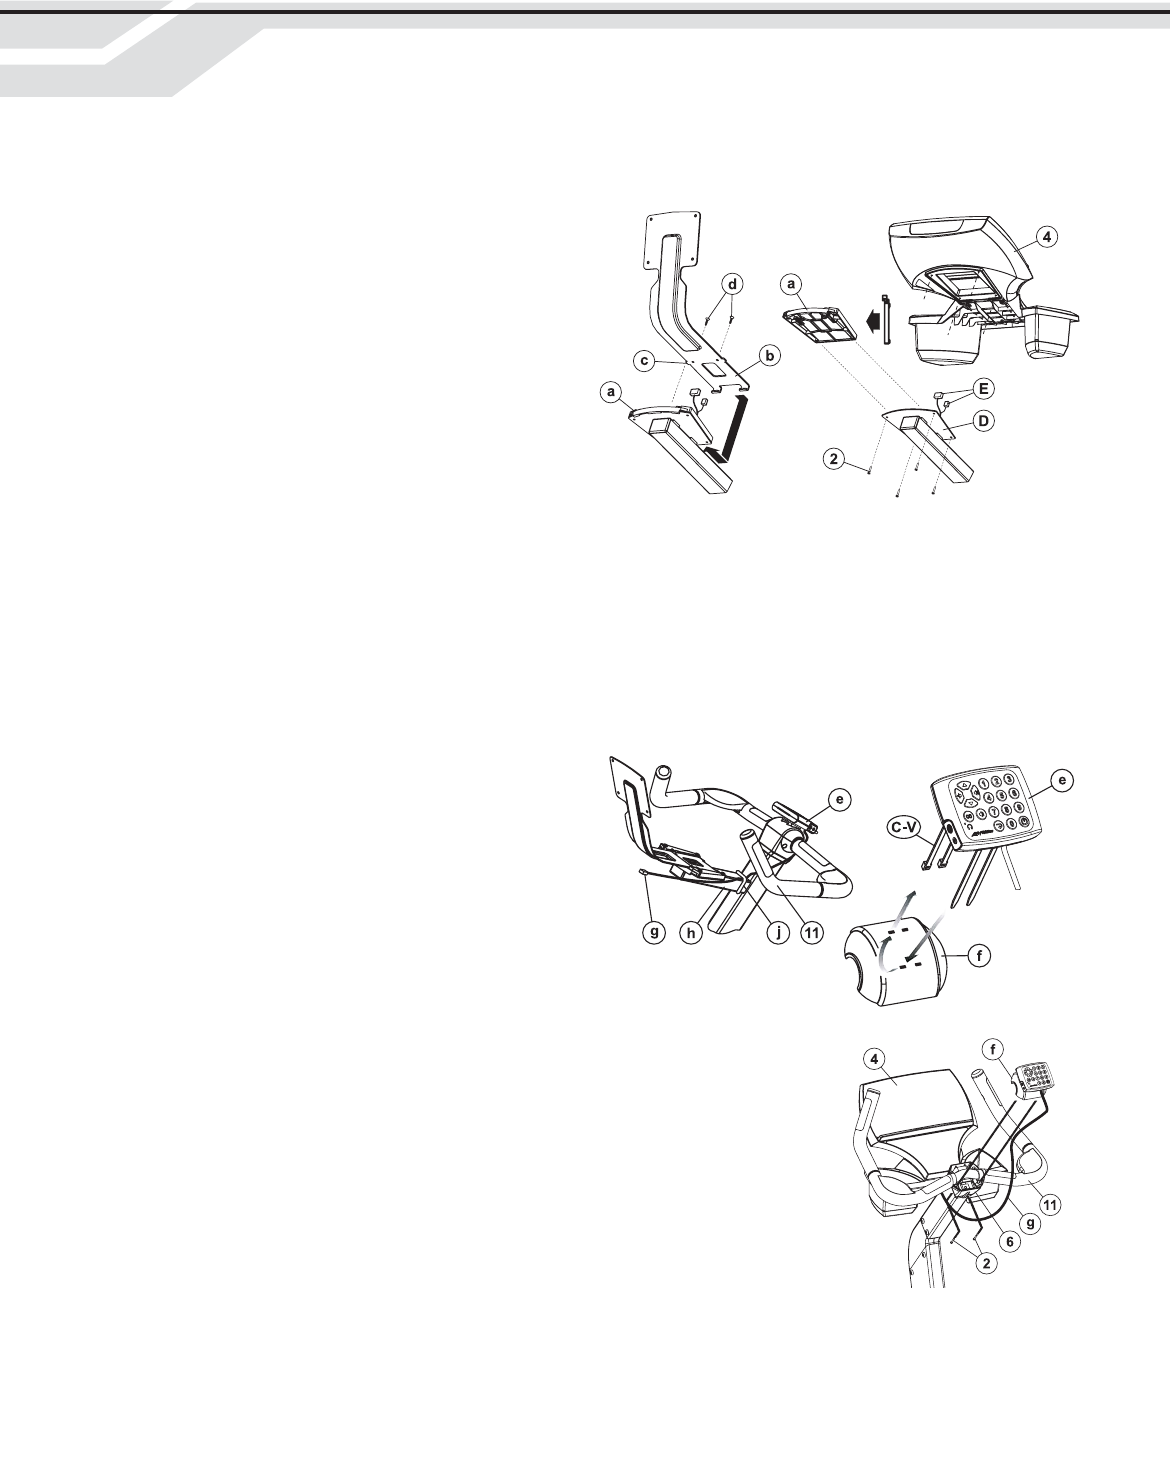
1. Locate the SPACER (a). With the SPACER oriented as shown,
feed all the CONSOLE CONNECTORS, POWER CORD, and
COAXIAL CABLE through the large center hole in the SPACER.
Slide the SPACER onto the CONSOLE MOUNTING PLATE ()
making sure the top of the SPACER hooks over the top of the
CONSOLE MOUNTING PLATE. Align the mounting holes of
the SPACER and CONSOLE MOUNTING PLATE. Run the
POWER CORD, and COAXIAL CABLE through the channel
at the top of the SPACER.
2. Locate the MOUNTING BRACKET (b). With the MOUNTING
BRACKET oriented as shown, feed all the CONSOLE CONNEC-
TORS through the large center hole in the MOUNTING BRACKET. Align
the LOCATING TABS (c) of the MOUNTING BRACKET with the tab slots and position the MOUNTING BRACKET
into the center channel of the SPACER. Slide the MOUNTING BRACKET upward until it locks solidly in the SPAC-
ER. Secure the MOUNTING BRACKET to the SPACER using two FLAT HEAD SCREWS (d). Tighten the SCREWS
securely.
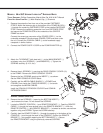
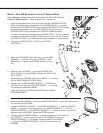
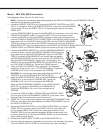
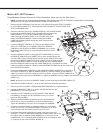
3. Locate the REMOTE CONTROL (e). Remove the two HORIZONTAL CABLE TIES (C-H) for a VERTICAL (C-V)
installation.
4. Remove the four SCREWS (2) securing the TOP POLAR COVER (5) to the BOTTOM POLAR COVER (6) and
remove the TOP POLAR COVER. Carefully pull the lead end of each CABLE TIE (C-V) until the receptor end meets
the bottom of the REMOTE CONTROL (e).
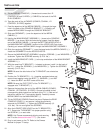
5. Locate the provided new TOP POLAR COVER (f) with mount-
ing slots. Feed both lead ends of the CABLE TIES (C-V)
throught the bottom mounting slots of the TOP POLAR COVER
as shown. Loop the lead ends of the CABLE TIES upward
through the top mounting slots. Feed the CABLE TIES through
until the bottom of the REMOTE CONTROL (e) contacts the TOP
POLAR COVER.
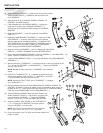
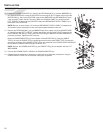
6. Feed the lead ends of the CABLE TIES (C-V) through the recep-
tor ends and slowly pull them tight, alternating between the two
CABLE TIES. The remote control should now be snug against the TOP
POLAR COVER (f). Trim the excess length of CABLE TIES.
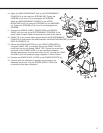
7. Install the new TOP POLAR COVER (f) to the BOTTOM POLAR COVER (5) using the
four previously removed SCREWS (2).
8. Loop the REMOTE CABLE (g) under the HANDLEBARS (11) and secure it to the top of
the CONSOLE EXTENSION TUBE (h) using one CABLE TIE (j) at the location shown.
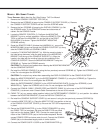
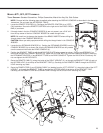
9. Install the DISPLAY CONSOLE (4) and ACCESSORY TRAY (3) as instructed in the
Assembly Instructions using the four new 1-1/2" SCREWS () supplied. Tighten the
SCREWS to 6-8 in-lbs. Do not overtighten the SCREWS.
CAUTION: Do not pinch any wires when assembling the DISPLAY CONSOLE (4) to the
CONSOLE MOUNTING PLATE (D).


