


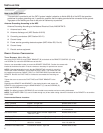
MODELS NEW 95X CROSS-TRAINERS
TOOLS REQUIRED: Phillips Screwdriver, Metric Allen Set, M16 & M17 Wrench
PARTS
NOT USED FROM KIT: (1) Main Bracket Cap, (1) Grommet
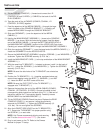
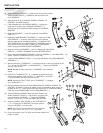
1. Remove the protective liner from one of the provided FASTENER STRIPS.
Attach the fastener strip to the bottom of the POWER BLOCK (--). Interlock
the remaining FASTENER STRIP to the installed FASTENER STRIP.
Remove the remaining protective liner from FASTENER STRIP and secure
the POWER BLOCK to the underside of the CENTER FRAME as shown.
Connect the screw-type connector of the POWER CORD (--) to the underside
receptacle. Bundle excess POWER CORD and store under the unit. Connect
the COAXIAL CABLE (r) to the broadcast supply receptacle in similar fashion.
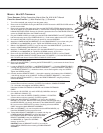
2. Connect the POWER SUPPLY CORD to the POWER ADAPTER (o).
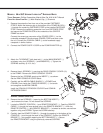
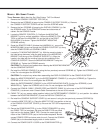
3. Attach the TV BRACKET (with bent tab) (--) to the MAIN BRACKET (--) as shown
using four SCREWS (--) and WASHERS (--). Tighten the SCREWS securely. (8-10 ft.
lbs.)
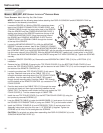
4. Remove the six SCREWS (--) securing the REAR CON-
SOLE COVER (10) to the FRAME. Remove the REAR
CONSOLE COVER.
Remove the four SCREWS securing the INSERT (--) as
shown. Set the REAR CONSOLE COVER aside.
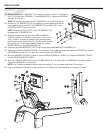
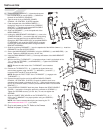
5. Carefully pull the MEDIA CABLE BUNDLE (--) (POWER
and COAXIAL) from inside the CONSOLE BRIDGE (--). Un-
bundle and straighten the MEDIA CABLES.
Install the COAXIAL EXTENSION COUPLER and COAXIAL
EXTENSION CABLE.
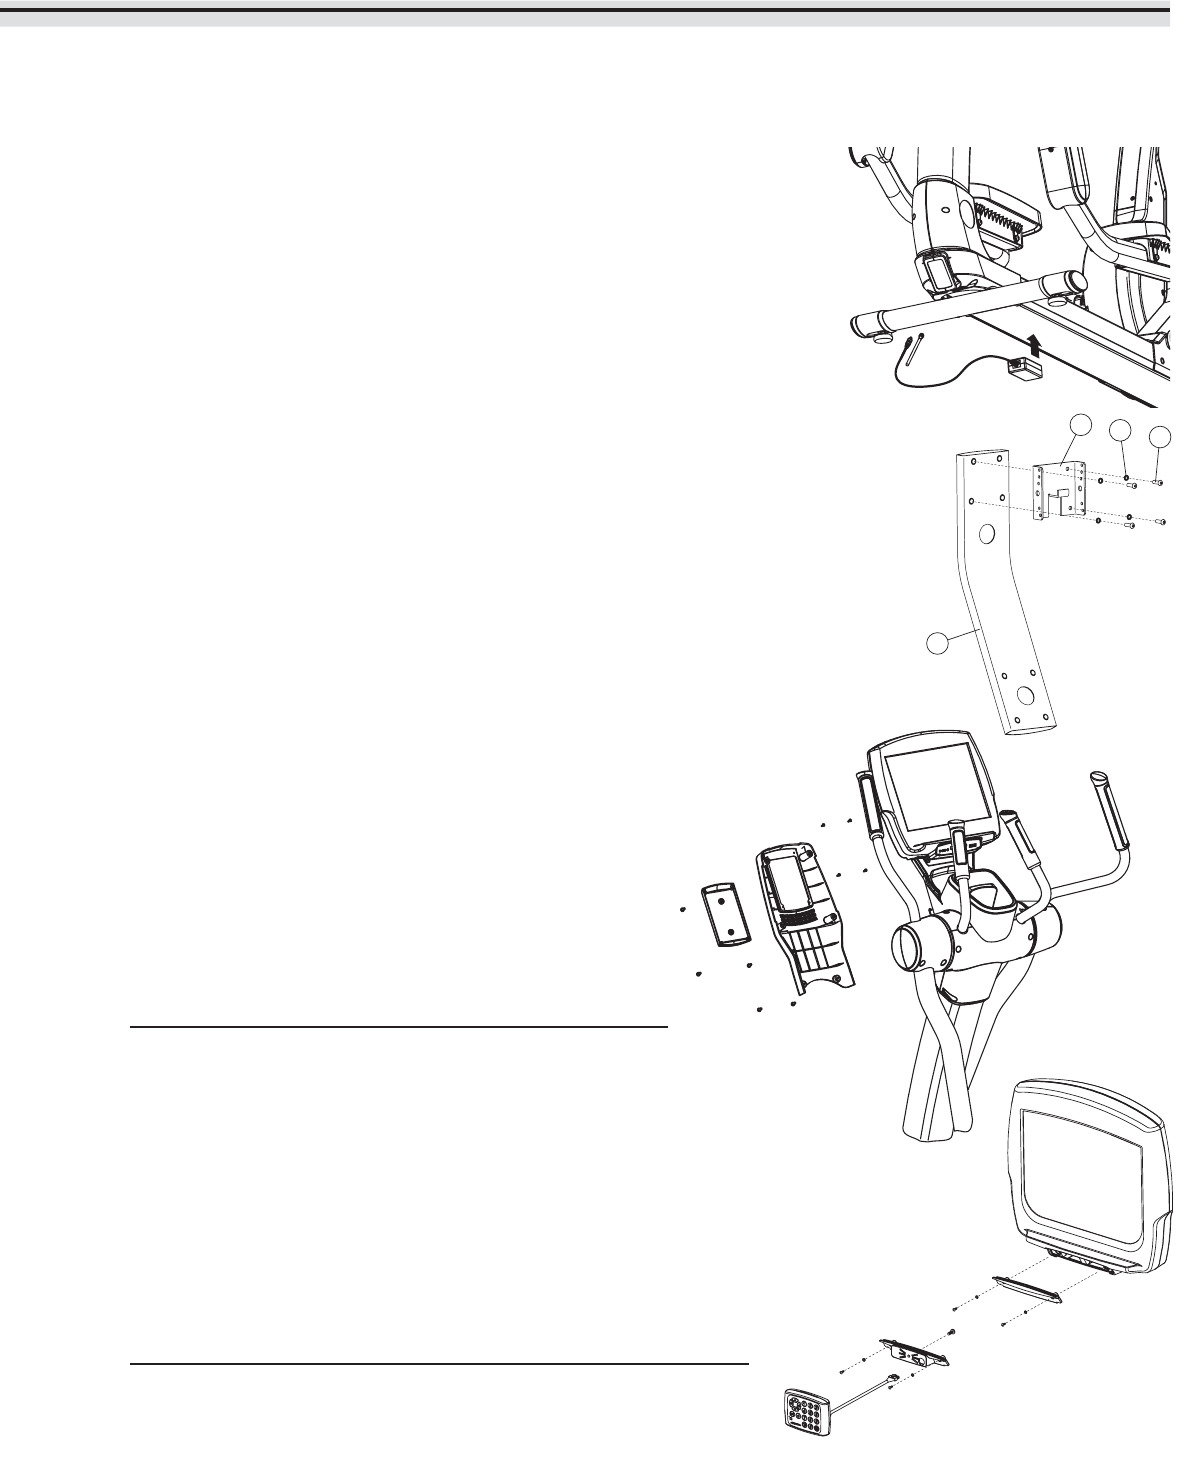
Achieve Console Units Only:
6. Remove the two SCREWS (--) securing the BOTTOM
INSERT (--) and remove the insert. Do not discard the
SCREWS.
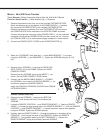
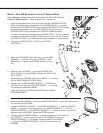
7. Locate the REMOTE CONTROL (--) and REMOTE BRACKET (--). Feed the REMOTE
CABLE (--) through the large access hole in the REMOTE BRACKET (--). With the REMOTE
CONTROL (--) and REMOTE BRACKET (--) oriented as shown, secure them together
using one SCREW. Tighten the SCREW securely.
8. Carefully feed the REMOTE CABLE (--) through the opening in the bottom of the
CONSOLE (--) and through the back of the CONSOLE. Position the REMOTE
BRACKET (--) into position replacing the BOTTOM INSERT (--). Secure the
REMOTE BRACKET using the previously removed SCREWS.
9
8
6
5
4