


TM
TM
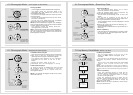
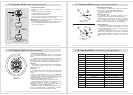
To Set the Pacer Rate (bpm)
- Press and hold the [mode] button for 2 seconds to
change the display from Pacer to P a c e r S e t t i n g
Mode.
- The digits flash on the display because it is being
selected.
The setting procedure
- If the digits are flashing, press the [start/stop] button to
increase the number (steps of 5 BPM); hold the
[start/stop] button to change the number at a higher
speed. Press the [Compass] button to decrease the
number (steps of 5 BPM); hold the [Compass] button to
change the number at a higher speed.
- After you set the pacer, press the [mode] button to
exit the setting sequence.
- If no key-stoke has been activated for 30 seconds, the
setting display will return to Pacer Mode.
NOTE: The setting range of the pacer: 40 bpm to 180 bpm.
9.1 Pacer Mode - Setting the Pacer Rate (bpm)
decrease the bpm
at a higher speed
increase the bpm
at a higher speed
decrease the bpm
increase the bpm
Pacer Setting Mode
(90 bpm)
Pacer Setting Sequence
Dual Time Setting Sequence
hold
compass
hold
start/stop
compass
button
start/stop
button
17
18
19
20
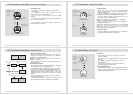
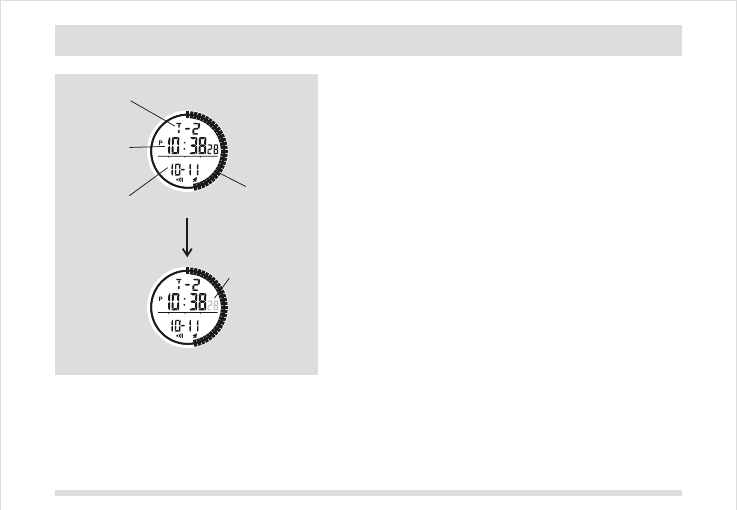
Dual Time Mode
- The 'T-2' indicator will be displayed on the 1st row of the
display.
- The 2nd row of the display shows the dual time:
hour, minute and second.
- The 3rd row of the display shows the calendar: month,
day.
- The indicators around the display show the dual time
in 1 second resolution.
NOTE: The calendar readout of the Dual Time Mode will be
the same as the Current Time Mode.
To Set the Dual Time
- To set the dual time, press and hold the [mode] button for
2 seconds to change the display from the Dual Time
Mode to Dual Time Setting Mode.
- The minute digits flash on the display because they are
being selected.
The Setting Procedures
- Press [mode] button to change the selections following the
Dual Time Setting Sequence shown on the left.
- If the digits are flashing, press the [start/stop] button to
increase the number; hold the [start/stop] button to
change the number at a higher speed. Press the
[Compass] button to decrease the number; hold the
[Compass] button to change the number at a higher speed.
- After you set the Dual Timer, press the [mode] button to
exit the Dual Time Setting Sequence.
- If no key-stoke has been activated for 30 seconds, the
setting display will return to Dual Time Mode.
10.0 Dual Time Mode - Dual Time Mode
10.1 Dual Time Mode - Setting the Dual Time
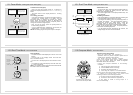
11.0 Compass Mode - The Precautions
hold
mode
Dual Time Setting Mode
Dual Time Mode
digits have been
selected (flashing)
Calendar
(month-day)
analog
second
dual time
(hour:minute
second)
'T2' indicator
minute hour
Dual Time Setting Sequence
hold
mode
mode
button
mode
button
Increase
the number
increase the
number at
a higher speed
start/stop button hold start/stop
decrease
the number
decrease the
number at
a higher speed
hold compasscompass button
Precautions when Using XG-20
Check the 'What is Magnetic
Declination' section for more detail.
- Keep your XG-20 away from magnets or
appliances which may contain magnetic objects such as
mobile phones, speakers, motors and etc.
- The XG-20, like most magnetic compass,
points to the magnetic North which is slightly different
from the true North.
- Perform the compass calibration in the following
conditions: :
1) when the XG-20 is used the first time,
2) when the 'DIST' indicator is flashing,
3) the battery has been replaced, or
4) when using the compass in a location different
from the place in which the compass had been calibrated.
- To achieve an accurate result, you should avoid
measuring a direction in the following conditions:
1) the watch is close to magnetic/metal objects,
2) the watch is close to electrical appliances, or
3) the watch is inside a moving object or a
ferro-concrete building.
bezel
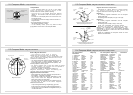
The features of the HiTrax Scout
which relat to the Compass Mode