


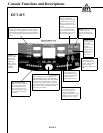
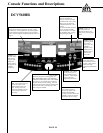

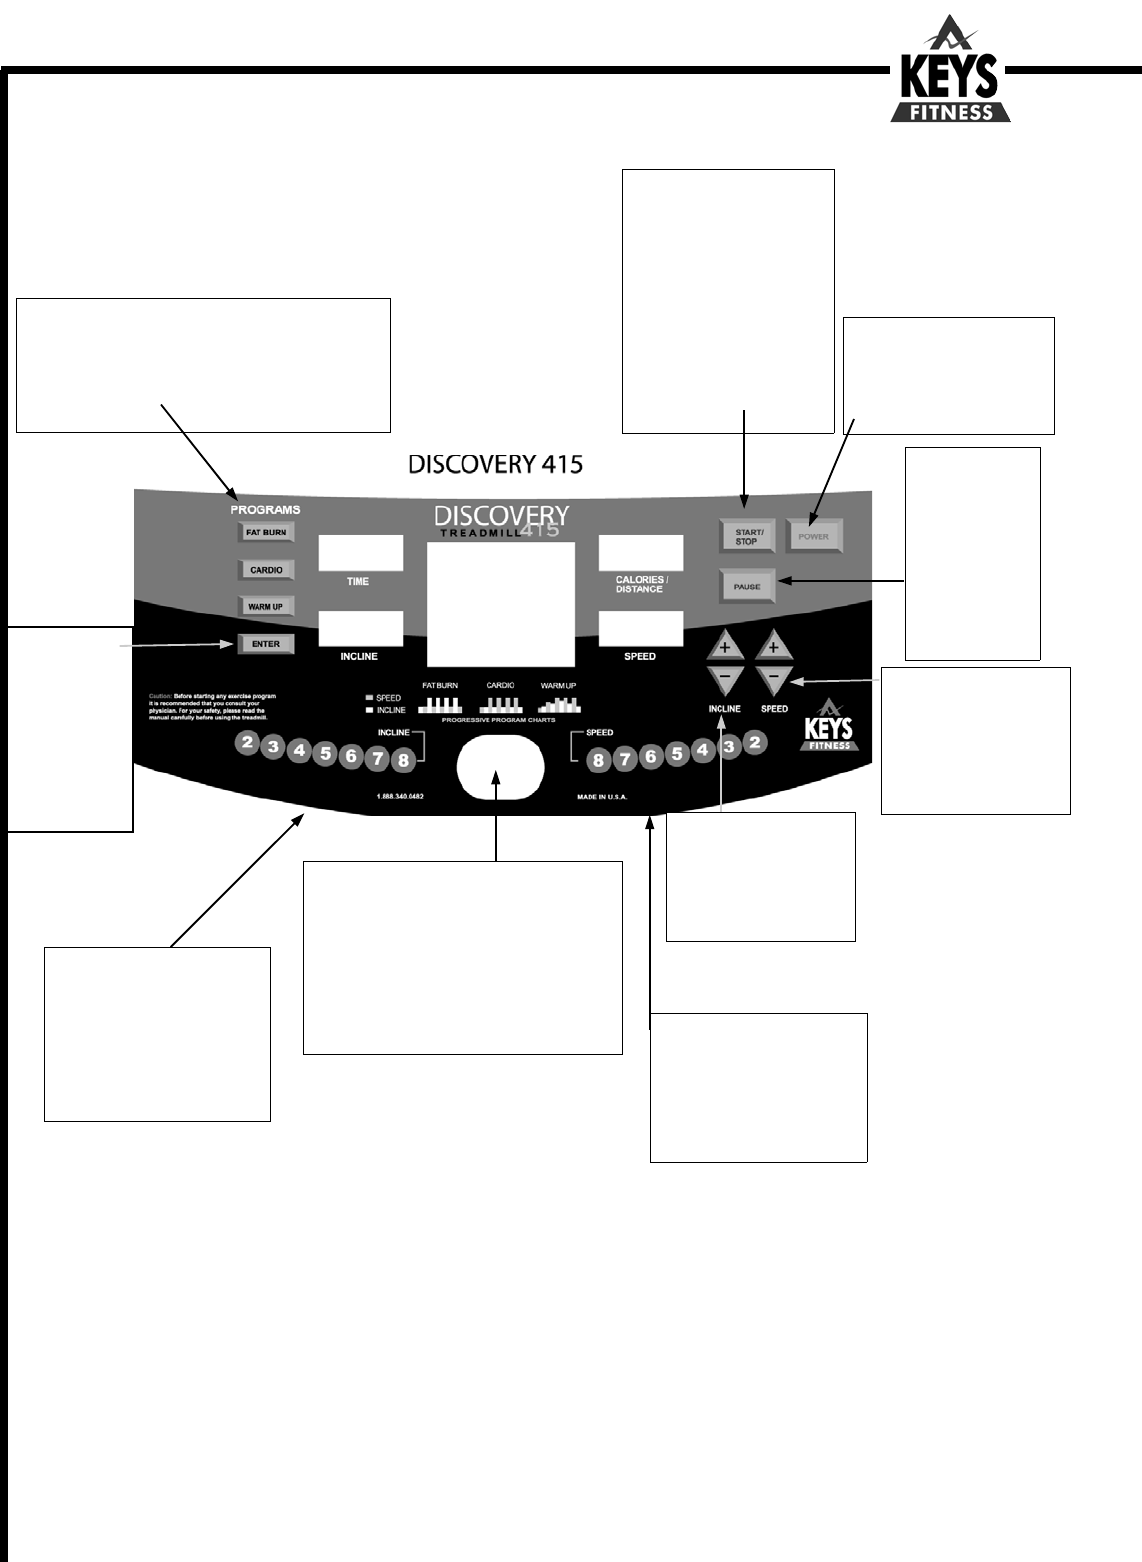
Console Functions and Descriptions
POWER
- Press to on. Allow
6-8 seconds while the
electronics perform a self
check prior to pressing other
buttons.
START/STOP
- This button
starts the treadmill belt
moving. There is a 4 second
countdown built in as a safety
feature to let you know the
treadmill belt is about to start
moving.
Use the START/STOP button
also to stop your treadmill
after your workout. The belt
will gradually come to a stop
after pressing the button.
PAUSE
- Press to
temporarily pause
your workout
while in use. The
treadmill is
designed with an
automatic power
off feature after 5
minutes in the
pause mode.
SPEED
- Use to either
increase (UP arrow) or
decrease (DOWN arrow)
the speed. These buttons
are also used while
programming SPEED and
TIME.
INCLINE
- Use to either
increase (UP arrow) or
decrease (DOWN arrow)
the incline. These buttons
are also used while
programming INCLINE.
ONE TOUCH SPEED BAR
-
Use to either increase or
decrease the speed. Each
number indicates MPH.
Pressing one of the buttons will
gradually increase or decrease
the speed to the new setting.
ONE TOUCH INCLINE
BAR
- Use to either increase or
decrease the incline. Each
number indicates percent of
grade. Pressing one of the
buttons will gradually increase
or decrease the incline to the
new setting.
CONSOLE SAFETY KEY
- Place the RED
Safety Key here prior to turning power on.
THE TREADMILL WILL NOT OPERATE
WITHOUT THE SAFETY KEY ATTACHED.
The safety key is equipped with a string and
clip that will clip to your clothing. This is an
important safety feature that will automatically
turn the power off if you should trip or fall
while using the treadmill.
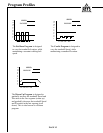
PROGRAM BUTTONS - These buttons are used to
access each of the three programs: Fat Burn, Cardio,
and Warm Up. Each program has one preset program,
and two additional custom programs in the P1 and P2
mode. See the “Program and Operating Instructions” on
page 12.
ENTER
- Use
the Enter button
while setting
program time,
speed, and
incline options.
See page 12 for
complete
instructions.
PAGE 9
DCV415