


10
INTRODUCTION
IMPORTANT
PRECAUTIONS
ASSEMBLY
BEFORE
YOU BEGIN
TREADMILL
OPERATION
LIMITED
WARRANTY
TROUBLESHOOTING
& MAINTENANCE
CONDITIONING
GUIDELINES
11
INTRODUCTION
IMPORTANT
PRECAUTIONS
ASSEMBLY
BEFORE
YOU BEGIN
TREADMILL
OPERATION
CONDITIONING
GUIDELINES
TROUBLESHOOTING
& MAINTENANCE
LIMITED
WARRANTY
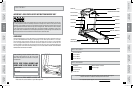
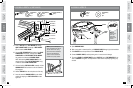
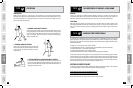
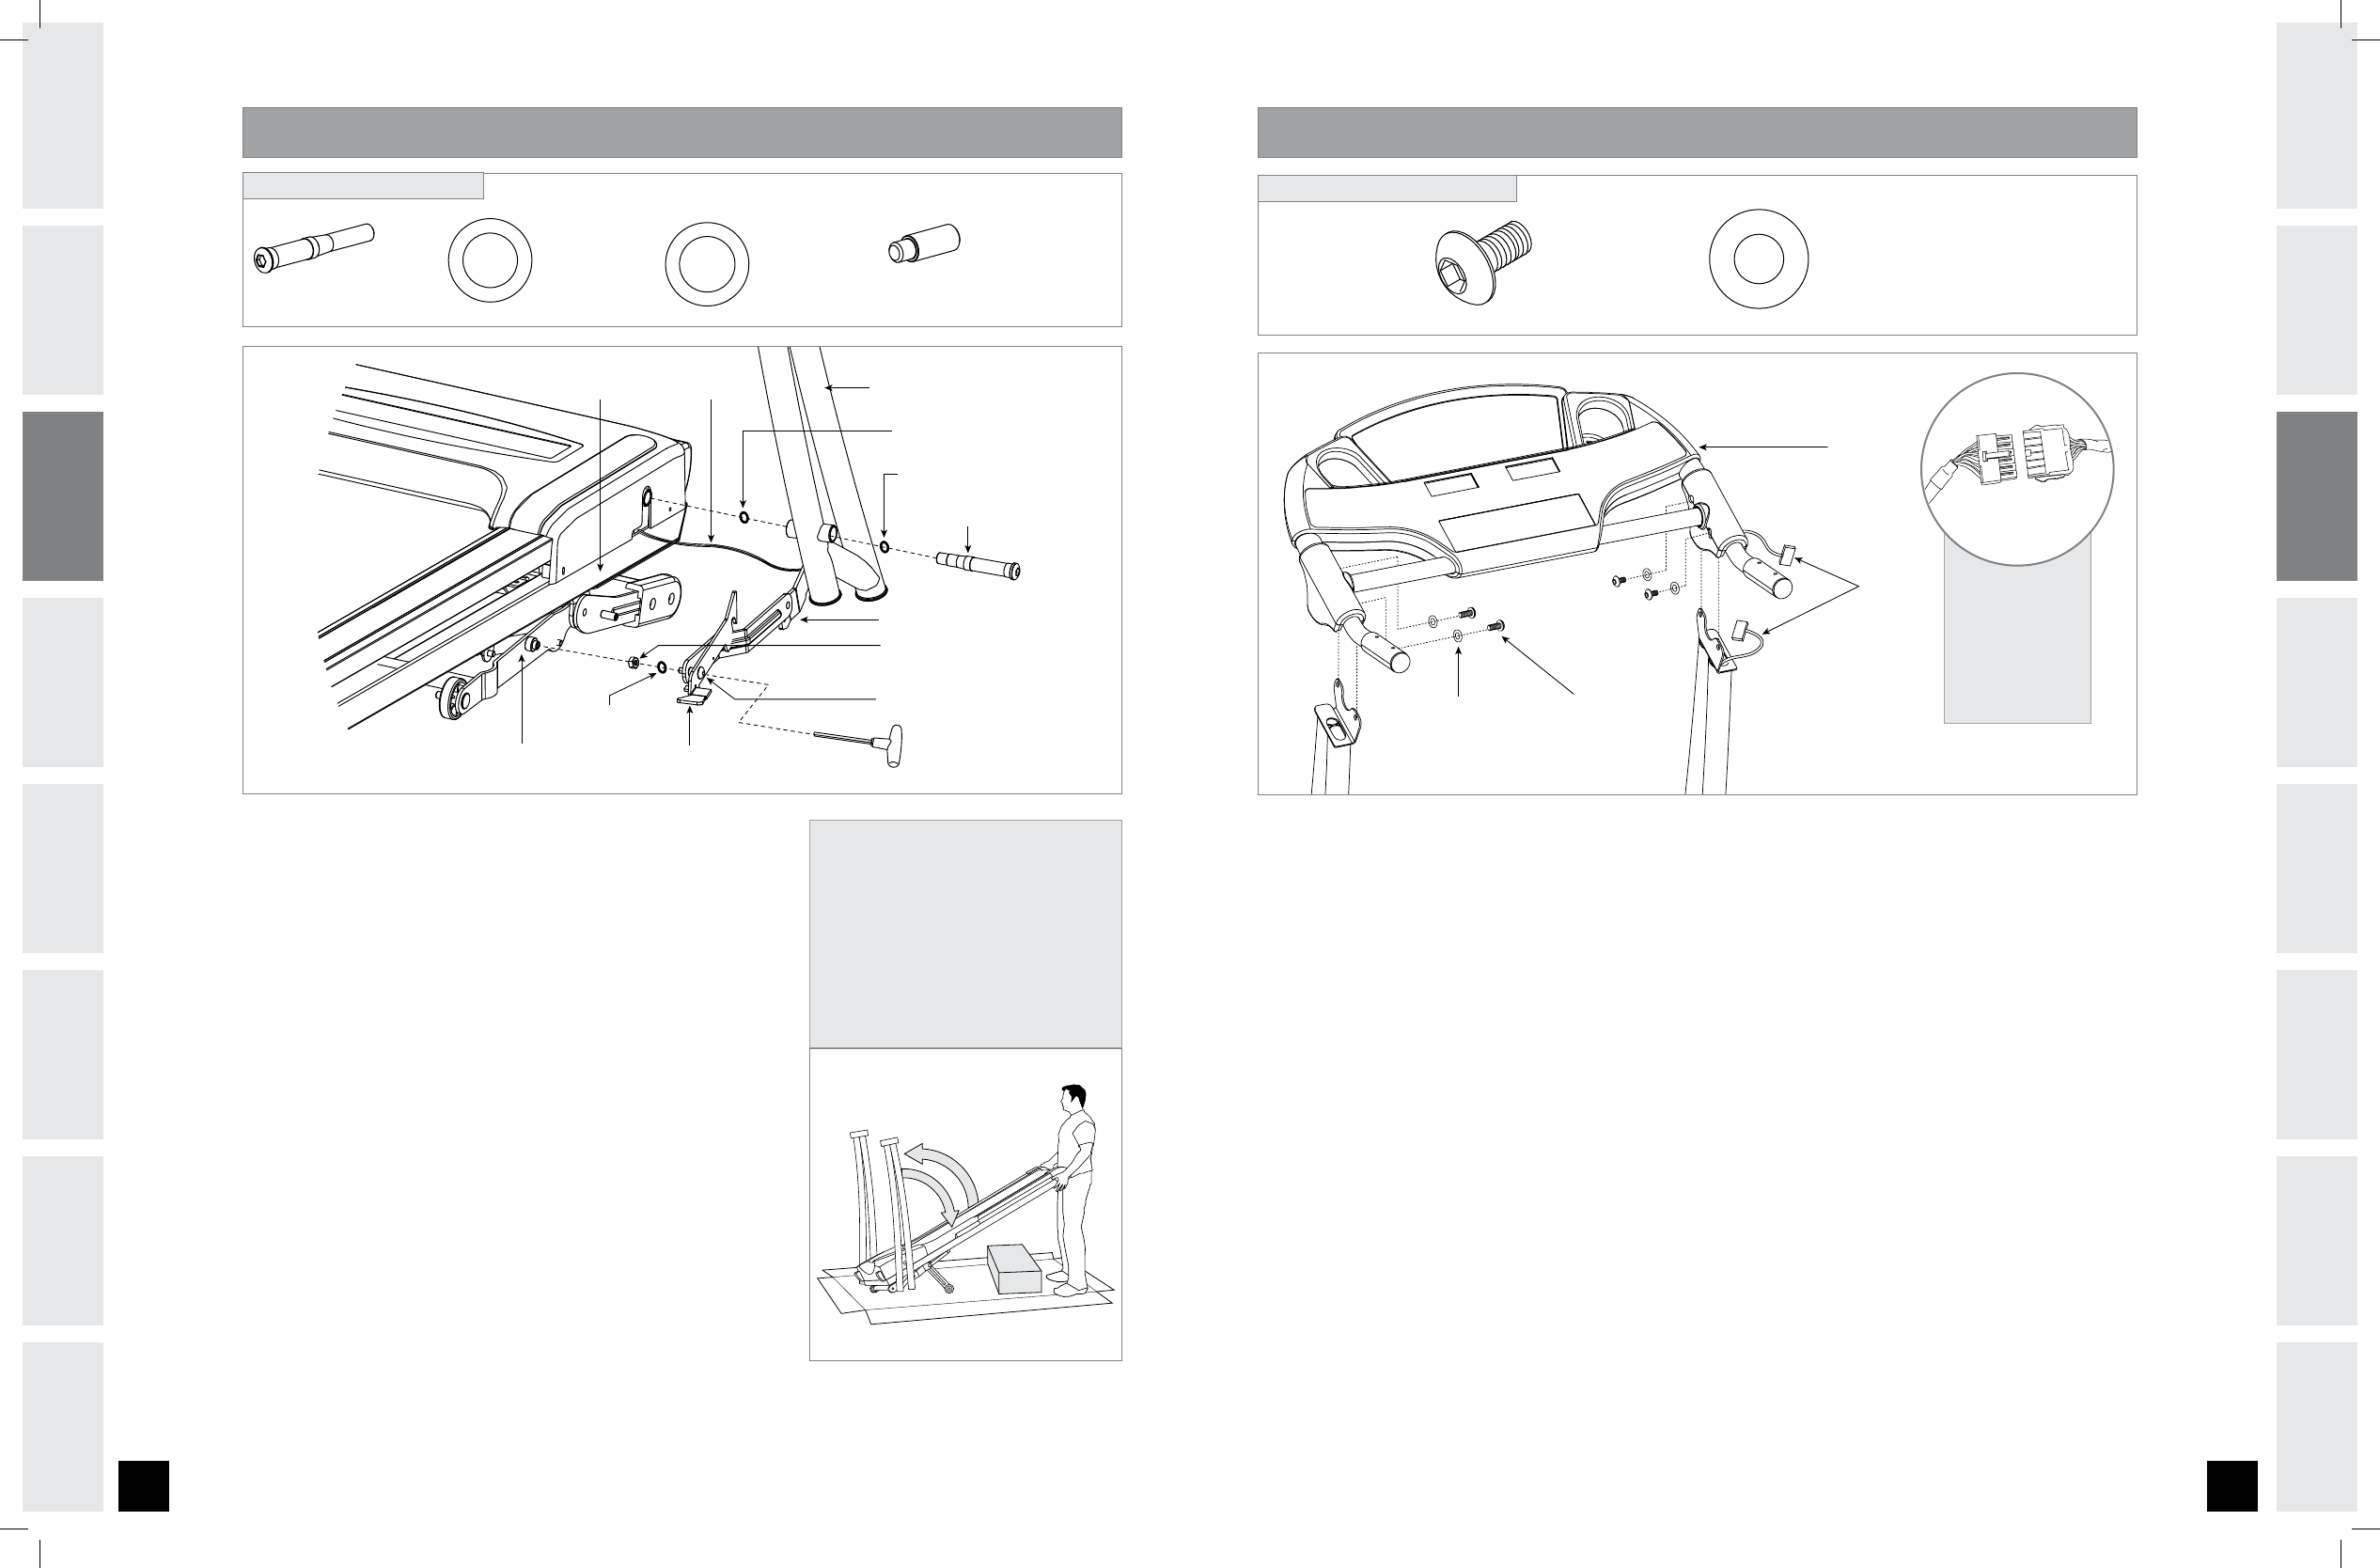
A S S E M B LY S T E P 2 ( C O N T I N U E D )
FLAT WASHER (E)
BOLT (D)
RIGHT CONSOLE MASTMAIN FRAME
WAVY WASHER (F)
ELEVATION FRAME
PRE-ATTACHED NUT
PRE-ATTACHED BOLT
CONSOLE CABLES
FOOT LOCK LATCH
RIGHT LINKAGE ARM
PRE-ATTACHED
TEFLON WASHER
1
3
2
NOTE: If you have attempted to
move the treadmill from the box
and the machine has sprung
open and cannot be assembled,
refer to the troubleshooting
section in order to restore the
treadmill to its proper position.
Insert 1 BOLT (D) and 1 FLAT WASHER (E) through
RIGHT CONSOLE MAST
followed by 1 WAVY WASHER
(F) and attach to MAIN FRAME.
Unscrew PRE-ATTACHED NUT and remove from RIGHT
LINKAGE ARM and discard. Carefully move RIGHT
LINKAGE ARM and PRE-ATTACHED TEFLON WASHER
into position and attach to ELEVATION FRAME.
NOTE: While holding RIGHT CONSOLE MAST in the
upright position, tighten PRE-ATTACHED BOLT using
T-wrench to attach RIGHT LINKAGE ARM.
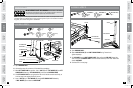
Cut band holding FOOT LOCK LATCH assembly. Lift the
RUNNING DECK
until lock latch on side of treadmill is
fully engaged.
Remove CONSOLE from box and place out of the way.
Lower the treadmill RUNNING DECK from the folded
position by stepping on FOOT LOCK LATCH on lower
right side.
A
B
C
D
E
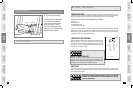
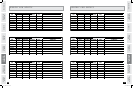
LOCK LATCH PIN (G)
Qty: 1
WAVY WASHER (F)
29 mm
Qty: 1
BOLT (D)
Qty: 1
FLAT WASHER (E)
27 mm
Qty: 1
HARDWARE BAG 2 CONTENTS:
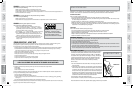
A S S E M B LY S T E P 3
CONSOLE
CABLES
BOLTS (A)FLAT WASHERS (H)
CONSOLE
BOLT (A)
15 mm
Qty: 4
FLAT WASHER (H)
16 mm
Qty: 4
HARDWARE BAG 3 CONTENTS:
Open HARDWARE BAG 3.
With running deck in lowered position, pull CONSOLE CABLES through right side handlebar.
Slide CONSOLE onto the top brackets of the UPRIGHT MASTS.
Connect CONSOLE CABLES, carefully tucking wires in masts to avoid damage.
To connect CONSOLE to UPRIGHT MASTS, place 4 BOLTS (A) and 4 FLAT WASHERS (H) into
holes in CONSOLE and tighten. Partially thread all bolts before completely tightening any
one bolt.
A
B
C
D
E
* NOTE: Be
careful not to
pinch any
wires while
attaching the
console.
T401_Rev.2.3.indd 10-11 7/1/08 8:22:13 AM