


8
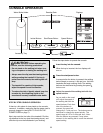
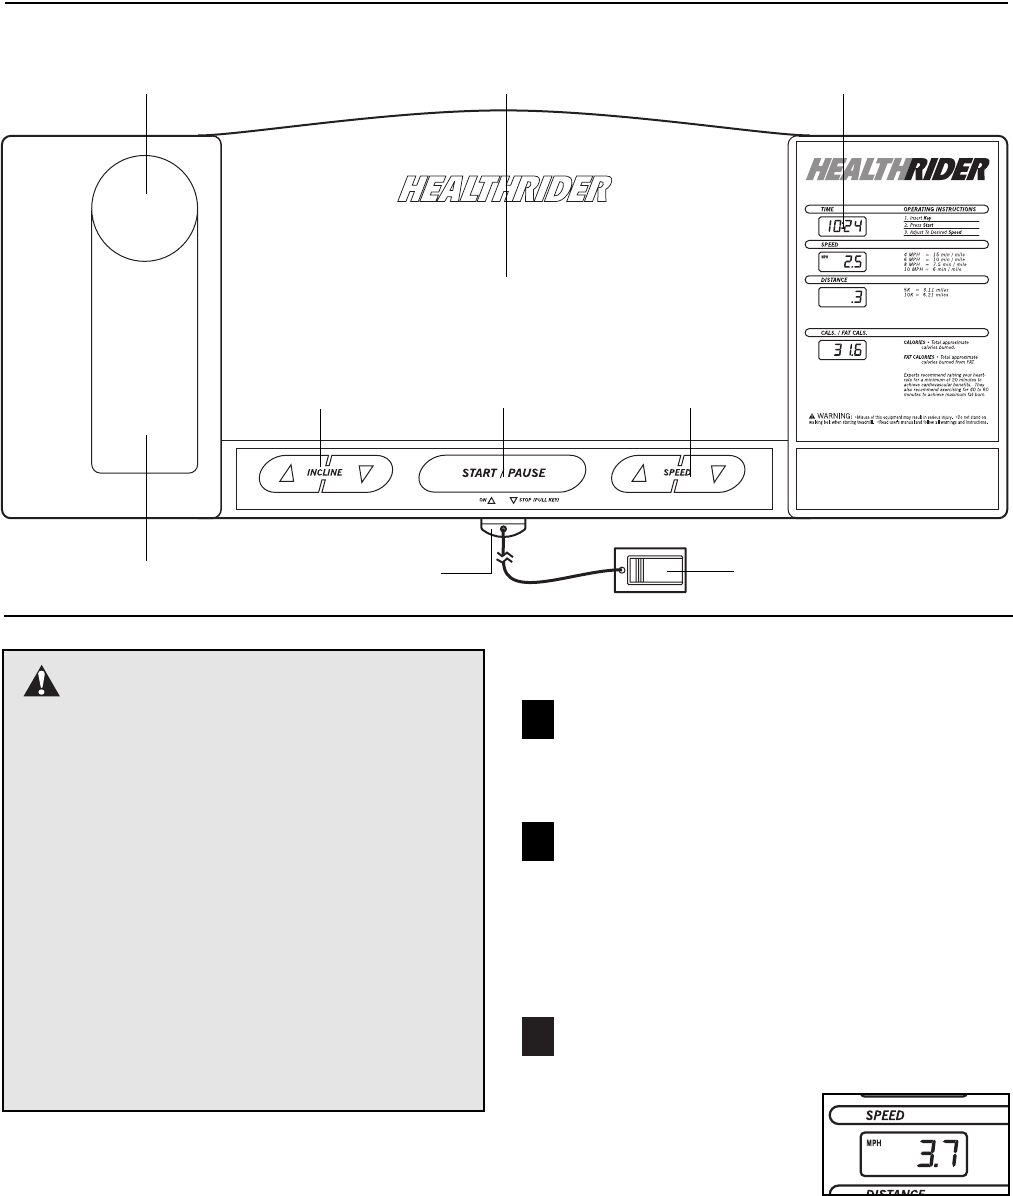
CONSOLE OPERATION
STEP BY STEP CONSOLE OPERATION
If there is a thin sheet of clear plastic on the console,
remove it. In addition, make sure that the power cord is
properly plugged in (see HOW TO PLUG IN THE
POWER CORD on page 7).
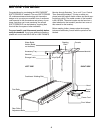
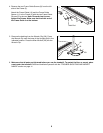
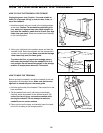
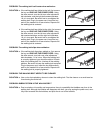
Next, step onto the foot rails of the treadmill. Find the
clip attached to the key (see the drawing above), and
slide the clip onto the waistband of your clothing.
Follow the steps below to operate the console.
Insert the key into the console.
When the key is inserted, the four displays will
turn on.
Press the start/pause button.
A moment after the button is pressed, the walking
belt will begin to move at 1 mile per hour. Hold the
handrails and begin walking. Note: The walking
belt can also be started by pressing the speed
▲▲
button once.
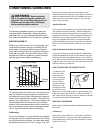
Adjust the speed of the walking belt with the
speed buttons.
As you walk on the tread-
mill, adjust the speed of
the walking belt with the
speed buttons. Each time
one of the buttons is
pressed, the speed will
change by 0.1 mile per hour. The buttons can be
held down to change the speed quickly. The
speed range is 0.5 to 10 miles per hour. Note:
After the buttons are pressed, it may take a
moment for the walking belt to reach the selected
speed setting.
3
2
1
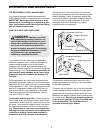
CAUTION: Before operating the
console, read the following precautions.
¥ Do not stand on the walking belt when turn-
ing on the power or starting the walking belt.
¥ Always wear the clip (see the drawing above)
while operating the treadmill. If the key is
pulled from the console, the walking belt will
stop.
¥ The treadmill is capable of high speeds;
adjust the speed in small increments.
¥ To reduce the risk of electric shock, keep the
console dry. Avoid spilling liquid on the
console and use only a sealable water bottle.
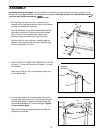
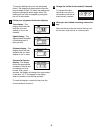
Water Bottle Holder
Accessory Tray
Reading Rack
Start/Pause ButtonIncline Buttons Speed Buttons
Clip
Key
Displays