


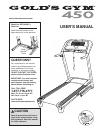

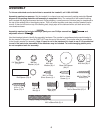
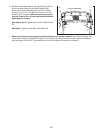
8
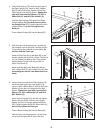
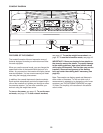
6. Have a second person hold a Bolt Spacer (79)
inside the lower end of the Left Upright (73).
Insert an M10 x 96mm Bolt (5) with an M10 Star
Washer (8) into the Left Upright and the Bolt
Spacer. Repeat this step with a second Bolt
Spacer (79), M10 x 96mm Bolt (5), and M10
Star Washer (8).
Orient the Left Upright (73) and the Left Upright
Spacer (83) as shown. Hold the Left Upright
Spacer and the Left Upright against the Base
(85). Partially tighten the M10 x 96mm Bolts (5);
do not fully tighten the Bolts yet.
Press a Base Endcap (82) into the Base (85).
With the help of a second person, tip the tread-
mill so that the Base (85) is flat on the floor.
83
73
5
85
79
79
82
8
6
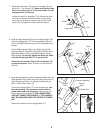
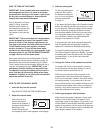
5. With the help of a second person, carefully tip
the treadmill onto its right side. Partially fold the
Frame (48) so the treadmill is more stable; do
not fully fold the Frame yet.
Attach a Base Pad (81) to the Base (85) in the
location shown with an M4.2 x 25mm Tek Screw
(2) and a Base Pad Spacer (64). Then, attach
another Base Pad (81) with only an M4.2 x
25mm Tek Screw (2).
Attach a Wheel (86) to the Base (85) with an
M10 x 50mm Bolt (27) and an M10 Nut (33). Do
not overtighten the Nut; the Wheel must turn
freely.
5
85
86
48
27
33
81
2
81
64
2
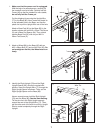
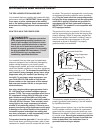
4. Hold a Bolt Spacer (79) inside the lower end of
the Right Upright (78). Insert an M10 x 96mm
Bolt (5) with an M10 Star Washer (8) into the
Right Upright and the Bolt Spacer. Repeat this
s
tep with a second Bolt Spacer (79), M10 x
96mm Bolt (5), and M10 Star Washer (8).
Hold the Right Upright (78) against the Right
U
pright Spacer (80). Be careful not to pinch
the Upright Wire (77). Partially tighten the M10
x 96mm Bolts (5); do not fully tighten the
Bolts yet.
Press a Base Endcap (82) into the Base (85).
80
78
7
7
8
82
79
79
5
4
85