


14 15
GB
GB
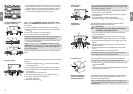
1. Place the Soil Moisture Sensor
G
in the area to be irrigated
– or –
the Rain Sensor electronic (if necessary with an extension
cable) outside of the area to be irrigated
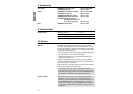
2. Thread the connecting cable
I
of the sensor
G
through one
of the two stopper slits
H
.
3. Adjust the cable length
I
in the box as required.
4. Press the stopper
H
back into box wall.
5. Plug the connector
J
into the sensor socket
K
of the Control
Unit / Radio Receiver.
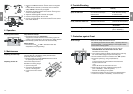
4. Operation
Fully Automatic Control:
v Set selection lever
L
to “AUTO/OFF”.
Programme-controlled water flow to the watering system ac-
cording to the programming in the Control Unit / Radio Receiver.
An automatically opened valve cannot be closed manually.
Manual Control:
v Set selection lever
L
to “ON”.
Permanent water flow,
independent of the programming
.
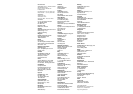
5. Maintenance
The foam inlay
N
of the draining outlet prevents insects
(especially ants) from entering.
v Please contact your nearest GARDENA Service Centre
for replacing the foam inlay
N
.
The box lid is step-proof and
attached to the box by hinges.
1. Open the box lid
D
.
2. Push the lid
D
backwards
and out of the hinges
O
.
3. Fit the new lid in the reverse
order.
Adjusting valve control:
Replacing the foam inlay:
Replacing the box lid:
G
J
H
I
K
J
H
I
L
Winter storage
6. Trouble-Shooting
Fault Possible Causes Remedy
Solenoid valve does not Control Unit / Radio Receiver v Connect Control Unit/
open, no water flow not connected correctly to Radio Receiver correctly
solenoid valve. to solenoid valve.
No water supply. v Turn on water supply.
Pipe closed. v Remove end cap
B
.
Solenoid valve does not Solenoid valve installed v Turn solenoid valve in box
close, continuous water flow opposite to flow direction. (observe the flow direction).
Selection lever
L
set to “ON”. v Set selection lever
L
to
“AUTO/OFF”.
Pipe slides off nipple Hose clips
2
are too loose. v Tighten hose clips
2
(see “3. Assembly”).
If other faults occur, please contact GARDENA Customer Service.
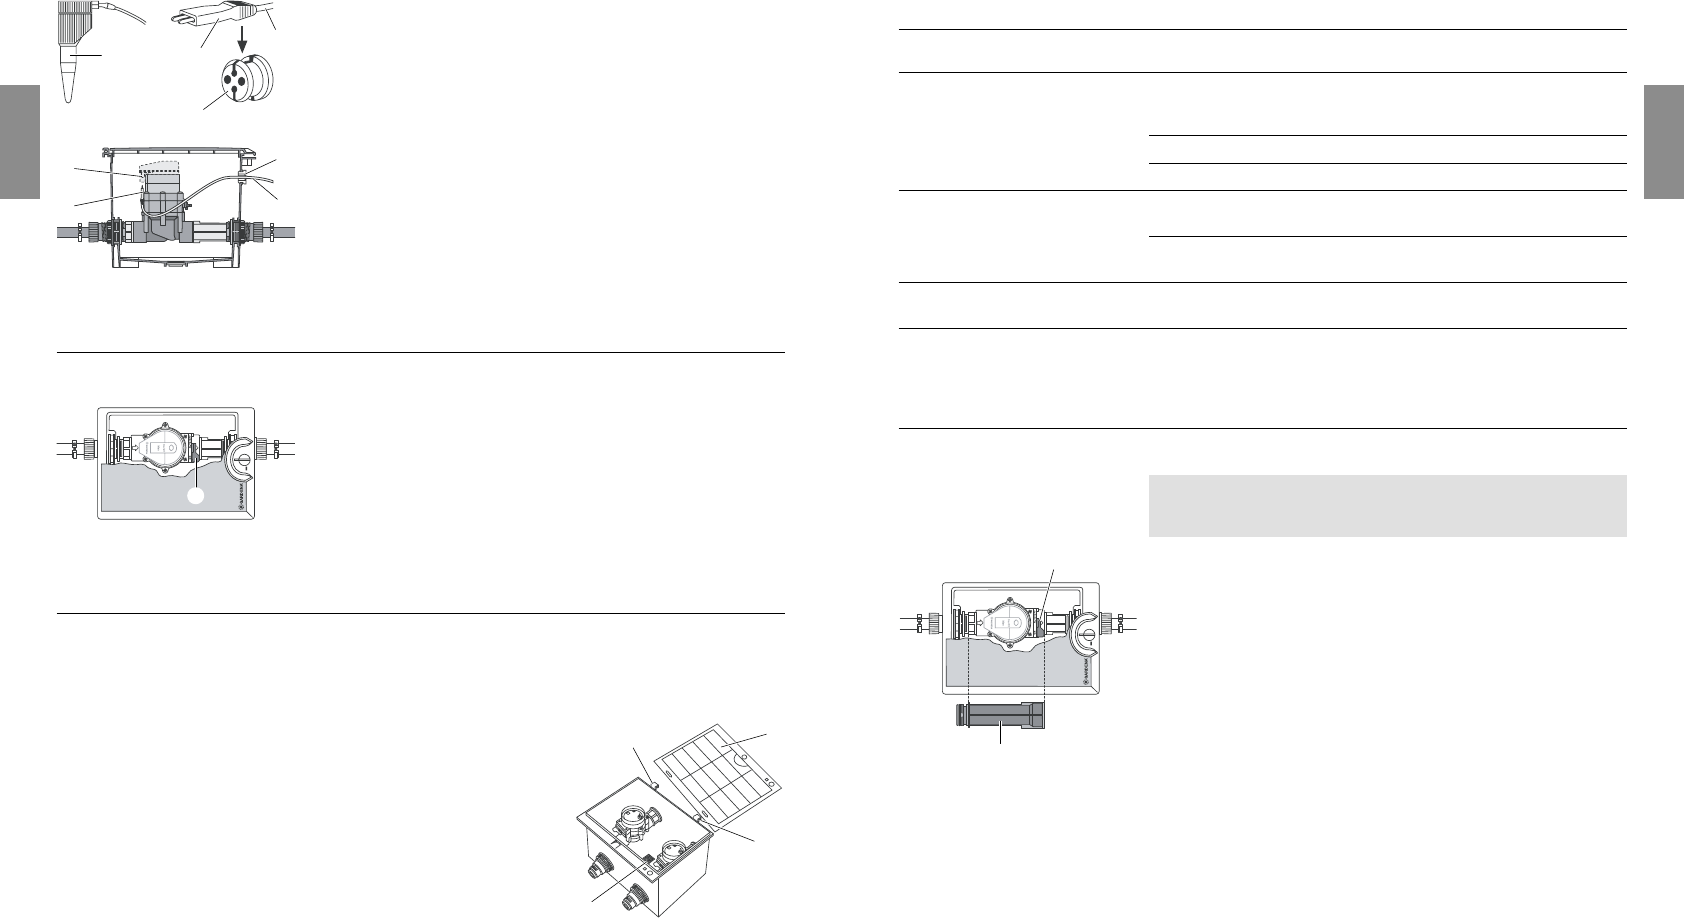
7. Protection against Frost
Valves can be easily removed from the box.
The following precautions must be taken – especially before the
frost period starts – to prevent damage to the Irrigation Valves
and the entire watering system:
1. Close the water tap and disconnect the hose from the
GARDENA Water Connection Point Art. No. 1594.
This allows air to flow freely.
2. If the watering system is directly connected to the water tap,
turn off the water supply and open the venting tap.
3. Set the selection lever
L
of all valves to the “ON” position.
4. Empty the system (e.g. using compressed air)
– or –
on slopes remove the valve located at the lowest level
and store safe from frost
– or –
remove all valves and store safe from frost.
5. After removing the valve, install the flushing pipe
9
(see “3. Assembly”,
“Flush the system”
).
Prevents dirt collecting in the system.
6. Remove the battery from the Control Unit / Radio Receiver.
7. Lock the box lid (see “3. Assembly”,
“Lock the box lid”
).
N
O
O
D
L
9