


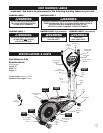
6
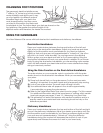
front roller
front bottom view of
base frame assembly
place
screw
here
align
notches
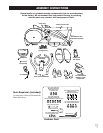
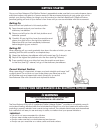
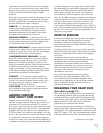
STEP 1 – Vertical Column Assembly
Lift up the Vertical Column Tube and insert into Base
Frame Assembly. When lifting the Vertical Column Tube,
be sure you don’t cut wires.
It is critical that you line up the sticker on the
Vertical Column Tube and Main Frame to assure
proper alignment.
Insert the six M8 x 15mm Allen Bolts, M8 Spring Washers
and M8 Curved Washers, finger tighten. Once all Bolts are
inserted you must tighten with
the long Allen Wrench provided.
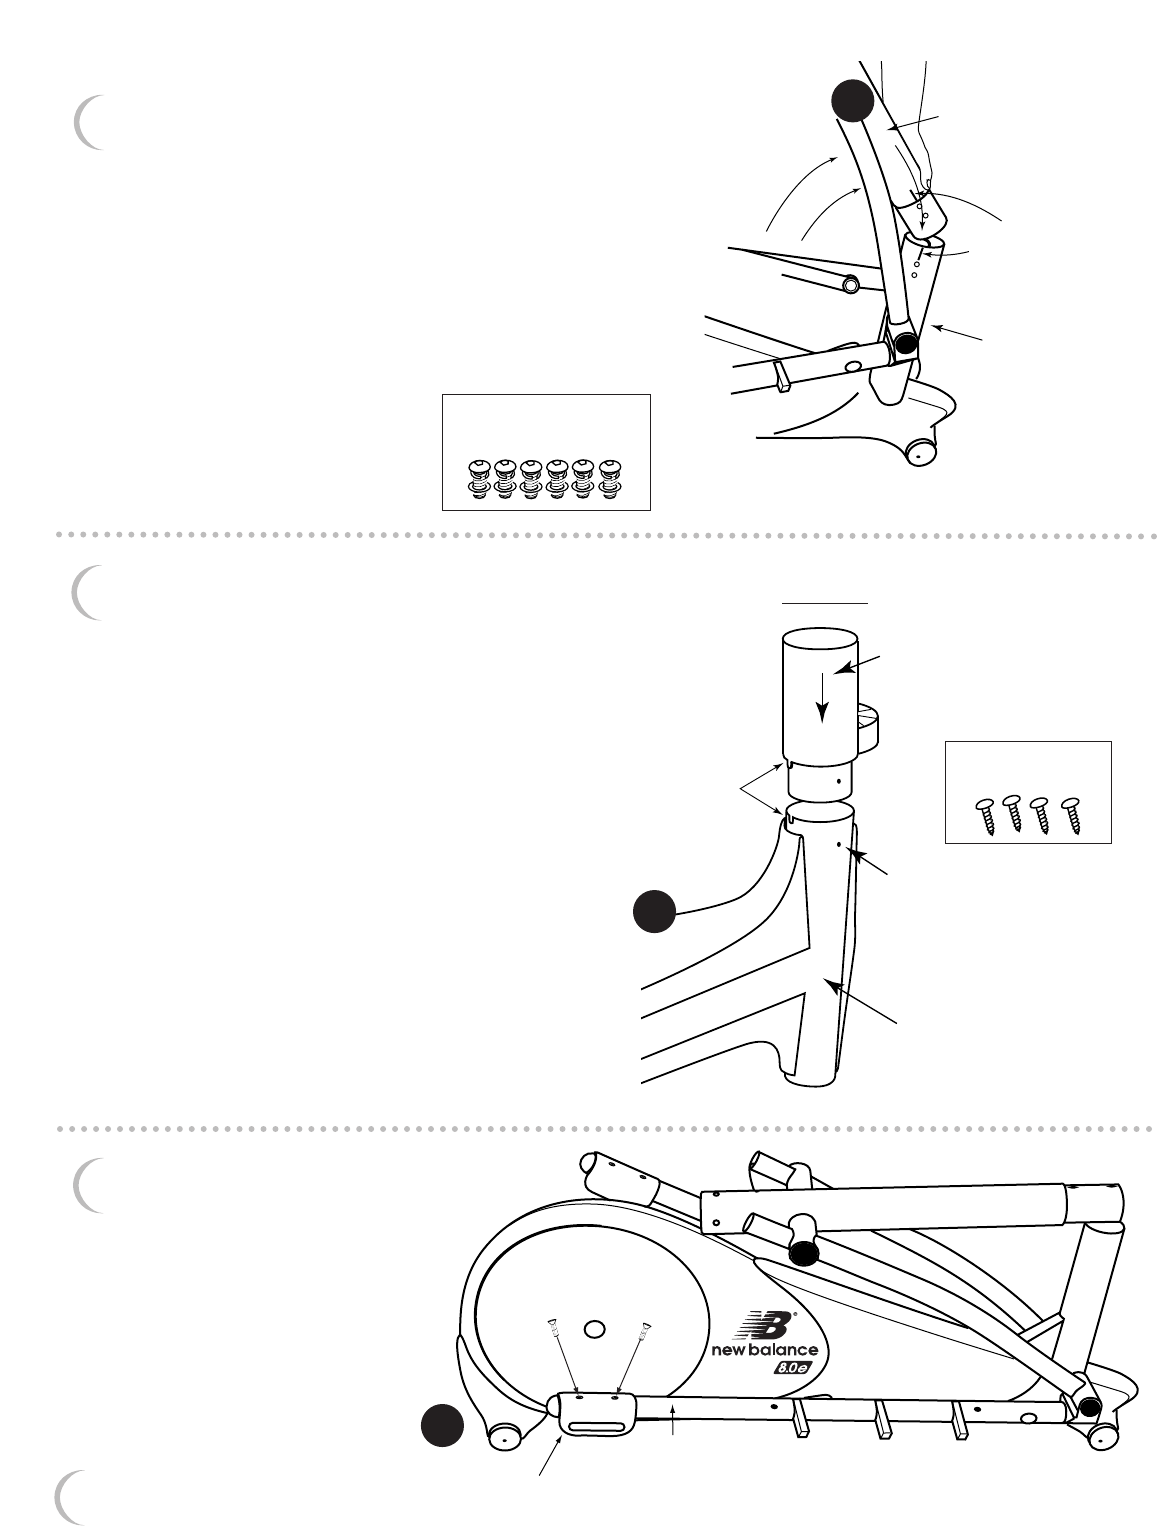
STEP 2 – Rear Caps/Front Rollers Assembly
Carefully lay the unit on its side. Remove the
orange Shipping Plugs by prying them out
with a Screwdriver. Put Rear Cap and Front
Roller on the appropriate ends of the Base
Frame Assembly that are facing up. Aligning
the notches in the Base Frame Assembly with
the notches in the Rear Caps and Front
Rollers, insert the two M6 x 20mm Phillips
Screws and tighten with the
Screwdriver provided.
Lay the Unit on the other side and repeat.
Stand unit back up to proceed.
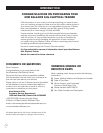
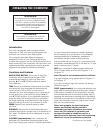
2
3
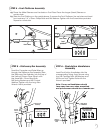
STEP 3 – Foot Tube Shroud
Assembly
Place the Foot Tube Shroud over
the two rear holes on the Foot
Tube. Attach with the M6 x 15mm
Phillips Bolts. The Foot Tube
Shrouds are marked “L” and “R”.
M6 x 20mm
phillips screws
M8 x 15mm allen bolts,
M8 spring washers and
M8 curved washers
alignment
stickers
vertical column tube
base frame
assembly
1
example
foot tube
foot tube shroud
M6 x 15mm
phillips bolts
RIGHT SIDE