


9
before each ride for abrasions, tears and tightness.
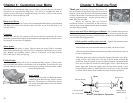
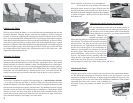
To install the seat on your Metro, first make sure
both quick release skewers are open. Slide the seat rails
onto the main frame track from the front. Slide the seat to
the middle of the track and tighten the quick release skewers
as shown in Chapter 1. Make sure the seat does not slide
back under load.
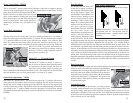
Adjusting the seat for proper leg extension
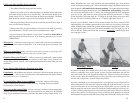
It is very important to set the seat in the proper position. If
possible, set your Metro on a rear wheel type wind trainer. If
you don't have access to such a trainer, have a friend hold the
bike up behind your seat while you sit and pedal the bike
normally. When the leg
length is set properly, you
will be pedaling with just a slight bend in your knee at
full extension. Get off the seat, loosen the seat quick
release skewers, and slide the seat forward or back
the right spot for you. Tighten both seat quick-release
skewers and sit down again. If you need further ad-
justment to get the proper leg extension, get off the
seat and try again. Take your time—this is a very im-
portant adjustment. Once you have your leg exten-
sion set—and confirm this by spending some time
riding the bike—you might want to make a discreet
mark on the seat track. This way you can remove the
seat for transport, and still get it back exactly where you like it.
Adjusting the Gears
Adjusting gear systems can be a complex task, usually best left to experienced mechan-
ics. We include the manufacturer's instruction sheets on the gear systems, if you are
interested in working on the bike they are highly suggested reading. We'll go over a few
of the items here, in case you need some more information. Remember, if the standard
adjustment procedures don't seem to work, something else
is probably wrong, and perhaps you should see your local
mechanic.
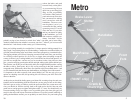
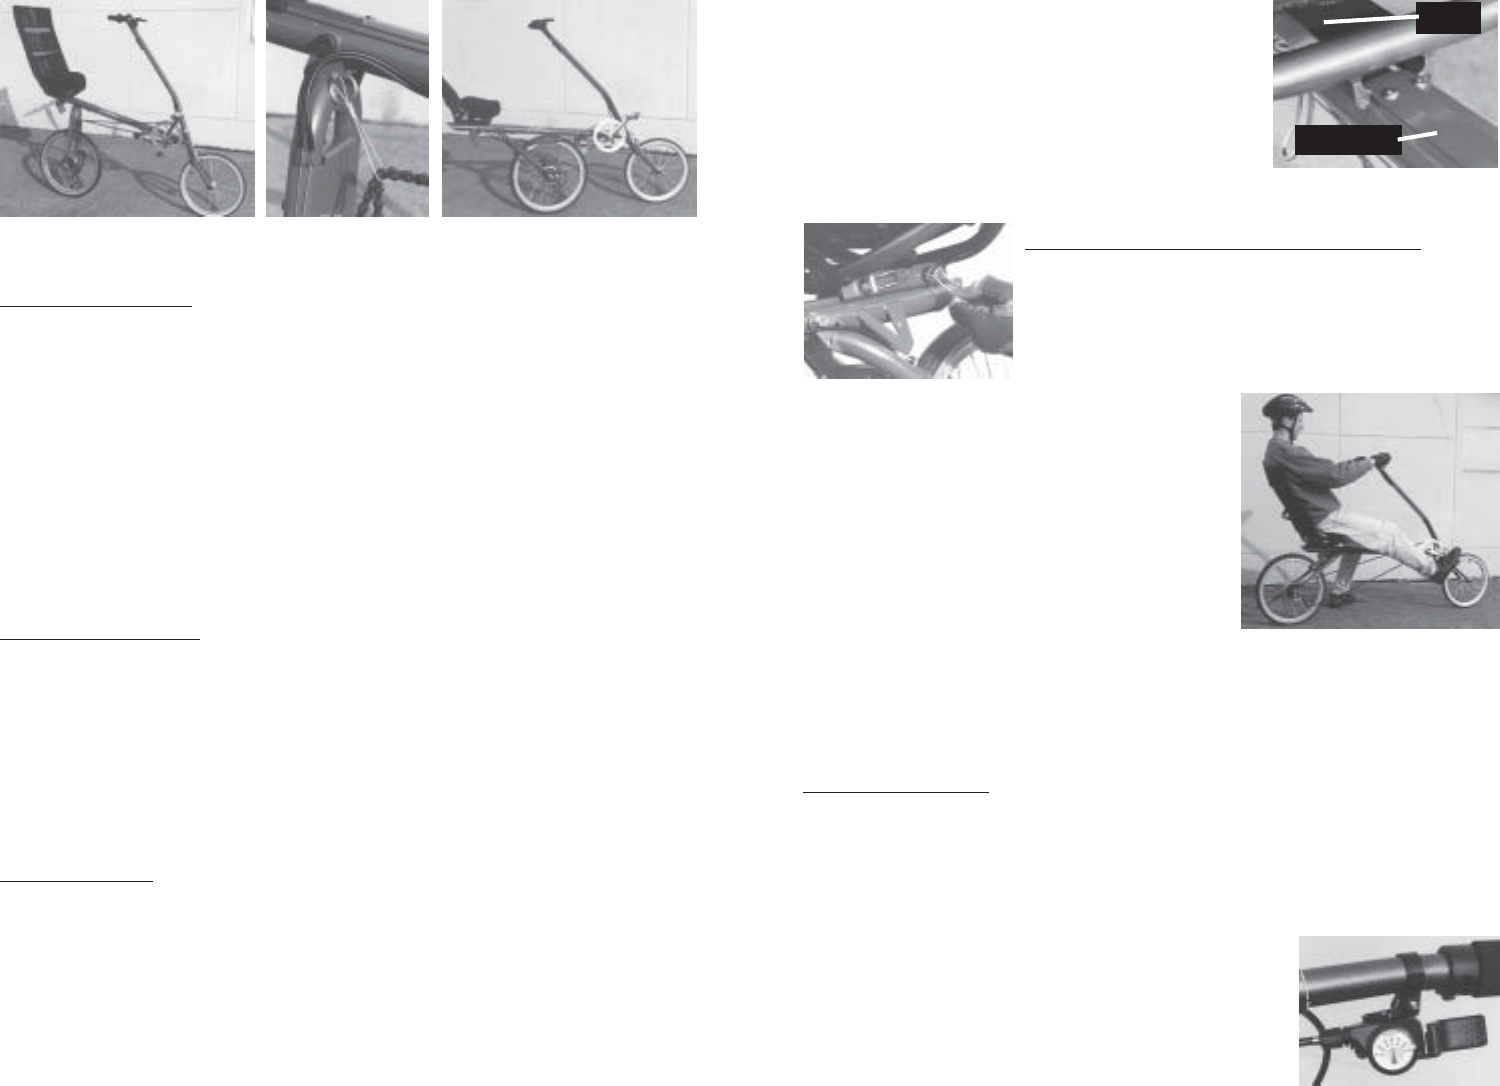
NEXUS Shifter
Seat Attachment
Seat Track
Seat
Proper Leg Extension
Setting the Seat Position
12
Photo of MetrPhoto of Metr
Photo of MetrPhoto of Metr
Photo of Metr
o showingo showing
o showingo showing
o showing
prpr
prpr
pr
oper leg extensionoper leg extension
oper leg extensionoper leg extension
oper leg extension
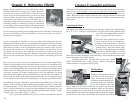
Folding your Metro
The first step to folding the Metro is to sit on the bike and reach underneath the seat and
loosen the elastomer clamping wingnut. Undo the nut completely, Fold the swing arm
forward. To keep from misplacing the clamping nut, thread it back onto the bolt it came
off of.. If you want the partially folded position for car top transport, then stop the swingarm
when the hole in the swingarm brace lines up with the partial fold hole on the main frame
of the bike. Capture the chain by looping cable of the chain hanger/locking pin around
the chain, as illustrated. Then insert the pin into the appropriate hole, locking the swingarm
in place. For tighter storage, allow the swingarm to move all the way forward, and align
the swingarm brace hole with the fully folded position hole on the main frame , then
capture the chain and insert the pin.
Adjusting the Brakes
The brakes are set by the factory, and your shop will have checked them. However, you
should examine your brakes before you ride each time. Test the brake levers. They should
operate smoothly, and feel firm when they clamp. The VR30S Metro has caliper brakes
front and rear. As the pads wear out, you can keep proper braking by using the adjusting
barrel on each caliper to tighten the brake. The VR30N Metro has a standard caliper
front brake, but rear wheel braking is handled by the Nexus' own internal brake. Be
careful not to touch any part of the rear hub after using the brake, it can get quite hot.
Final Inspection
Your Vision™ recumbent is complete! One last thing to do -- and also before each ride
-- is to inspect all the nuts and bolts on the bike, looking for any parts that may have
loosened in shipment. Check the alignment of the wheels, and inspect the brakes to make
sure the shoes contact the rims squarely and don't bind. The andlebars should be aligned
and able to turn from side to side without binding or interference. Check that the wheel
skewers are secure, and that a sharp blow on the wheel while you hold the bike off the
ground will not jar the wheel loose. Make sure your seat skewers are tight, and the seat
won't slide back suddenly. See Chapter 1 for more details.
First Fold Position
Locking Pin Fully Folded