


English - 4
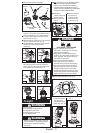
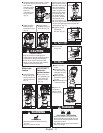
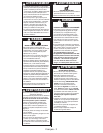
■ Push lighted match
through lighting hole,
hold near mantle and
open fuel valve fully.
(Fig. 15)
Match Light
Lantern
INSTASTART™
Electronic
Ignition Lantern
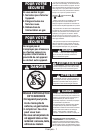
CAUTION
r4&37*$&4"'&5:
rKeep all connections and ttings clean.
Inspect propane cylinder and lantern propane
connections for damage before attaching.
rDuring set up, check all connections and
ttings for leaks using soapy water. Bubbles
indicate a leak. Never use a ame.
■ Open burner valve
and repeatedly push
igniter button and
ignite the mantles.
(Fig. 16)
Fig. 15 Fig.16
WARNING
r#63/)";"3%
r/FWFSMFBWFMBOUFSOVOBUUFOEFEXIFOIPU
or in use.
r,FFQPVUPGSFBDIPGDIJMESFO
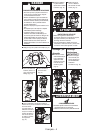
NOTE: If lantern does not
light, repeat above step. If
the lantern does not light
after several attempts,
check for a spark while
clicking the igniter. If no
spark is present, check
the electrode gap. The
gap should be about
.2” (5.0 mm). Carefully
bend electrode to set
gap. If the lantern is wet
due to rain, high humidity, etc., the electrode may
not spark. Use lighting procedure for match light
version lanterns. (Fig. 17)
■ Brightness may be
adjusted with
fuel valve. (Fig. 18)
Fig. 18
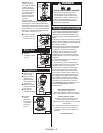
To Turn Off
■ .BLFTVSFMBOUFSO
is cool.
■ .PWFMBOUFSOBXBZ
from ame (including
pilot lights) and other
ignition sources.
■ Remove propane
cylinder from lantern.
(Fig. 20)
■ Replace protective cap
on propane cylinder .
■ Turn fuel valve
off. (Fig. 19)
Fig. 20
To Store
Fig. 19
DANGER
r&91-04*0/'*3&)";"3%
r/FWFSTUPSFQSPQBOFOFBSIJHIIFBUPQFO
ames, pilot lights, direct sunlight, other igni-
tion sources or where temperatures exceed
120 degrees F (49°C).
r5IFDZMJOEFSNVTUCFEJTDPOOFDUFEXIFOUIF
lantern is in storage.
■ Lantern can
be placed in
base for secure
storage. (Fig. 21)
Fig. 21
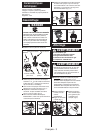
Fig. 13
Fig. 14
■ Reecting position.
Bottom tab rests
inside lantern frame.
(Fig. 13)
■ Storage position.
Reector hangs from
back rails. (Fig. 14)
.2”
(5.0 mm)
Fig. 17
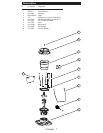
■ Assemble reector to back of lantern. Position
the reector clips onto the center of the two
back rails and
slide either upward
into the reecting
position or
downward into the
storage position.
(Fig. 12)
Fig. 12