


Operation Guide 3135 3206
2
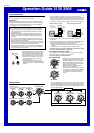
Timekeeping
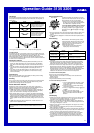
Use the Timekeeping Mode to set and view the current time and date.
• In the Timekeeping Mode, an indicator moves along the ring around the
display as seconds advance.
• The tide graph shows tidal movements for the current date in accordance
with the current time as kept in the Timekeeping Mode.
• The Moon phase indicator shows the current Moon phase in accordance
with the current date as kept in the Timekeeping Mode.
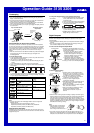
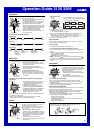
• In the Timekeeping Mode, you can press E to toggle the display contents
as shown below.
Day of week
Month – Day
Day of the Week Screen
PM indicator
Hour :
Minute
Second
Barometric Pressure
Graph Screen
Month – Day
Barometric
pressure
graph
Press E.
▲
▲
Hour :
Minute
Second
Read This Before You Set the Time and Date!
This watch is preset with a number of city codes, each of which represents
the time zone where that city is located. When setting the time, it is important
that you first select the correct city code for your Home City (the city where
you normally use the watch). If your location is not included in the preset city
codes, select the preset city code that is in the same time zone as your
location.
• Note that all of the times for the World Time Mode city codes are displayed
in accordance with the time and date settings you configure in the
Timekeeping Mode.
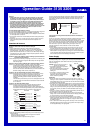
To set the time and date
1. In the Timekeeping Mode, hold down E until the city code starts to flash,
which indicates the setting screen.
2. Use A and C to select the city code you want.
• Make sure you select your Home City code before changing any other
setting.
• For full information on city codes, see the “City Code Table”.
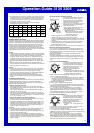
Year
Second
Hour
Minute
Day
Month
12/24-Hour
Format
Power
Saving
Barometric
Pressure Unit
Altitude Unit
Temperature
Unit
City Code
DST
Do this:
Use A (east) and
C(west).
Press A.
Press A.
To do this:
Change the city code
Toggle between Daylight Saving
Time (
) and Standard Time
(
).
Toggle between 12-hour (
12H
)
and 24-hour (
24H
) timekeeping.
Screen
3. Press D to move the flashing in the sequence shown below to select the
other settings.
• The following steps explain how to configure timekeeping settings only.
4. When the timekeeping setting you want to change is flashing, use A and/
or C to change it as described below.
5. Press E to exit the setting screen.
Note
• You also need to enter the Timekeeping Mode in order to configure the
following settings.
Power saving on/off (“To turn Power Saving on and off”)
Temperature, barometric pressure, and altitude units (“To select the
temperature, barometric pressure, and altitude units”)
Press A
.
Use A (+) and C (–).
Reset the seconds to
00
Change the hour or minute
Change the year
Change the month or day
Daylight Saving Time (DST)
Daylight Saving Time (summer time) advances the time setting by one hour
from Standard Time. Remember that not all countries or even local areas use
Daylight Saving Time.
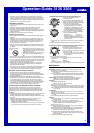
To change the Daylight Saving Time (summer time) setting
1. In the Timekeeping Mode, hold down E until
the city code starts to flash, which indicates
the setting screen.
2. Press D and the DST setting screen appears.
3. Use A to cycle through the DST settings in
the sequence shown below.
DST off ( ) DST on ( )
4. When the setting you want is selected, press
E to exit the setting screen.
• The DST indicator appears to indicate that
Daylight Saving Time is turned on.
l
l
l
l
l
l
l
l
l
l
l
l
l
l
l
l
l
l
l
l
l
l
l
l
l
l
l
l
l
l
DST indicator
Digital Compass
A built-in bearing sensor detects magnetic north and indicates one of 16
directions on the display. Direction readings are performed in the Digital
Compass Mode.
• You can calibrate the bearing sensor if you suspect the direction reading is
incorrect.
• See “Using the Digital Compass While Mountain Climbing or Hiking” for
some real-life examples of how to use this feature.
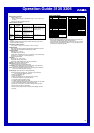
To enter and exit the Digital Compass Mode
1. While in the Timekeeping Mode or in any of
the other sensor modes, press C to enter the
Digital Compass Mode.
• At this time, the watch will start a Digital
Compass operation. After about two
seconds, letters appear on the display to
indicate the direction that the 12 o’clock
position of the watch is pointing.
•
The direction reading on the display is
updated each second for up to 20 seconds,
after which measurement stops automatically.
2. Press D to return to the Timekeeping Mode.
Current time
12 o’clock position
Two seconds
▲
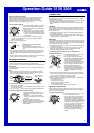
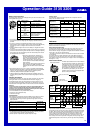
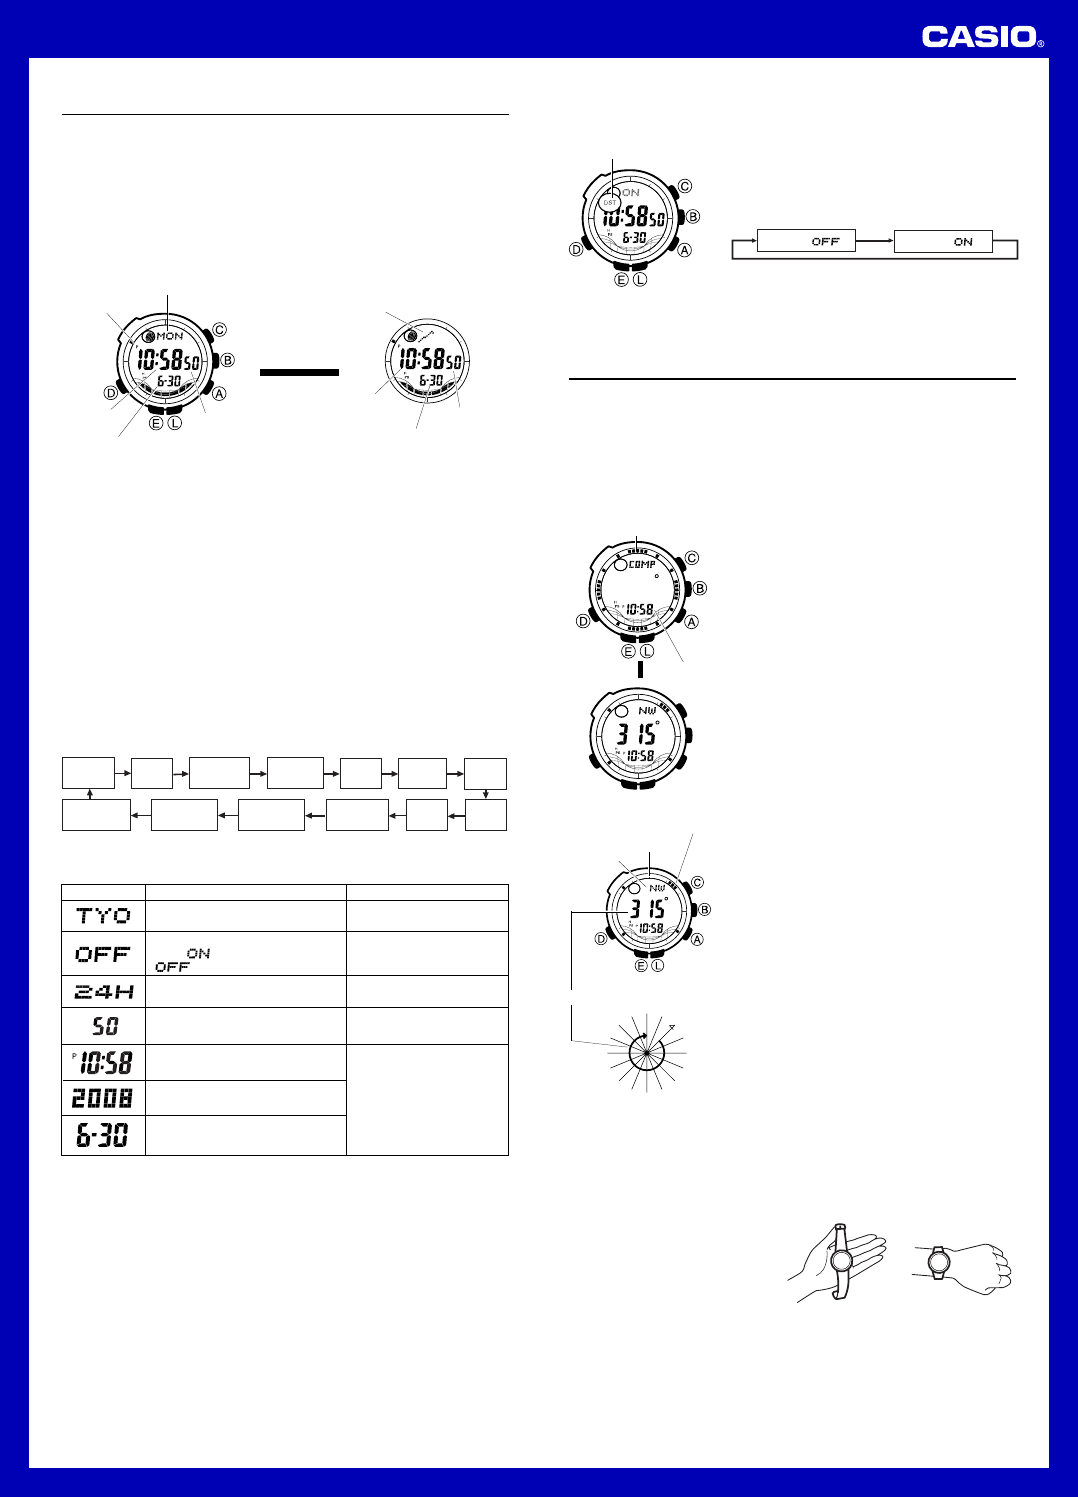
To take a direction reading
1. While the watch is in the Digital Compass
Mode, place it on a flat surface, or if you are
wearing the watch, make sure that your wrist
is horizontal (in relation to the horizon).
2. Point the 12 o’clock position of the watch in
the direction you want to measure.
3. Press C to start a Digital Compass
measurement operation.
• After about two seconds, the direction that the
12 o’clock position of the watch is pointing
appears on the display.
• Also, four pointers appear to indicate magnetic
north, south, east, and west.
• After the first reading is obtained, the watch
continues to take direction readings
automatically each second, for up to 20
seconds.
Direction
indicator
North pointer
12 o’clock position
NW
0°
W
N
W
W
W
S
W
SW
S
S
W
S
SSE
SE
E
S
E
E
E
N
E
NE
N
N
E
N
NNW
90°
180°
270°
Angle value (in degrees)
• While the watch is taking compass readings, it displays a direction angle, a
direction indicator, and four direction pointers, all of which change dynamically
when the watch is moved. The direction angle, direction indicator and
direction pointers all disappear from the display after the compass reading
operation is complete. Use the direction indicators imprinted on the bezel to
record the indicated direction. For details, see “Using the Digital Compass
While Mountain Climbing or Hiking”.
Note
• Note that taking a measurement
while the watch is not horizontal
(in relation to the horizon) can
result in large measurement error.
• The margin of error for the angle value and the direction indicator is ±11
degrees. If the indicated direction is northwest (NW) and 315 degrees, for
example, the actual direction can be anywhere from 304 to 326 degrees.