


Operation Guide 5142
E-19
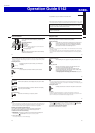
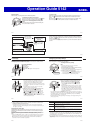
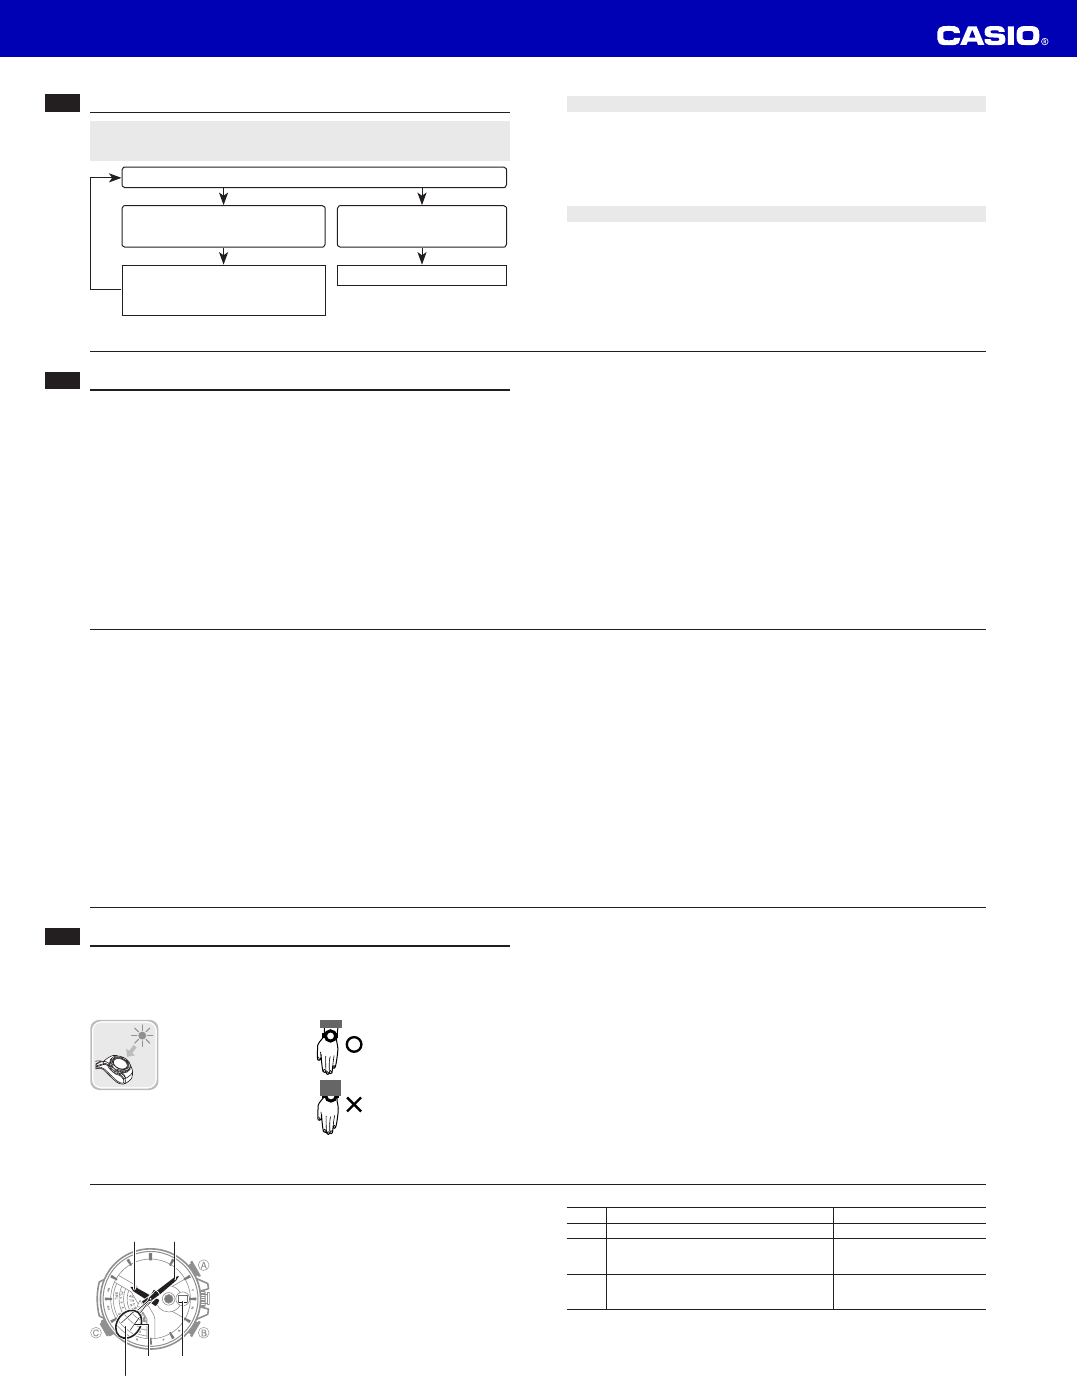
Level Hand Movement Function Status
1 Normal. All functions enabled
2
x
x
Second Hand moves at two-second intervals.
n
n
Day changes to 1 (home position).
Beeper, time calibration signal
reception, and countdown timer
operation disabled
3
x
x
Second Hand stopped.
z
z Hour Hand and c
c
Minute Hand stopped at
12 o’clock.
All functions disabled
When power drops to Level 3, all functions will be disabled but the watch will x
continue to keep time internally for about one week. If you recharge the battery
suffi ciently during this period, the analog hands will move automatically to the
correct setting and regular timekeeping will resume. After one week, all settings
(including timekeeping) will be cleared. Recharging the battery will reset all settings
to their initial factory defaults.
E-18
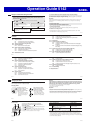
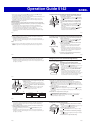
Power Levels
You can get an idea of the watch’s power level by
observing the movement of the
x
Second Hand in the
Timekeeping Mode.
If the
x
x
Second Hand is moving normally at one-second
intervals, power is at Level 1.
If the
x
x
Second Hand is moving at two-second intervals,
power is at Level 2, which is quite low. Expose the watch
to light as soon as possible so it can charge.
Moves at two-second
intervals.
+
6@
B
E-17
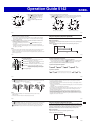
Warning!
Leaving the watch in bright light for charging can cause it to become quite hot.
Take care when handling the watch to avoid burn injury. The watch can become
particularly hot when exposed to the following conditions for long periods.
On the dashboard of a car parked in direct sunlight
x
Too close to an incandescent lamp x
Under direct sunlight x
Important!
Keep the watch in an area normally exposed to bright light when storing it for long
x
periods. This helps to ensure that power does not run down.
Storing the watch for long periods in an area where there is no light or wearing it in
x
such a way that it is blocked from exposure to light can cause power to run down.
Make sure that the watch is exposed to bright light whenever possible.
E-16
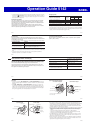
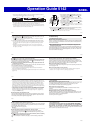
Charging the Watch
The face of the watch is a solar panel that generates power from light. The generated
power charges a built-in rechargeable battery, which powers watch operations. The
watch charges whenever it is exposed to light.
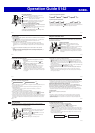
Charging Guide
Whenever you are not
wearing the watch, be sure
to leave it in a location
where it is exposed to light.
Best charging
x
performance is achieved
by exposing the watch to
light that is as strong as
possible.
When wearing the watch,
makes sure that its face is
not blocked from light by the
sleeve of your clothing.
The watch may enter a
x
sleep state (page E-22) if
its face is blocked by your
sleeve even only partially.
E-15
E-82 To stop the alarm
E-83 Checking the Current Time in a Different Time Zone
E-84 To view the time in another time zone
E-86 To check whether a time zone is AM or PM
E-86 To specify standard time or daylight saving time (DST) for a city
E-88 Adjusting Home Positions
E-89 To adjust home positions
E-93 Troubleshooting
E-105 Specifi cations
E-14
E-65 To perform an elapsed time operation
E-65 To pause at a split time
E-69 Using the Stopwatch (Stopwatch lap mode)
E-70 To enter and exit the Stopwatch Lap Mode
E-71 To perform an elapsed time operation
E-71 To perform lap time measurement
E-72 To recall lap data
E-73 Using the Countdown Timer
E-74 To specify the countdown start time
E-76 To perform a countdown timer operation
E-77 To stop the alarm
E-78 Using the Alarm
E-79 To change the alarm time setting
E-82 To check the AM/PM setting of the alarm
E-82 To turn the alarm on or off
E-13
E-40 To determine the watch’s current mode
E-40 To return to the Timekeeping Mode from any other mode
E-41 To select a mode
E-44 Timekeeping
E-45 Confi guring Home City Settings
E-45 To confi gure Home City settings
E-51 To toggle the Home City time between standard time and daylight
saving time
E-53 To manually override a time calibration standard time/daylight saving
time setting
E-55 Confi guring Current Time and Date Settings Manually
E-55 To change the current time setting manually
E-59 To change the current date setting manually
E-63 Using the Stopwatch (Stopwatch Split Mode)
E-65 To perform elapsed time measurement
E-12
Contents
E-2 About This Manual
E-3 Using the Crown
E-8 To disable crown button mode switching
E-9 To re-enable crown button mode switching
E-10 Things to check before using the watch
E-16 Charging the Watch
E-23 To recover from the sleep state
E-24 Radio Controlled Atomic Timekeeping
E-30 To get ready for a receive operation
E-33 To perform manual receive
E-35 To check the result of the latest receive operation
E-37 Mode Reference Guide
E-11
2. Check the Home City and the daylight saving time (DST) settings.
Use the procedure under “To confi gure Home City settings” (page E-45) to confi gure
your Home City and daylight saving time settings.
Important!
Proper time calibration signal reception depends on correct Home City, time, and
date settings in the Timekeeping Mode. Make sure you confi gure these settings
correctly.
3. Set the current time.
x To set the time using a time calibration signal
See “To get ready for a receive operation” (page E-30).
x To set the time manually
See “Confi guring Current Time and Date Settings Manually” (page E-55).
The watch is now ready for use.
For details about the watch’s radio controlled timekeeping feature, see “Radio
x
Controlled Atomic Timekeeping” (page E-24).
E-10
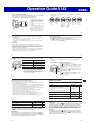
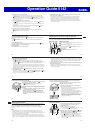
Things to check before using the watch
1. Press and hold the crown button (without unlocking the crown) for at
least two seconds to enter the Timekeeping Mode, and then observe the
movement of the
x
Second Hand.
Is the
x
Second Hand moving smoothly at one-second intervals?
Is the
x
Second Hand moving at
two-second intervals or is it stopped
completely?
Go to step 2.
The watch is charged suffi ciently.
For details about charging, see
“Charging the Watch” (page E-16).
Power is low. Charge the watch by placing
it in a location where it is exposed to light.
For details, see “Charging the Watch”
(page E-16).
NO
YES
YES
NEXT