


2345/2347-3
Using the barometric pressure graph
Barometric pressure is affected by changes in weather and temperature. The
following shows how to interpret the data that appears on the barometric
pressure graph.
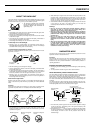
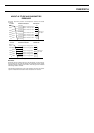
A rising graph generally means better weather.
A falling graph generally means deteriorating
weather.
Note that if there are sudden changes in weather or
temperature, the graph line of past measurements
may run off the top or bottom of the display. The
entire graph will become visible once barometric
pressure conditions stabilize.
The following conditions cause the barometric pressure measurement to be
skipped, with the corresponding point on the barometric pressure graph being
left blank.
• Barometric reading that is out of range (460 hPa/mb to 1100 hPa/mb/13.55
inHg to 32.45 inHg).
• Sensor malfunction.
• Dead battery.
Selecting the unit of measurement
1. Use C to enter the Barometer Mode.
2. Hold down A until “OFF” or the current barometric pressure value flashes
on the display.
3. Press C to change to the measurement unit selection screen.
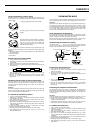
4. Each press of D or B cycles the barometric pressure measurement unit
as shown below.
hPa
mb
inHg
5. After you select the measurement unit you want, press A to return to the
Barometer Mode screen.
• Note that all measurement data currently in memory is also deleted
whenever you change the barometric pressure or temperature unit of
measurement.
Calibrating the barometric pressure measurement
The sensor of this watch is calibrated at the factory before shipment, and
further adjustment is normally not required. If noticeable error is found in the
barometric pressure readings produced by the watch, you can adjust it to
correct the error.
Important!
Incorrectly calibrating the barometric pressure measurement of this watch can
result in incorrect readings. Compare the readings produced by the watch with
those of another reliable, accurate barometer.
To calibrate the barometric pressure
1. Use C to enter the Barometer Mode.
2. Hold down A until “OFF” or the current barometric pressure calibration
value flashes on the display.
• “OFF” appears when the factory setting is currently set as the current
barometric pressure calibration value.
3. Each press of D increases the displayed barometric pressure by 1 hPa/mb,
while pressing B decreases it. Holding down either button changes the
value at high speed.
• If inHg is currently selected as the unit of measurement, the above
operations change the reading by 0.05 inHg.
• Pressing B and D at the same time returns to the “OFF” setting.
4. After calibrating the barometric pressure, press A to return to the
Barometer Mode screen.
THERMOMETER MODE
A built-in temperature sensor measures temperature and shows the measured
value on the display. The thermometer can be calibrated to correct for errors.
Important!
Temperature measurements are affected by your body temperature (while you
are wearing the watch), direct sunlight, and moisture. To achieve a more
accurate temperature measurement, remove the watch from your wrist, place
it in a well-ventilated location out of direct sunlight, and wipe off all moisture
from the case. It takes approximately 20 to 30 minutes for the case of the
watch to reach the temperature of the surrounding air.
About temperature measurements
The watch takes temperature measurements every five seconds for the first
two minutes after you enter the Thermometer Mode. The Thermometer Mode
indicator 1 flashes on the display during these two minutes.
After the first two minutes, the Thermometer Mode indicator 1 stops flashing,
and the watch automatically takes measurements every five minutes.
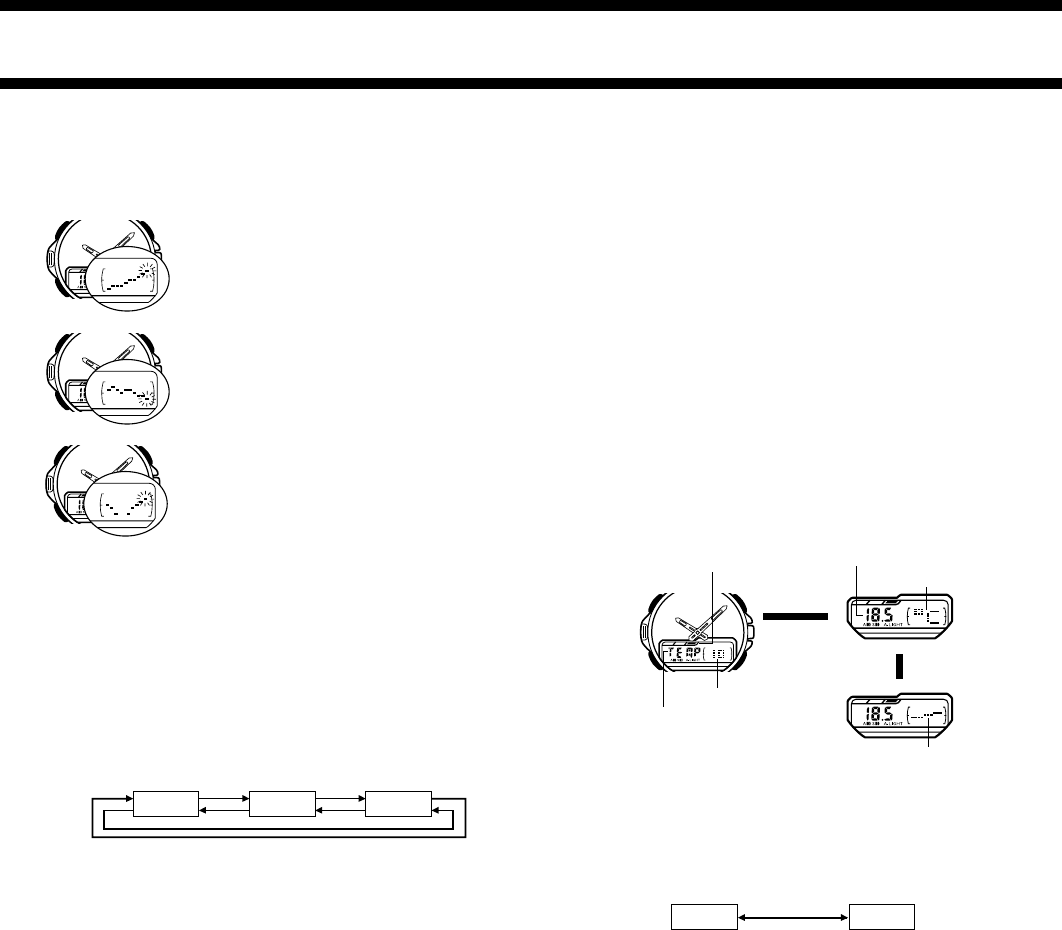
Understanding the temperature display
The display shows “– – . – °C” (or °F) if a measured value falls outside the
range of –10.0°C to 60.0°C (14.0°F to 140.0°F). The normal display will return
as soon as the temperature returns within the allowable range.
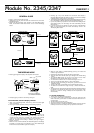
AB
CD
Thermometer Mode indicator 2
Remaining memory
Temperature graph
Press A.
Unit of measurement
Temperature
2 seconds
later
▼
▼
▼
Thermometer Mode indicator 1
Selecting the measurement unit
1. Use C to enter the Thermometer Mode.
2. Hold down A until “OFF” or the current temperature calibration value
flashes on the display.
3. Press C to change to the measurement unit selection screen.
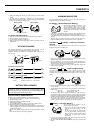
4. Each press of D or B toggles the temperature measurement unit as
shown below.
°C
°F
5. After you select the measurement unit you want, press A to return to the
Thermometer Mode screen.
• Note that all measurement data currently in memory is also deleted
whenever you change the barometric pressure or temperature unit of
measurement.
Calibrating the temperature measurement
The temperature sensor of this watch is calibrated at the factory before
shipment, and further adjustment is normally not required. If noticeable error is
found in the temperature readings produced by the watch, you can adjust it to
correct the error.
Important!
Incorrectly calibrating the temperature measurement of this watch can result
in incorrect readings. Carefully read the following before doing anything.
• Compare the readings produced by the watch with those of another
reliable, accurate thermometer.
• If adjustment is required, remove the watch from your wrist and wait for 20
or 30 minutes to give the temperature of the watch time to stabilize.
To calibrate the temperature
1. Use C to enter the Thermometer Mode.
2. Hold down A until “OFF” or the current temperature calibration value
flashes on the display.
• “OFF” appears when the factory setting is currently set as the current
temperature calibration value.
3. Each press of D increases the displayed temperature by 0.1°C, while
pressing B decreases it. Holding down either button changes the value at
high speed.
• If Fahrenheit is currently selected as the unit of measurement, the above
operations change the reading by 0.2°F.
• Pressing B and D at the same time returns to the “OFF” setting.
4. After calibrating the temperature, press A to return to the Thermometer
Mode screen.