1910-4
Editing a Schedule Record
1. Recall the record you want to edit.
2. Hold down the A button for about two seconds until the record operation
menu appears.
3. Use
and to move the flashing to EDIT, and then press the
key.
4. Make any changes you want to the description and date/time field data.
• Press
to toggle the display between the description field and the date/
time field screens.
• While the date/time field screen is on the display, use
and to move
the flashing in the following sequence.
• To change the Schedule record to an All Day Event, press
while any of
the date digits are flashing. This causes the time setting to disappear. Press
again to make the time setting reappear.
5. When you are finished making all the changes you want, press the A
button.
Deleting a Schedule Record
1. Recall the record you want to delete.
2. Hold down the A button for about two seconds until the record operation
menu appears.
3. Press
to move the flashing to CLR, and then press the key.
4. In response to the confirmation message that appears on the display,
press the
key to delete the record or the A button to abort the
procedure without deleting anything.
Year Month
Day
Minutes
Hour
AB
WORK
HOME
FAX CALL
E-MAIL OTHER
WORK
HOME
FAX CALL
E-MAIL OTHER
TO DO MODE
The To Do Mode makes it possible to keep track of all the important things you
need to do. See “Data Fields” for details on To Do Mode fields.
Entering the To Do Mode
In the Timekeeping Mode, press the
key once to enter the To Do Mode.
• The display initially shows how many
records are stored in the mode and the
percentage of memory that is unused.
Next, the display changes to show a To
Do record.
Inputting a To Do Record
Use the following procedure to input a new To Do record. See “Inputting Text
and Other Data” for full details about inputting characters.
To input a new To Do record
1. In the To Do Mode, hold down the A
button for about two seconds until the
record operation menu appears.
2.
NEW is flashing on the operation menu, so
press the
key to display the new record
input screen.
3. Input the description of the task, and then
press the
key.
4. Use
and to input the priority of the
task as a value from 1 (highest) through 4
(lowest), and then press the
key.
Description
Month Day Year
Priority
AB
WORK
HOME
FAX CALL
E-MAIL OTHER
WORK
HOME
FAX CALL
E-MAIL OTHER
WORK
HOME
FAX CALL
E-MAIL OTHER
5. Input the year, month, and day.
• The number area initially contains all
hyphens. Replace all the hyphens with
values for the year, month, and day.
• Use
and to move the flashing
between digits, and
and to cycle
through numbers at the flashing digit.
6. When you are finished inputting all the data you want, press the A button.
• To Do records are stored in the order you input them.
• A To Do record must have description data to be stored.
Recalling a To Do Record
In the To Do Mode, press to scroll forward through records or to scroll
back.
Year
Day
Month
Checking Finished Tasks
You can check off completed tasks in order to identify them as done.
To check a finished task
1. Recall the record whose task you want to check.
2. Hold down the
key for two seconds, until d (the checkmark) replaces
the priority value on the screen.
• Holding down
for two seconds again changes back to the priority value.
Editing a To Do Record
1. Recall the record you want to edit.
2. Hold down the A button for about two seconds until the record operation
menu appears.
3. Press
to move the flashing to EDIT, and then press the key.
4. Make the changes you want to the description, priority, and date.
• Press
to cycle between the description, priority, and date field screens.
• While the date field screen is on the display, use
and to move the
flashing the following sequence.
5. When you are finished making all the changes you want, press the A
button.
Deleting a To Do Record
1. Recall the record you want to delete.
2. Hold down the A button for about two seconds until the record operation
menu appears.
3. Press
to move the flashing to CLR, and then press the key.
4. In response to the confirmation message that appears on the display,
press the
key to delete the record or the A button to abort the
procedure without deleting anything.
AB
WORK
HOME
FAX CALL
E-MAIL OTHER
WORK
HOME
FAX CALL
E-MAIL OTHER
BROWSER MODE
The Browser Mode makes it possible to keep text on hand all the time. See
“Data Fields” for details on Browser Mode data fields.
About Browser Mode Text
Browser data is grouped according to units called pages. A page consists of a
title and text.
• The Browser Mode has a default page named
äWATCHäPAGE. All
Browser text you input using the procedure under “Inputting Browser Data”
is input into the
äWATCHäPAGE. The äWATCHäPAGE cannot
be renamed, deleted, or moved.
• You can use the Watch Application to create your own user pages and input
Browser text into them on your computer. Then you can download your
Browser pages to the watch. You cannot create user pages with the watch.
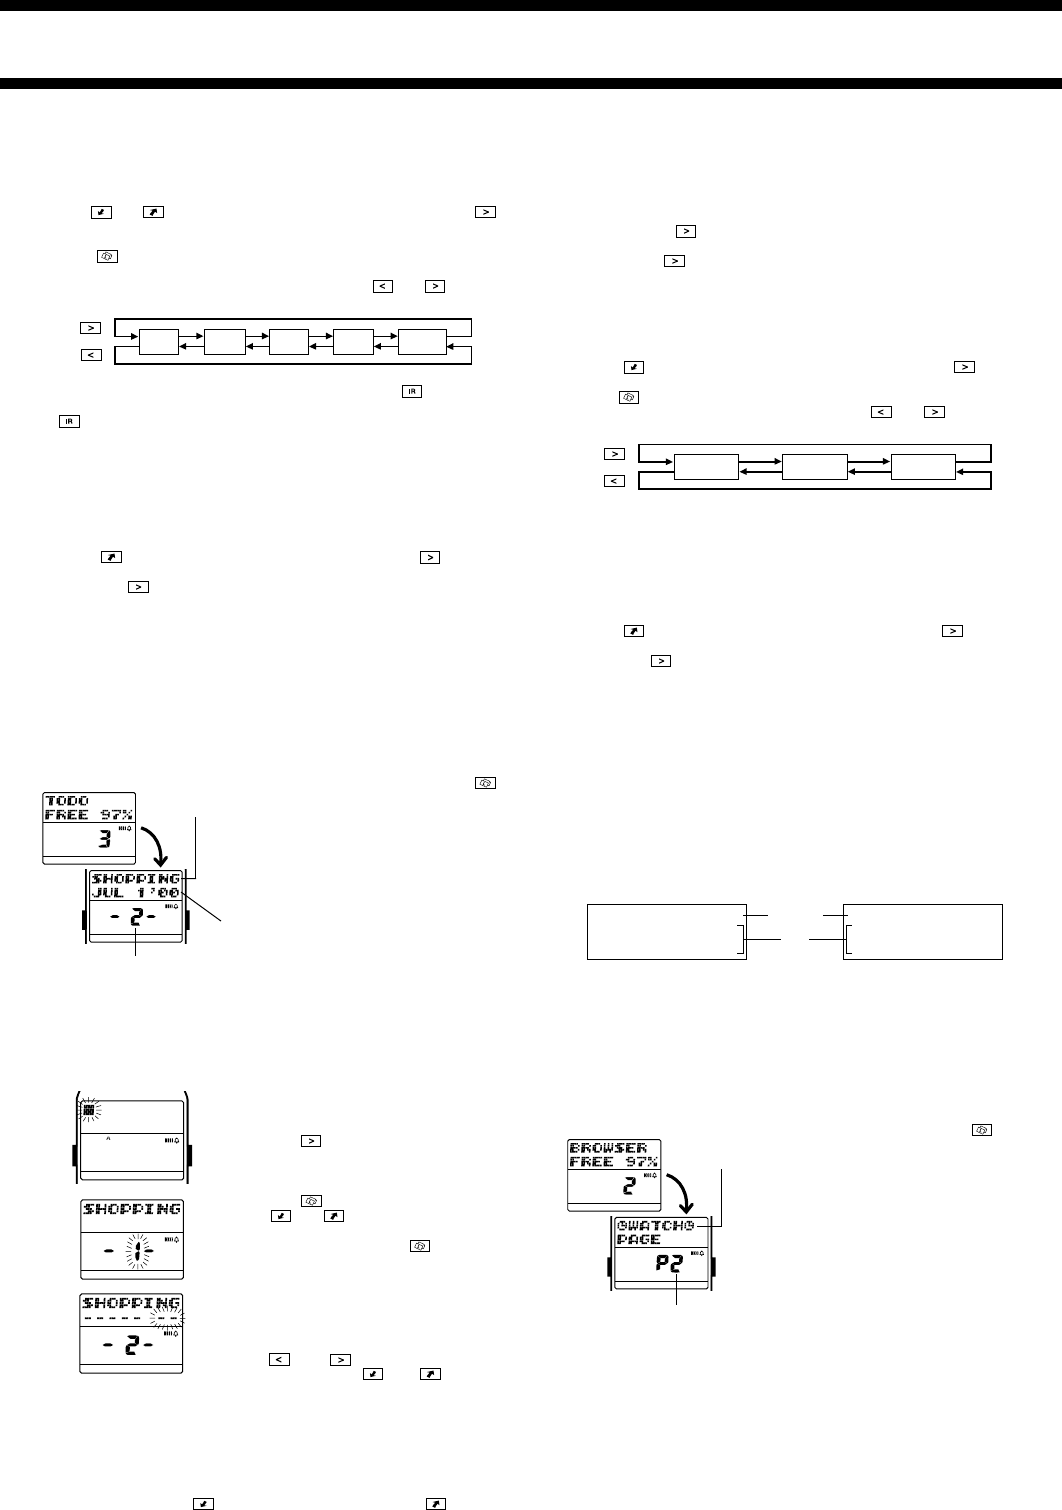
Entering the Browser Mode
In the Timekeeping Mode, press the key
twice to enter the Browser Mode.
• The display initially shows how many
records are stored in the mode and the
percentage of memory that is unused. Next,
the display changes to show the title of the
page whose text you were viewing when you
last exited the Browser Mode.
[Watch Page] [User Page (created with Watch Application)]
Current
page title
Current page number
äWATCHäPAGE
TRAIN; 7:00, 7:30, 8:00
BUS; 7:15, 7:45, 8:15
URL
CASIO; www.casio
G-SHOCK; www.g-shock
Page title
Text


