


1910-3
AB
WORK
HOME
FAX CALL
E-MAIL OTHER
WORK
HOME
FAX CALL
E-MAIL OTHER
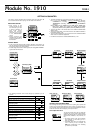
Description
Month Day Day of week
Time
AB
WORK
HOME
FAX CALL
E-MAIL OTHER
WORK
HOME
FAX CALL
E-MAIL OTHER
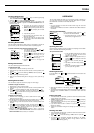
To recall a Contact record
1. Press to display the index screen.
2. Use
and to select the letter that starts the name field data of the
record you want to recall.
• To recall a record in the
äWATCHä index, scroll down to äWATCHä.
3. Press
to display the name field screen of the first record whose name
field begins with the letter you selected in step 2.
• If there is no data stored under the letter you select in step 2, pressing
in step 3 displays the message NO DATA!. Note that you cannot scroll
from the
NO DATA! screen. You must press to return to the letter
selection screen in step 2.
4. Press
to scroll forward through the names or to scroll back.
5. When the name field screen for the Contact record you want to recall is
displayed, press
to display its data screen.
6. Use
and to view the other fields of the Contact record.
• The data field indicator at the bottom of the screen shows which field’s data
is currently on the display.
• Only fields that contain data appear. Fields without data are skipped
automatically.
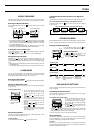
Editing a Contact Record
1. Display the name or data screen of the record you want to edit.
2. Hold down the A button for about two seconds until the record operation
menu appears.
3. Press
to move the flashing to EDIT, and then press the key to
display the record editing screen.
4. Make any changes to the record you want, pressing the
key after you
finish editing each field.
• If you want to leave the data in a field as it is, press the
key without
making any changes.
5. When you are finished making all the changes you want, press the A
button.
Deleting a Contact Record
1. Display the name or data screen of the record you want to delete.
2. Hold down the A button for about two seconds until the record operation
menu appears.
3. Press
to move the flashing to CLR, and then press the key.
4. In response to the confirmation message that appears on the display,
press the
key to delete the record or the A button to abort the
procedure without deleting anything.
SCHEDULE MODE
The Schedule Mode helps to keep you on time all the time by letting you take
a record of your appointments with you wherever you go. Schedule alarms
sound to remind you of important events. See “Data Fields” for details on
Schedule Mode fields.
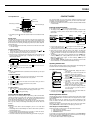
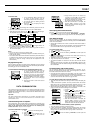
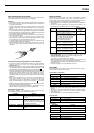
Entering the Schedule Mode
In the any mode, press the key to enter the
Schedule Mode.
• The display initially shows how many
Schedule records are stored and the
percentage of memory that is unused. Next,
the display changes to the next scheduled
appointment.
Inputting a Schedule Record
Use the following procedure to input a new Schedule record. See “Inputting
Text and Other Data” for full details about inputting characters.
To input a new Schedule record
1. In the Schedule Mode, hold down the A
button for about two seconds until the
record operation menu appears.
2.
NEW is flashing on the operation menu, so
press the
key to display the new record
input screen.
3. Input the description of the appointment,
and then press the
key.
• The initial date set for a new Schedule
record is today’s date, as kept in the
Timekeeping Mode.
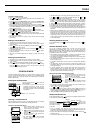
Day of the week
S (Sunday), M (Monday),
T (Tuesday), W (Wednesday),
T (Thursday), F (Friday),
S (Saturday)
0:00 to 11:59
12:00 to 17:59
18:00 to 23:59
AB
WORK
HOME
FAX CALL
E-MAIL OTHER
WORK
HOME
FAX CALL
E-MAIL OTHER
Separator
Current day of the week
Current time
4. Input the date (year, month, day), and time (hour and minutes).
• Use
and to move the flashing between the digits, and and
to cycle through numbers at the flashing digit.
• To create a Schedule record as an All Day Event (for an anniversary,
birthday, or event that takes all day), set the year, month, and day, and then
press the
key. This causes the time setting to disappear from the display.
5. When you are finished inputting all the data you want, press the A button.
• The Schedule record screen shows the day of the week in place of the year.
• Schedule records are automatically sorted according to date and time.
• A standard Schedule record must have description and date, and time data
to be stored. An All Day Event Schedule record must have description and
date data.
• When inputting a Schedule record, if you input a time but then change your
mind and want to change the record to an All Day Event, you can simply
delete the time. If you do this, however, the time you originally input remains
associated with the All Day Event, even though it does not appear on the
watch display. When you upload the record to your computer, the time you
originally input appears on the computer screen, even though the record is
for an All Day Event.
Recalling Schedule Records
In the Schedule Mode, press to scroll forward through records or to
scroll back.
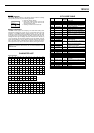
Schedule Reminder Alarm
You can set a schedule reminder alarm to sound at the time for which
appointments are scheduled (0:00), or at 5, 10, 15, 30, 45, or 60 minutes
before appointment times. When the watch is in the Timekeeping Mode, the
description, time, and date of a Schedule record appears on the display when
its schedule reminder time is reached.
• The schedule reminder alarm setting is applied for all schedule records.
You cannot make individual settings for each schedule record.
• The initial factory default for schedule reminder alarms is 10 minutes before
the Schedule record time.
• The schedule reminder alarm sounds for about 20 seconds or until you
press any button or key.
• A schedule reminder alarm cannot be set for an All Day Event Schedule
record.
• The description remains on the display for about three minutes in the
Timekeeping Mode, or until you press any key after the schedule reminder
alarm stops sounding.
• If another Schedule time is reached within about three minutes after a
previous Schedule time, the second alarm does not sound unless you
cleared the first record’s description from the display by pressing any key
after its schedule reminder alarm stops sounding.
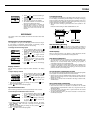
Setting the Schedule Reminder Alarm Time
1. In the Schedule Mode, hold down the A
button for about two seconds until the
record operation menu appears.
2. Press
to move the flashing to REM
and then press .
• At this time the current schedule reminder
alarm setting appears flashing on the
display.
• The schedule reminder alarm setting indicates how many minutes before
the Schedule record time the alarm will sound.
3. Use
and to change the setting.
• You can select one of the following for this setting:
0:00 (same time as
Schedule record time),
0:05 (5 minutes), 0:10 (10 minutes), 0:15 (15
minutes),
0:30 (30 minutes), 0:45 (45 minutes), 1:00 (1 hour).
4. After you select the setting you want, press the A button.
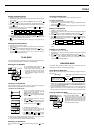
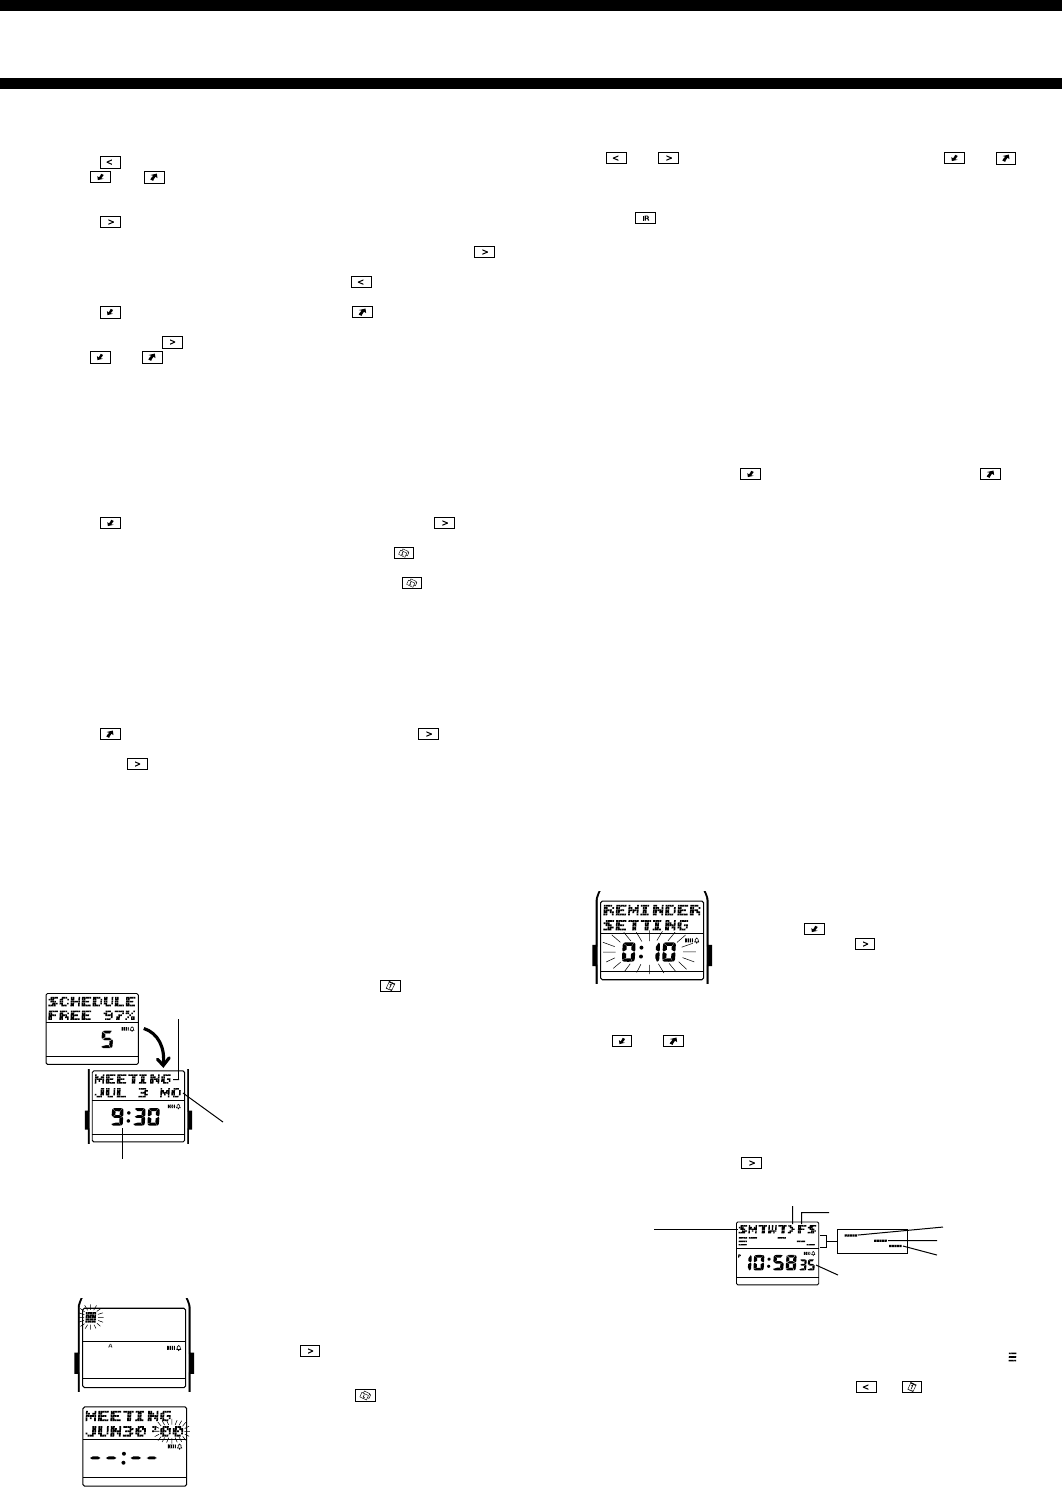
Weekly Schedule Screen
In the Schedule Mode, press to change to the Weekly Schedule screen
for the week that contains today’s date.
• A bar (
è) appears under each day of the week where you have an
appointment scheduled. The position of each bar indicates the relative part
of the day for which the appointment is scheduled.
• A day for which there is an All Day Event Schedule record is indicated by
alternating with Ö.
• To return to the Schedule record screen, press
(or ).