


16 BURLEY TRAILER OWNER’S INSTRUCTION AND SAFETY MANUAL
BURLEY TRAILER OWNER’S INSTRUCTION AND SAFETY MANUAL 17
Padded Seat & Shoulder Harness, Child Seat
Recliner, and Recessed Helmet Pocket
(d’Lite
™
, Solo
™
, Lady Bug
™
, Cub
™
)
To Install Seat Pad:
Attach the seat pad Velcro hook strips to the loop Velcro strips on the seat.
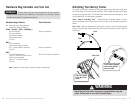
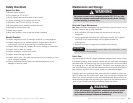
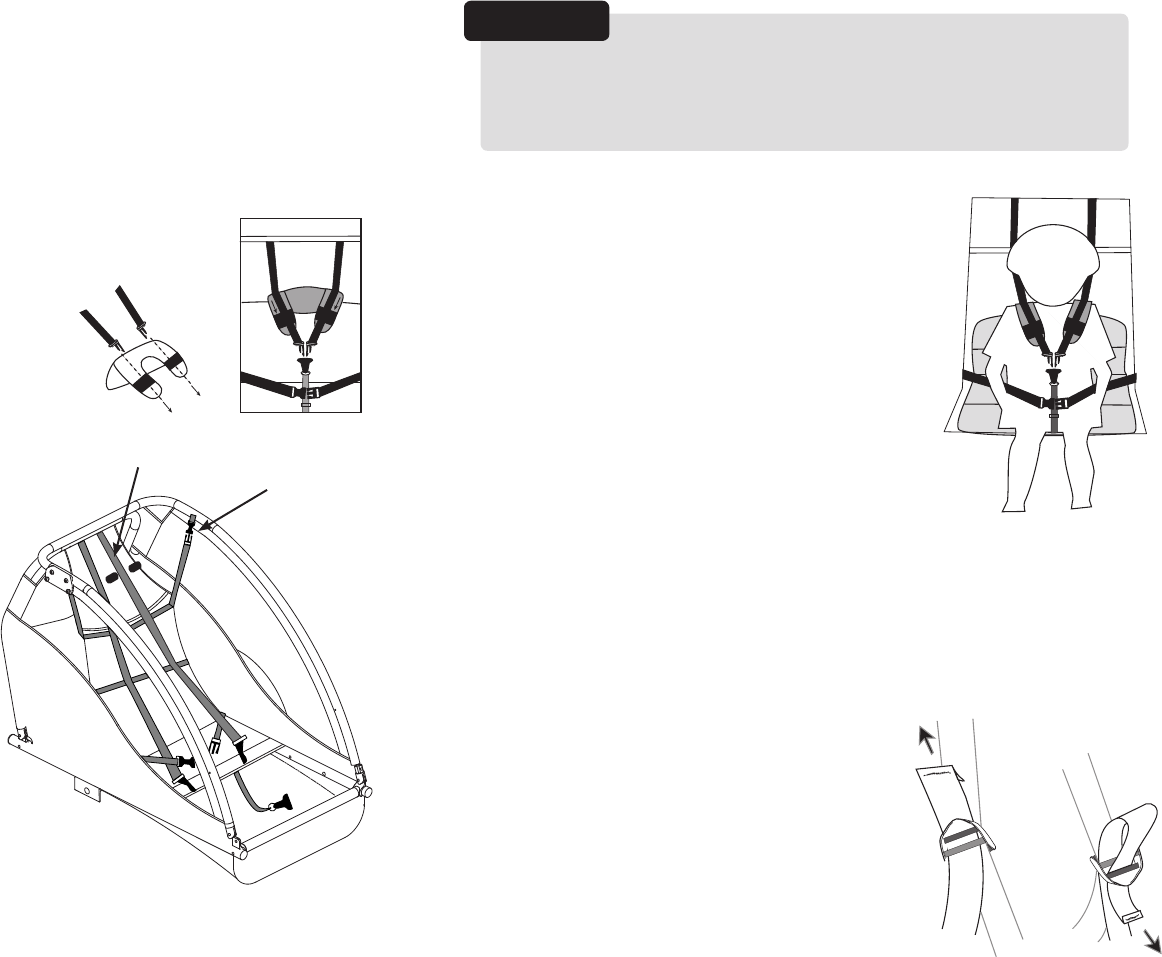
To Install Shoulder Harness Pad:
Insert the shoulder straps into the shoulder harness pad as shown in the
drawing at the right. The shoulder straps should
be oriented so that the FLAT parts of the male
buckles are facing toward each other.
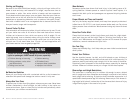
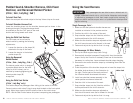
Using the Child Seat Recliner
The child seat can be reclined for
added comfort by making the following
adjustments:
1. Loosen the tension on the straps (A)
attached to the top of the frame.
2. Loosen the tension in the helmet
pocket straps (B).
Using the Recessed
Helmet Pocket
(d’Lite
™
, Solo
™
, Lady Bug
™
, Cub
™
)
The helmet pocket, which is designed
to provide added room for the back
side of a child’s helmet, can be
modified by loosening/tightening the
helmet pocket straps (B)
as required.
Using the Child Seat Divider
(d’Lite
™
, Lady Bug
™
only)
This feature keeps two passengers from sliding to the center of the seat.
Connect center crotch strap O-ring to snap hook located on the front splash
guard. Adjust strap tension with the plastic slider on the crotch strap.
NOTE: Use the Seat Divider feature only when transporting two passengers.
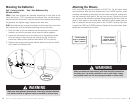
Using the Seat Harness
Only passengers who are able to wear a helmet and sit
upright, unassisted should ride in a child trailer. Adequate neck strength
is required by passengers to hold their heads upright while trailering. A
physician should evaluate anyone who is of questionable developmental
age for trailering.
IMPORTANT:
Single Passenger, Solo
™
:
1. Make sure the seat pad and shoulder harness are
installed as indicated in the previous section.
2. Position the child in the center of the seat.
3. Snap shoulder straps into the Y-buckle, with the
buckle positioned at the child’s sternum.
4. Make sure the shoulder straps are adjusted so that
the child cannot move too far forward in the seat.
5. Fasten and adjust the lap belt so that it is snug.
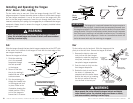
Single Passenger, All Other Models:
1. Unclip the center support strap (with O-ring).
2. Remove both shoulder harnesses (if applicable) from the shoulder
straps. Unclip the Y-buckle if necessary. Store one of the shoulder
harnesses in a safe place. Leave outboard shoulder straps dangling.
3. Remove the two center shoulder straps by unthreading them from the
ladder locks.
4. Trade the position of the shoulder straps and re-insert the straps into
the ladder locks as shown in the illustration to
the right. The flat parts of the male portion of
the Y-buckle should face toward the center.
5. Install one shoulder harness assembly in the
center position as shown at above left.
6. Seat the child in the center of the seat.
7. Snap shoulder straps into the Y-buckle, with the
buckle positioned at the child’s sternum.
8. Make sure the shoulder straps are adjusted so
that the child cannot move too far forward in the seat.
9. Fasten and adjust the lap belt so that it is snug.
B
A
Ladder Lock