


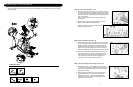
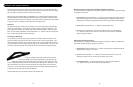


STEP 1: Secure Frame (See Figures 1 & 2)
A. Place the cross trainer on the floor in a level area. Pull out
the chrome plated rails by grabbing the back of the rails, by
the rear feet, and pulling the rear feet away from the frame.
The rails need to be fully extended in the length before the
nuts ca be attached.
Note: These rails pushed into the frame to reduce the
shipping size.
B. Secure the rails in place using the 4 Nuts (K) with Lock
Washers (M) included in the hardware bag.
C. Tighten the 4 Nuts (K) with Lock Washers (M)
using the provided wrench.
STEP 2: Attach Handlebars (See Figure 3)
A. Attach both the right and left handlebars by first removing
the four attaching screws (J) already in place on the frame
brackets where the handlebars are mounted. Place the
handlebar bracket over the top of the frame bracket and
align the 4 holes. Hand tighten each of the 4 screws (J)
first before tightening with the provided 6 mm Allen wrench.
B. Attach the round plastic outside handlebar covers by first
removing the screws (L) that are hand tightened on the
inner round cover. Place the outer cover over the inner
cover, aligning the holes, and install and tighten the
2 screws (L) with a Phillips head screw driver.
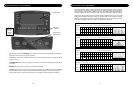
STEP 3: Attach the Display Console Frame (See Figure 4)
A. Remove the 4 screws (J) hand tightened into the top of
the console mount bracket. With the help of a 2nd person
connect the connector between the main frame and the
display console frame.
B. Align the Display Console Frame over the Main Frame
bracket being careful not to pinch the wire harness
between the 2 frames. Install and hand tighten the
4 attaching screws (J) before fully tightening with the
supplied 6 mm Allen wrench.
8
assembly instructions
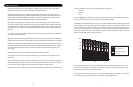
Since your elliptical cross trainer is a heavy piece of equipment, we recommend that you use 2 people
during assembly.
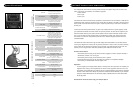
HARDWARE–TOOLS
9
Screws Already in Place on the Elliptical
Hardware Bag