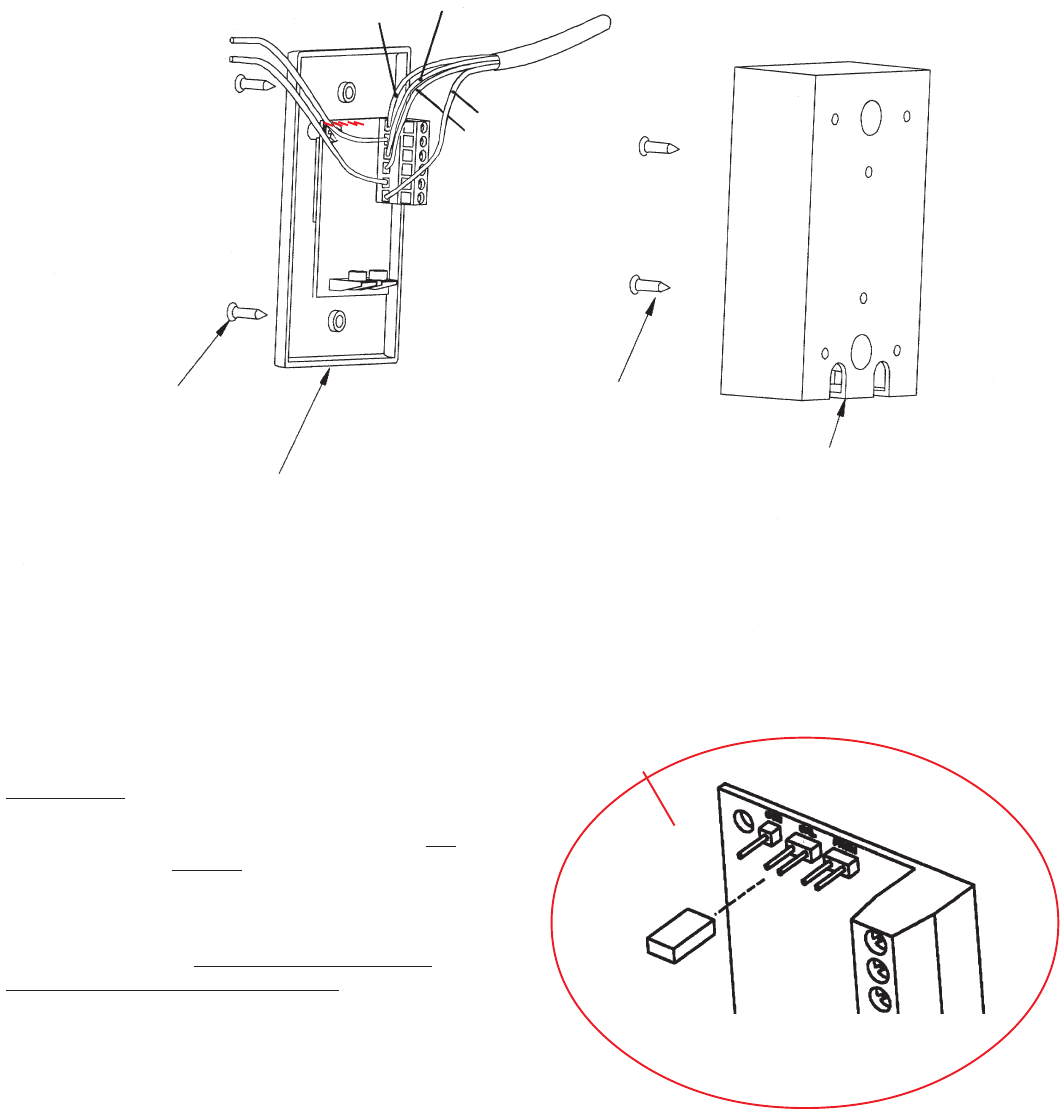
Wallplate Display Unit
#6 x 5/8"
Phillips Screw
Black
White
Red
Green
#6 x 1/2"
Phillips Screw
(optional)
DE-4600 only
SM-1000 Surface Mount Box
(optional), DE-4600 only
* CAUTION: DO NOT
connect a 9 volt battery
if using +12 VDC. 9 volt
battery is recommended.
(-) Neg. Ground*
(+) Pos. 12VDC*
Step 7. Figure 7. If using the SM-1000 surface mount
box, feed cable through hole in box. Connect wires
coming from sensor on roof to wall plate display in
coach. It is required to strip wires 1/4". It is
IMPORTANT to have connected the wires properly at
roof and to connect properly at wall plate. System is
designed to use a 9 volt battery (recommended) OR
+12 VDC from RV (not both). When inserting and
tightening the wires into terminals on back of display
board, be sure that you have clamped on the bare wire
conductor and not the insulation. DO NOT connect the
+12 VDC at this time. IMPROPER WIRING WILL
CAUSE DAMAGE TO THE PRODUCT.
Jumper
Step 8. Figure 7. There are five pins on back of display circuit
board. Place jumper (small plastic plug in the hardware bag)
across the second and third pin from the left. These are the calibrate
pins. Install a 9 volt battery and press the button on front of display. The
readout should display the letters CA (calibration) for approximately 10 seconds. The display
will then start alternating between two sets of numbers of no importance to you. At this time
remove battery. Now remove jumper and place on the single pin to the left. Electronic
calibration is now complete.
Figure 7
CAUTION: If using +12 VDC, it must be FILTERED!
If using non-filtered +12 VDC, the product will be damaged
and Warranty voided.
